Imagine the situation: you wrote a long report for a week, and then you deleted part of it. Then you add some more and suddenly decide that the last version was still better. What are you supposed to do in that case? This is where the Google Docs version history can help you.
Google Docs not only automatically saves your documents, but it also keeps a history of all the changes you make to them. Since you have access to your version history in Google Docs, you can restore an older version of a file or make a copy of an earlier version and add it to another project.
How does Google Docs version history work?
Every time you change something in your document, Google Docs creates a new version of it and saves it. After a while, several different versions of your document will be stored in the web app. So if you’re not happy with the result, you can always go back to the beginning and fix any flaws.
It’s easy to do. All you need to do is go to the version history and select the version you want. Selecting this version returns the document to the state it was in before you made the mistake.
This feature is also a great way to keep the original version of the document. For example, you spent a lot of time creating the perfect article and sent it to the editor. With version history, you can create an “original version” that you can always return to after making changes. That way, you’ll always have a pristine version of the document.
How to open your Google Docs version history
You can access the version history of your document in Google Docs in two ways – using the “File” menu and using the “Last edited” link in the toolbar. Let’s look at both.
To open your version history, you can follow these steps:
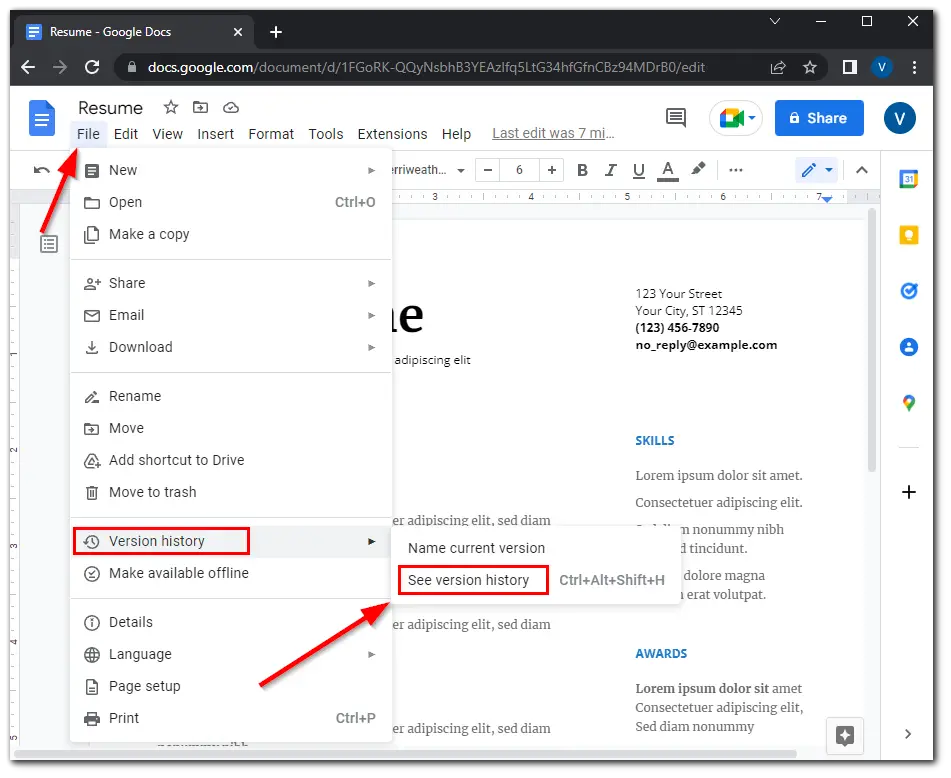
- Go to your document and click “File”.
- Then click “Version history” and select one of the given options:
- Name current version
- See version history
- You need to select the second option from the list. You also press “Ctrl + Alt + Shift + H” to open it.

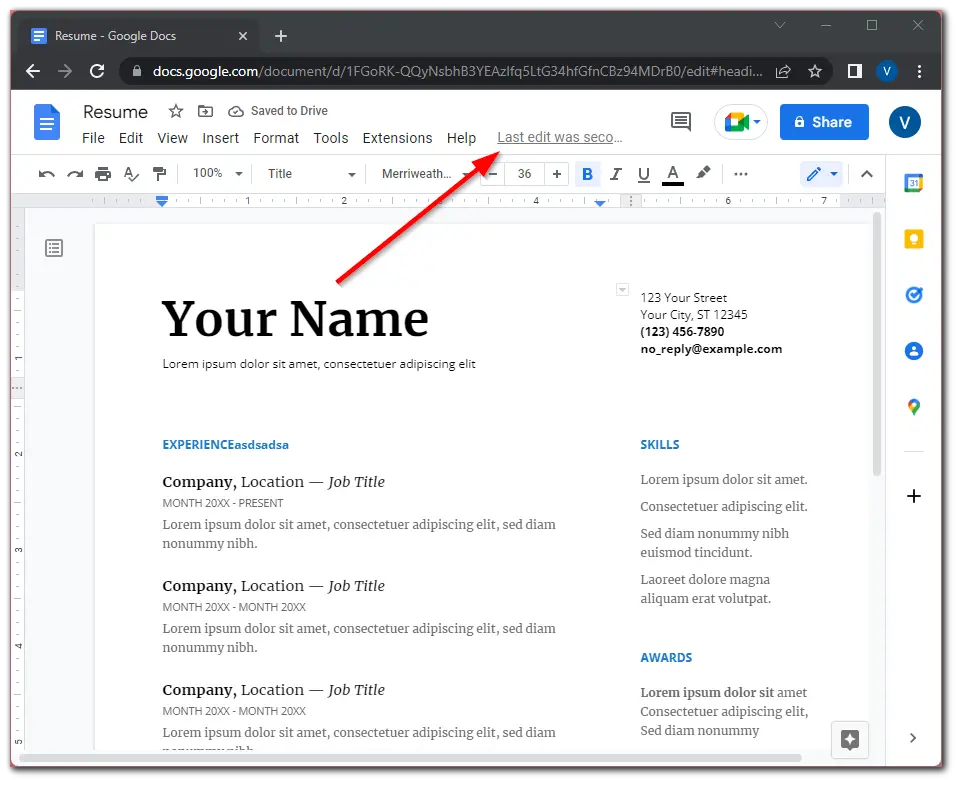
- You can also open your Google Docs version history by clicking on the “Last edit” link located on the toolbar.

- Finally, you will see the “Version history” sidebar in your web browser.
In this way of accessing version history, you won’t be offered an alternative name for the current version. You can still rename any version of the document when you are redirected to the version history.
How to restore a version of your document in Google Docs
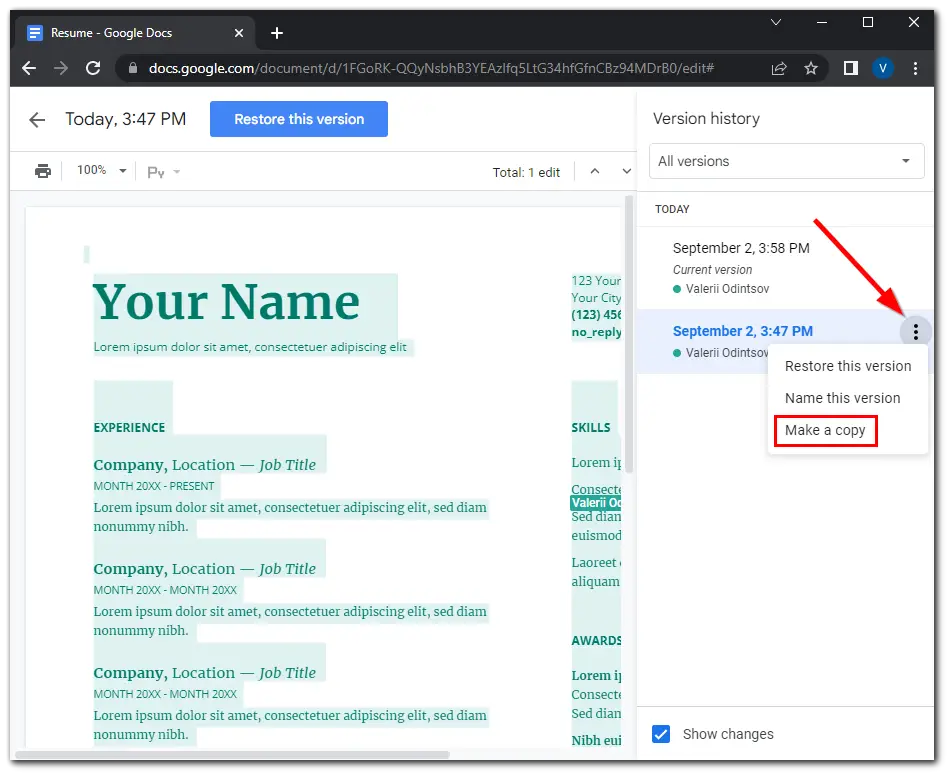
Once you have access to the Google Docs version history, you can restore any previous version. From the list of versions that appears on the right, just click on the file you want to open. At the top of the window appears a large blue button that says “Restore this version”.

If you restore the selected version, you still retain all other versions, even those that were created after the currently selected one.
How to make a copy of an earlier Google Docs version
In addition to restoring an old version of a file, you can make a copy of it. To do so, you can follow these steps:
- Open the version history and select the one you want to copy.
- Then click on the three dots icon and select “Make a copy”.

Making a copy allows you to quickly spin up different versions of the same file. For example, this is a good hiring technique and you want each resume and cover letter to be unique, but you don’t want to start from scratch every time.
Read Also:
- How to draw on Google Docs
- How to create a template in Google Docs
- How to track changes in Google Docs
How to name your version of a document in Google Docs
Now that you know how to find the change history in Google Docs, you can get more use out of it by naming the different versions. You can rename them in one of the following ways:
- Open the version history, click on the three dots icon and select “Name this version”.
- Go to the “File” menu, select “Version history” and click “Name current version”.
By naming them, you can easily identify versions that you might want to restore later or spin up for another purpose. If you don’t rename them, the default name is the time and date stamp.


