AirPods can automatically update their firmware. When you connect the AirPods to your iPhone, iPad, or Mac and they are within range of an active Internet connection, the iOS device checks for available firmware updates for the AirPods. If an update is available, it will update itself.
In order to update your AirPods yourself, you’ll need to charge them. Connect them to your Mac or iPhone. Then make sure your Mac or iPhone is connected to Wi-Fi or LTE. After that, the update will start automatically.
You can also check the firmware version of your AirPods. To do this, first, connect your AirPods to your Mac or iPhone. On iPhone, open the Settings and Bluetooth section. Then tap on the “i” icon next to your AirPods.
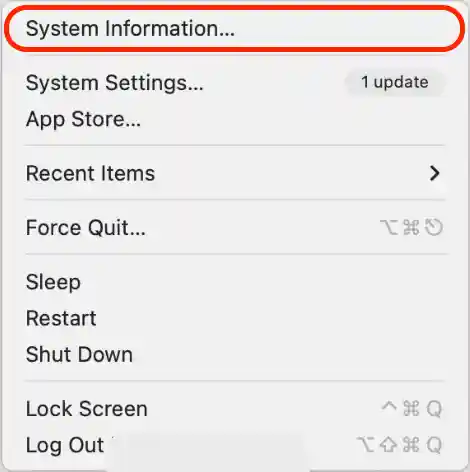
On Mac, the steps are different from the macOS version. If you have macOS Ventura, click on the “i” icon in the Bluetooth section next to your AirPods. If macOS Monterey, Big Sur, or older, press and hold the Option key while choosing the Apple menu. Then you need to open “System Information” and the Bluetooth section.
How to update AirPods firmware using iPhone?
In order to update AirPods firmware using iPhone, you need to follow these steps:
- Make sure that your iPhone is running the latest iOS version.
- Make sure your AirPods are charged.
- Make sure your iPhone is connected to Wi-Fi or LTE.
- Open Settings and Bluetooth section.
- Then open the AirPods case and hold it up to your iPhone.
- In the Bluetooth section, tap on your AirPods to connect them.
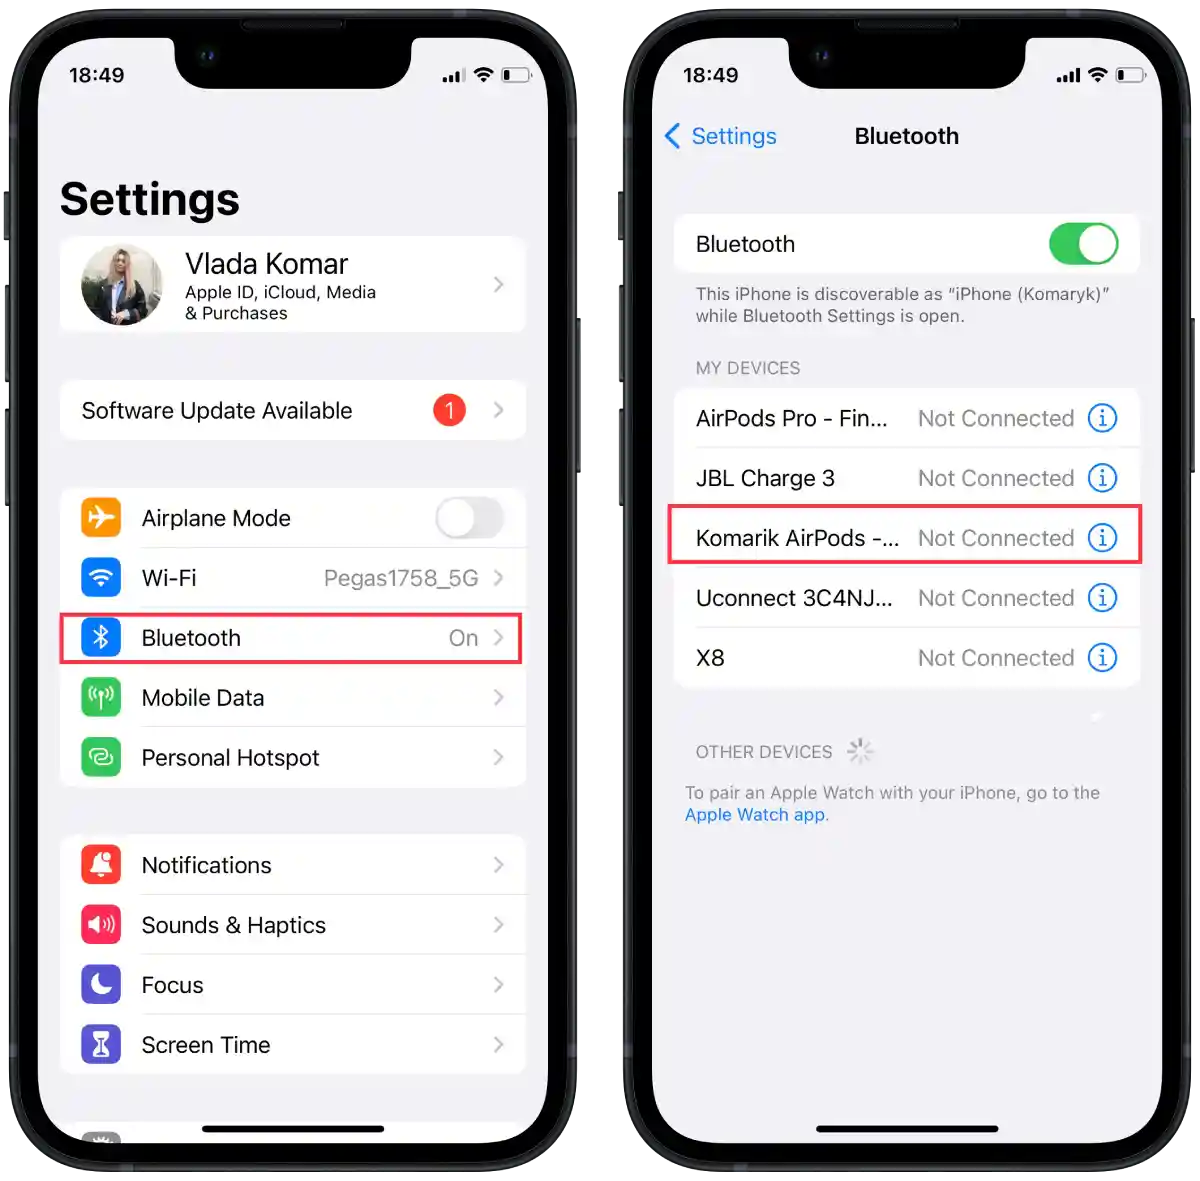
- Your AirPods will update automatically.
This will take a few minutes. After these steps, you can check the firmware version of your AirPods to make sure the update is complete.
How to update AirPods firmware using Mac?
In order to update AirPods firmware using Mac, you need to follow these steps:
- Make sure that your Mac is running the latest macOS version.
- Make sure your AirPods are charged.
- Make sure your Mac is connected to Wi-Fi or LTE.
- Open System Settings.
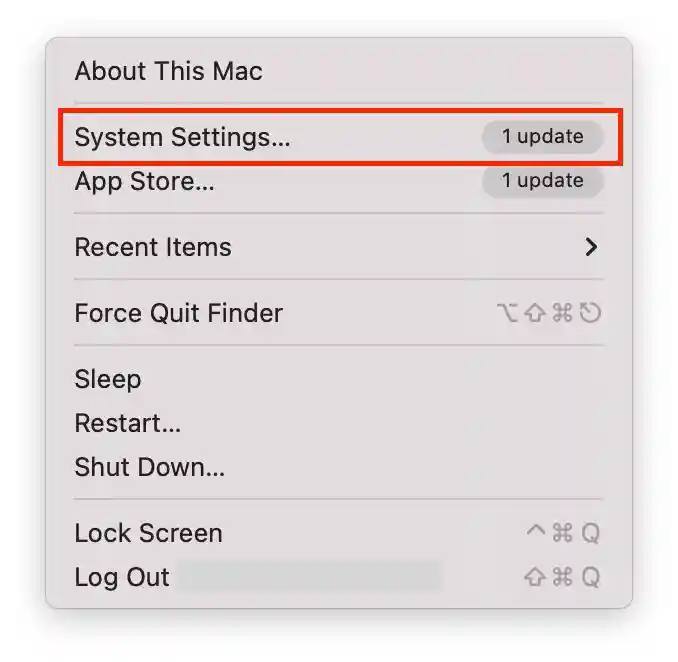
- Then select the Bluetooth section.
- Then open the AirPods case and hold it up to your Mac.
- In the Bluetooth section, click on “Connect“ to connect them.
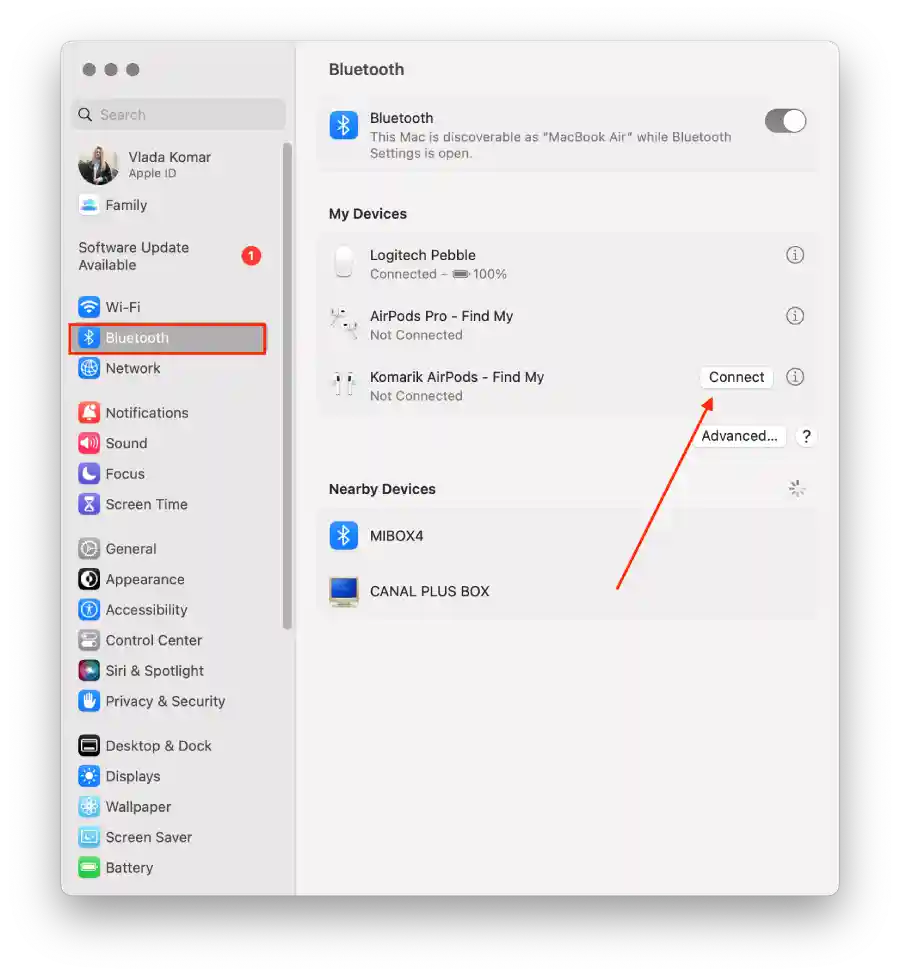
- Your AirPods will update automatically.
After these steps, the update will complete in a few minutes.
How to check the firmware version your AirPods have using iPhone?
Firmware updates may include fixes that improve AirPods stability and performance. If you’re having trouble getting your AirPods to work, checking the firmware version may help. Sometimes problems are related to a specific firmware version, and upgrading to a newer version can resolve these issues. Checking the firmware version will allow you to determine if you need to update your AirPods to fix known issues.
So to check what firmware version your AirPods have using iPhone, you need to follow these steps:
- First, you need to connect your AirPods to your iPhone.
- Then open the “Settings” app.
- Scroll down and tap on “Bluetooth.”
- You should see your AirPods listed under the “My Devices” section.
- Tap on the “i” icon next to your AirPods.
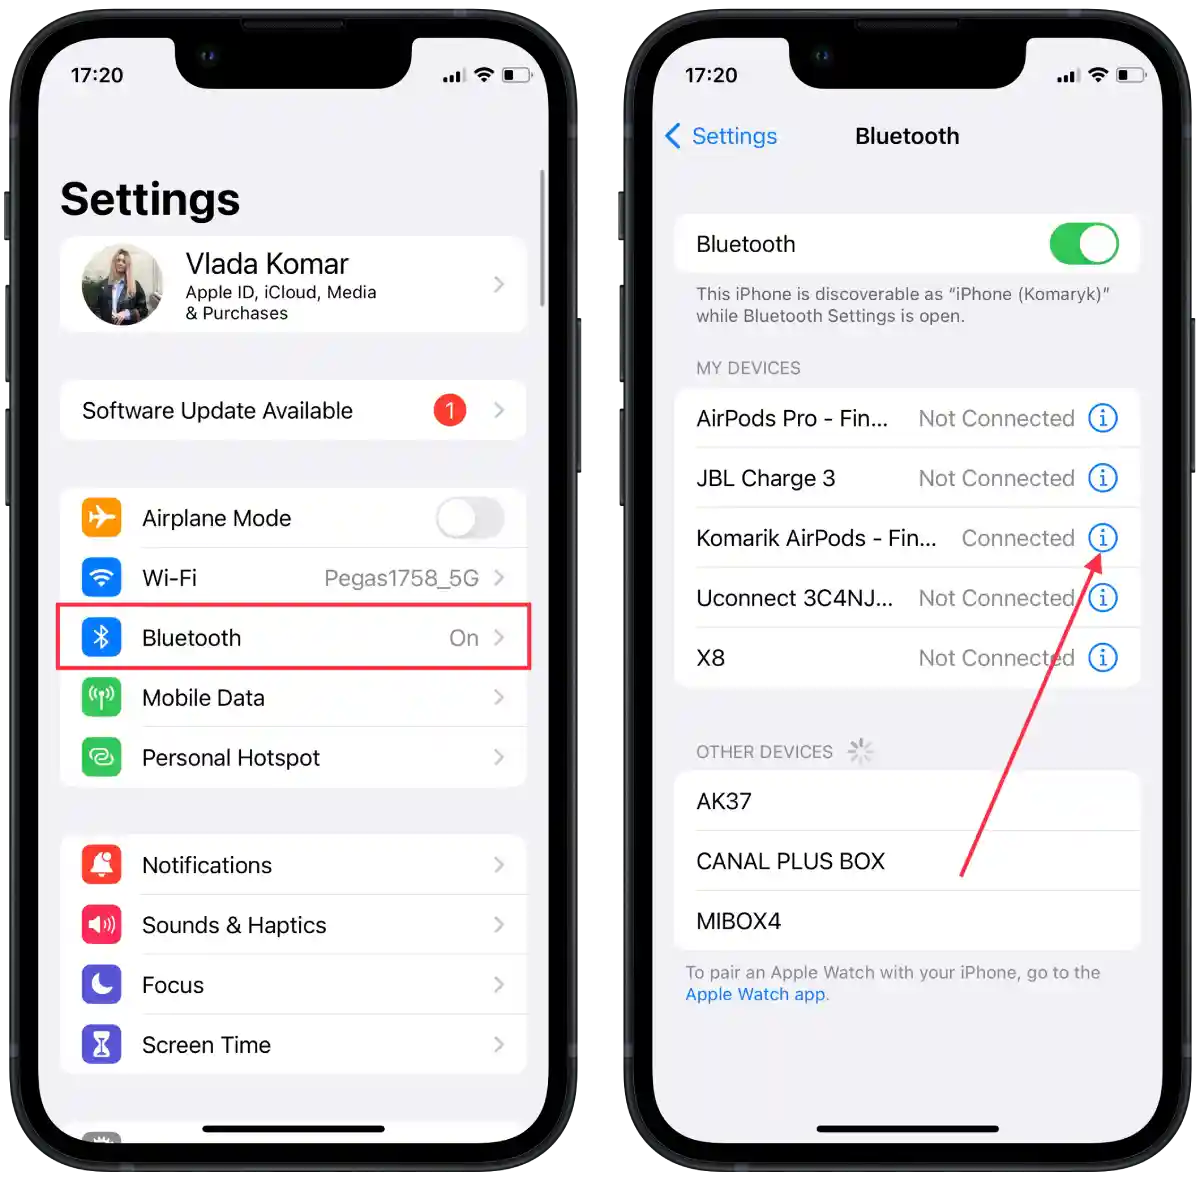
- Scroll down to find the “Version” section.
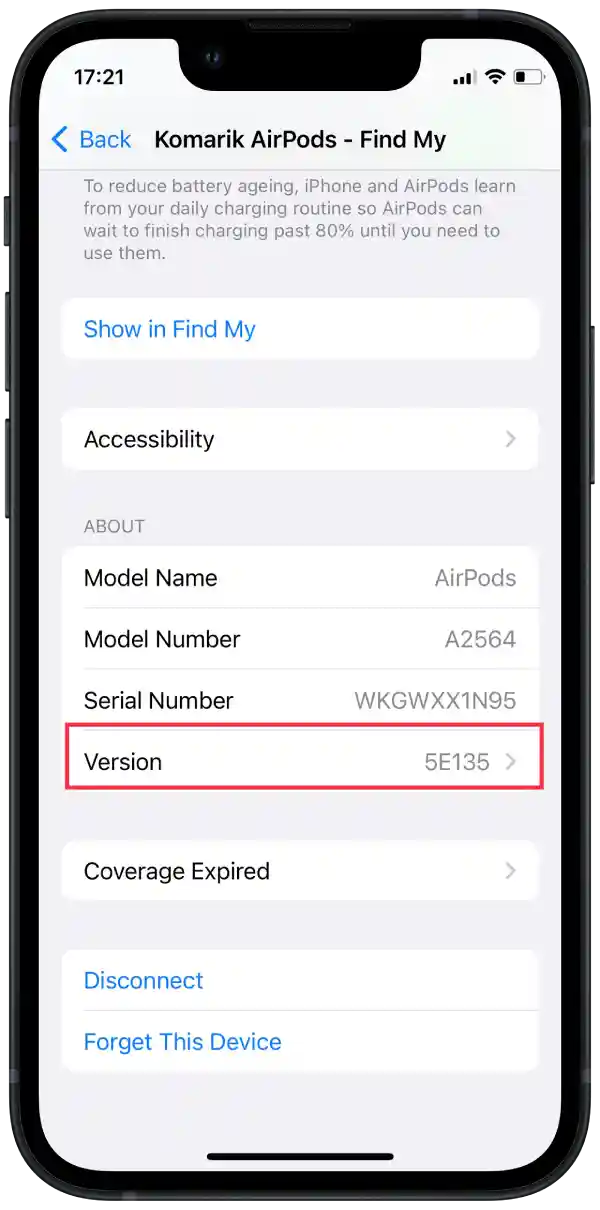
After following these steps, you can easily check the firmware version of your AirPods using your iPhone. It is recommended that you update your AirPods firmware to the latest version to ensure optimal performance and access to new features.
How to check what firmware version your AirPods have using Mac?
When you check the firmware version, you can determine if your AirPods have the latest firmware version installed or if an update is available. Firmware updates often include new features, bug fixes, and enhancements to allow you to utilize the latest features.
To check what firmware version your AirPods have using Mac (macOS Ventura) , you need to follow these steps:
- First, you need to connect your AirPods to your Mac.
- Click on the Apple menu in the top-left corner of the screen and select “System Settings“.
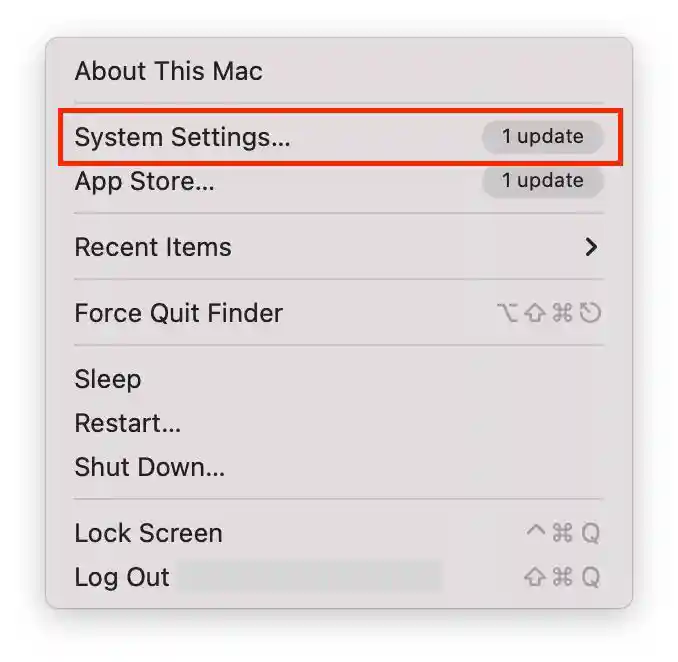
- Click on “Bluetooth” section and click the Info button next to the name of your AirPods.
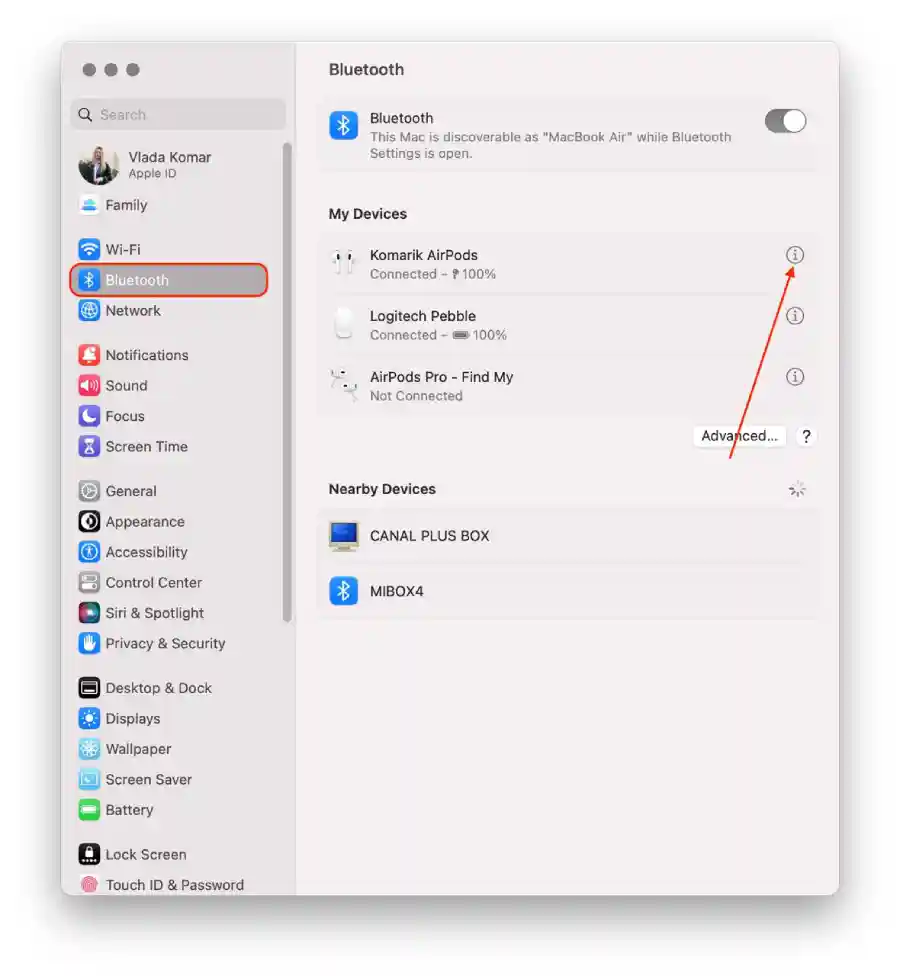
- In the “Version” section, you will find all the information you need.
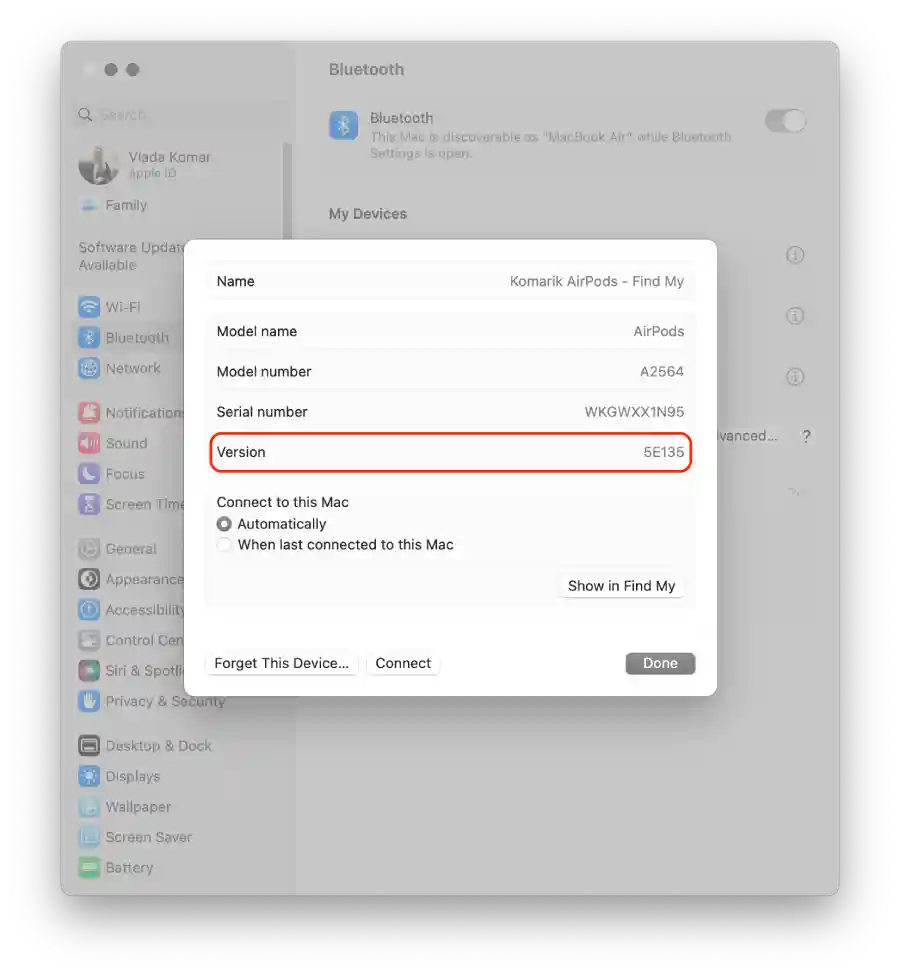
To check what firmware version your AirPods have using Mac (macOS Monterey, Big Sur or older) , you need to follow these steps:
- First, you need to connect your AirPods to your Mac.
- Press and hold the Option key while choosing the Apple menu in the top-left corner of the screen.

- Next click on “System Information“.
- Select the “Bluetooth” section.
- In the “Connected” section, your AirPods with firmware version will be displayed.
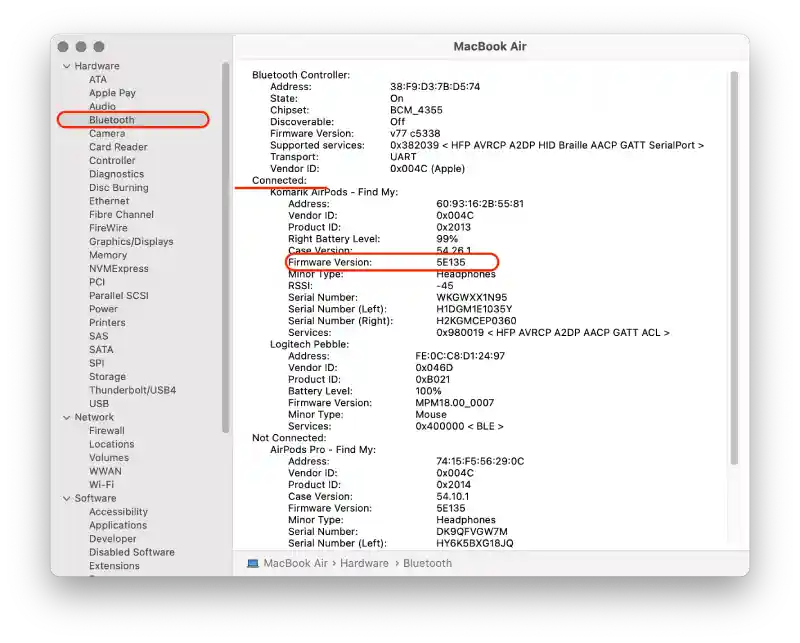
This method is similar to using it on an iPhone. After checking the version, if it is not the latest version, you can follow the steps to update.


