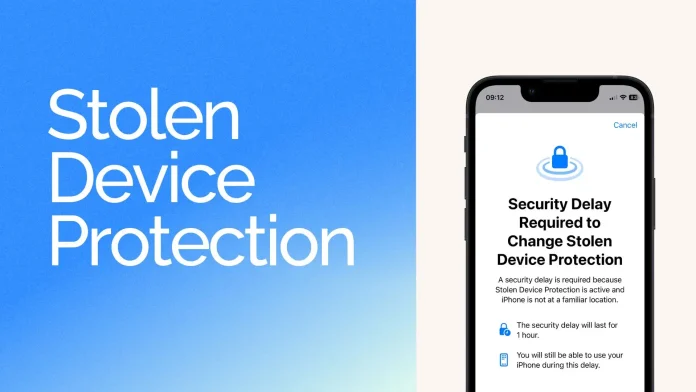
In iOS 17.3, iPhones get a cool feature called Stolen Device Protection. You’re probably wondering, “Should I turn this on?” And I’m here to tell you, heck yeah! It’s all about keeping your phone safe without messing with how you use it. Turning it on is super easy and could be a lifesaver later on.
So, what’s the deal with Stolen Device Protection? Basically, it adds an extra layer of security for your iPhone if it gets lost or stolen. With this feature, nobody can mess with your device or Apple ID settings, like changing passwords, without your face or fingerprint.
But there’s a twist. If you try to change your password or tweak some security settings when you’re not at your usual spot, you’ll need to wait an hour after using Face ID or Touch ID. Then, after an hour, you’ll have to do another biometric check. Apple’s thinking is to give you time to mark your iPhone as lost before a thief can mess with your security details.
Let’s get down to how to switch on Stolen Device Protection on your iPhone.
How to enable Stolen Device Protection on iPhone
- Open Settings.
- On an iPhone with Face ID: Tap Face ID & Passcode.
- On an iPhone with a Home button: Tap Touch ID & Passcode.
- Enter your device passcode.
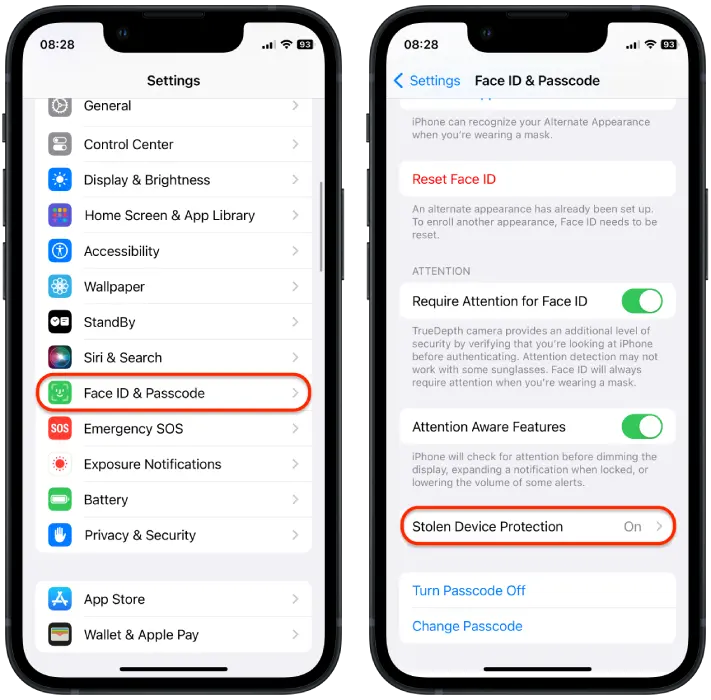
- Tap on the “Stolen Device Protection” section.
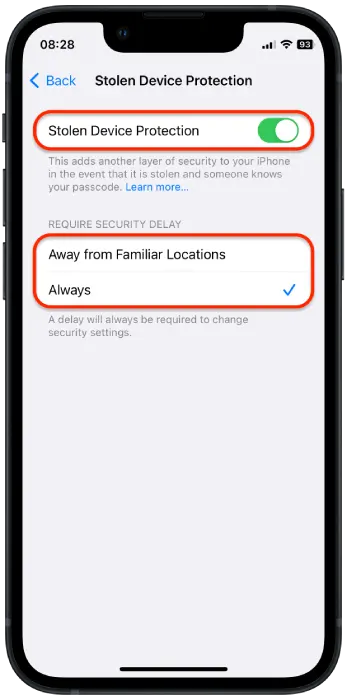
- Turn on “Stolen Device Protection“.
- And select one:
- Tap Away from Familiar Locations if you want to use protection when you’re away from home or work.
- Tap Always if you want to use protection everywhere.
If you haven’t set up a Home Base on your iOS gadget yet, it’s a good idea to get that sorted. Otherwise, you might be stuck waiting an hour, even if you’re just lounging in your home. Here’s a tip on how to do that:
- Open Maps app.
- Tap on the Home icon.
- Then, tap Open My Contact Card.
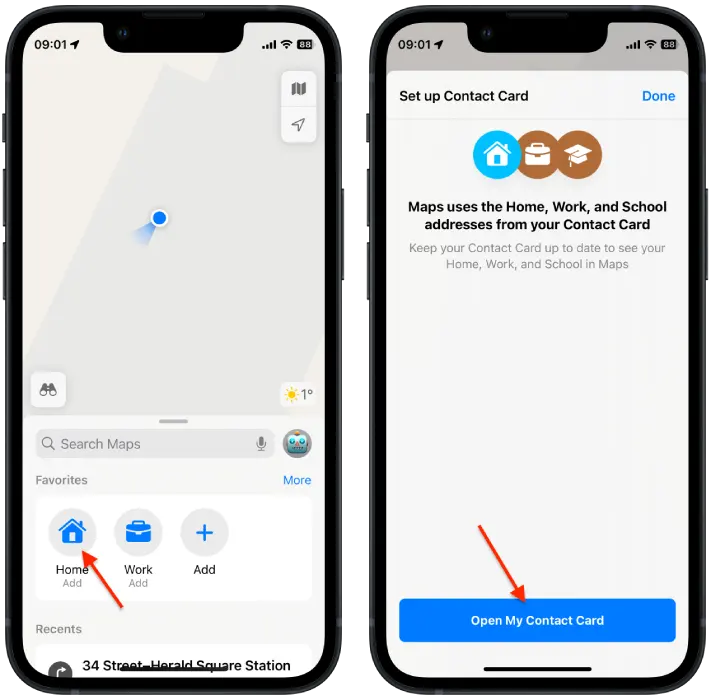
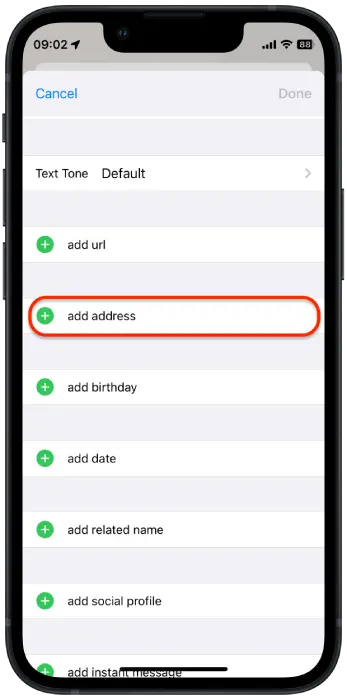
- Sroll to add the address section and add your home address.
And if for some reason you want to turn off “Stolen Device Protection” on iPhone, follow the same steps and drag the switch of this option.

