Taking a screenshot during a FaceTime call is a built-in feature of the app. During a FaceTime call, you can take a screenshot of the video stream using a specific button or combination of buttons on your device. You can also take a live photo during a FaceTime call.
However, it’s essential to use this feature with caution and to respect the privacy of others in the conversation.
How do you take a screenshot of a FaceTime call on an iPhone with your picture?
Most people take a screenshot during a FaceTime call using the side buttons. This way of screenshotting will take a picture with all the buttons and captions on the screen, such as time, battery charge, sound button, name of the contact, and course of your photo. To take a screenshot of a FaceTime call on an iPhone with your picture, you can follow these steps:
- Start a FaceTime call.
- Then press the lock and volume up buttons (on iPhones with FaceID).

- Or press the home and lock buttons (on TouchID phones).

After these steps, a screenshot with all the items on the screen and your photo will be saved to Gallery.
How do you hide your picture on FaceTime on an iPhone?
You can also make a screenshot, which will only show your interlocutor. This way, the screenshot will not contain your picture or other elements. To make a screenshot without your picture, you need to follow these steps:
- Start a FaceTime call.
- Then click the take a pic button.
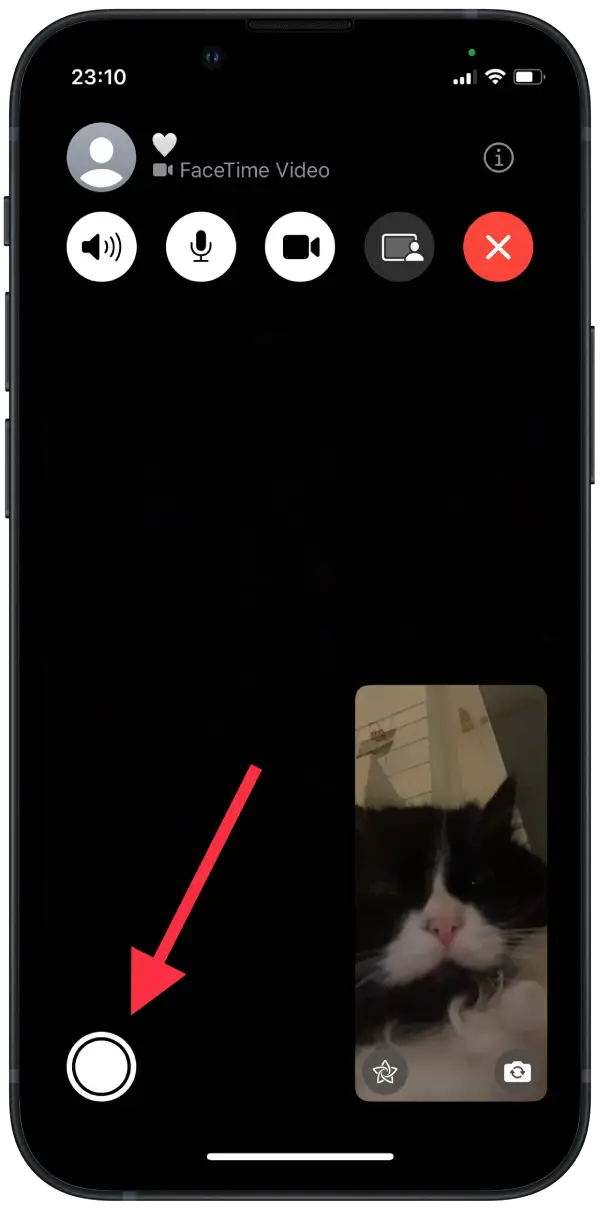
This way, not a single item will be placed in the screenshot. The screenshot will only contain a photo of your FaceTime caller.
How to take a live screenshot of a FaceTime call on an iPhone?
You can take a Live photo of your FaceTime caller. Live Photos is a feature on the iPhone that captures a short video clip along with a still image when you take a photo. When you take a Live Photo, your iPhone records 1.5 seconds of video before and after you press the shutter button. This creates a photo that comes to life when you touch it or press and hold it on your iPhone. To do this, you must first activate this function in the settings. So follow these steps:
- To take a live photo during your FaceTime call, open Settings on your iPhone or iPad.
- Then scroll through and select the FaceTime section.
- Next, drag the slider on the FaceTime Live Photos section.
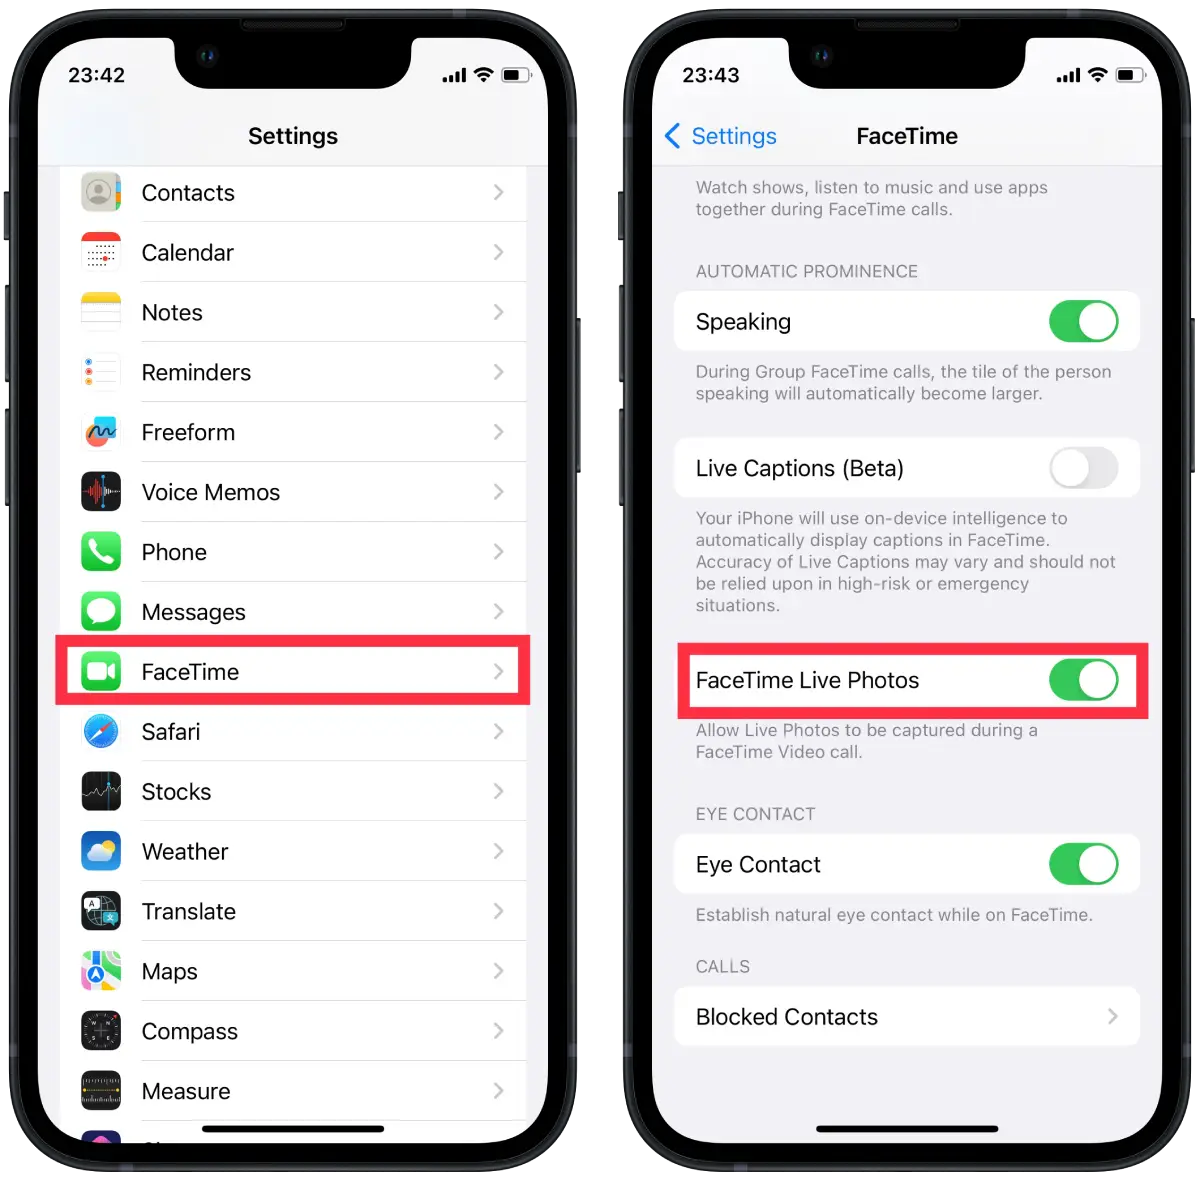
- Then start or continue the FaceTime call.
- To take a live photo, click the take a pic button.
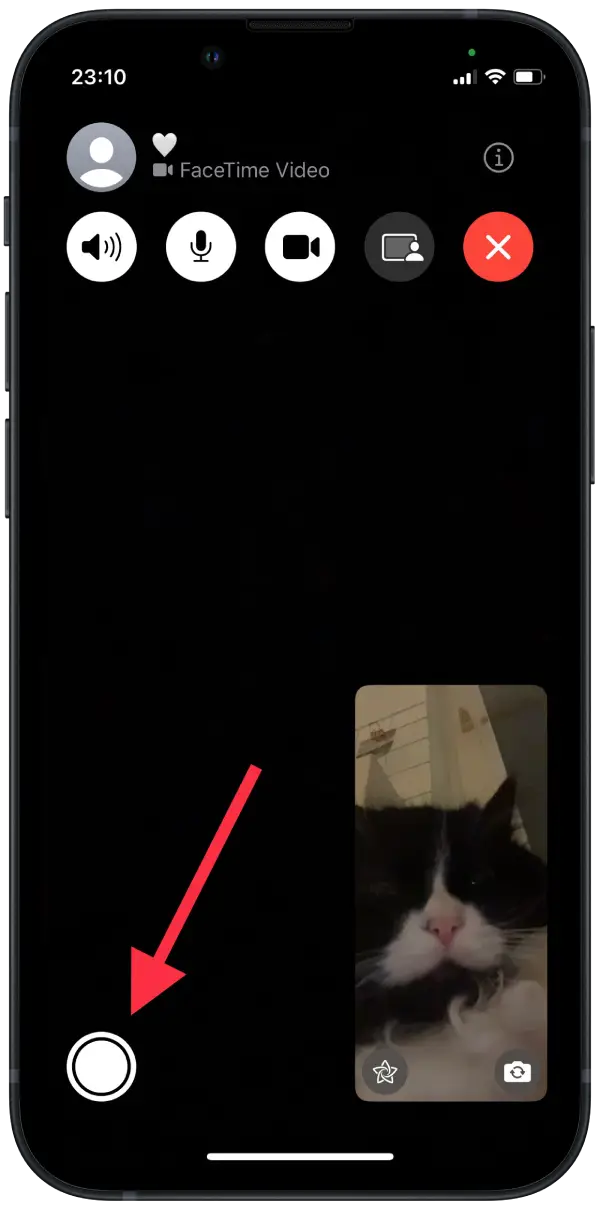
Then open Gallery and click the photo, and it will start playing like any other Live photo.
How to record a FaceTime call screen on your iPhone?
Screen Recording is a feature that allows users to record video and audio of what is on their device’s screen.
Users must go to Control Center on their device to use the screen recording function and click the screen recording button. Once the recording starts, everything that appears on the device’s screen, including the sound, will be recorded. To record a FaceTime call screen on your iPhone, you need the following:
- Open Settings.
- Then select the Control Centre section.
- Next, click on the + section of the Screen Recording section.
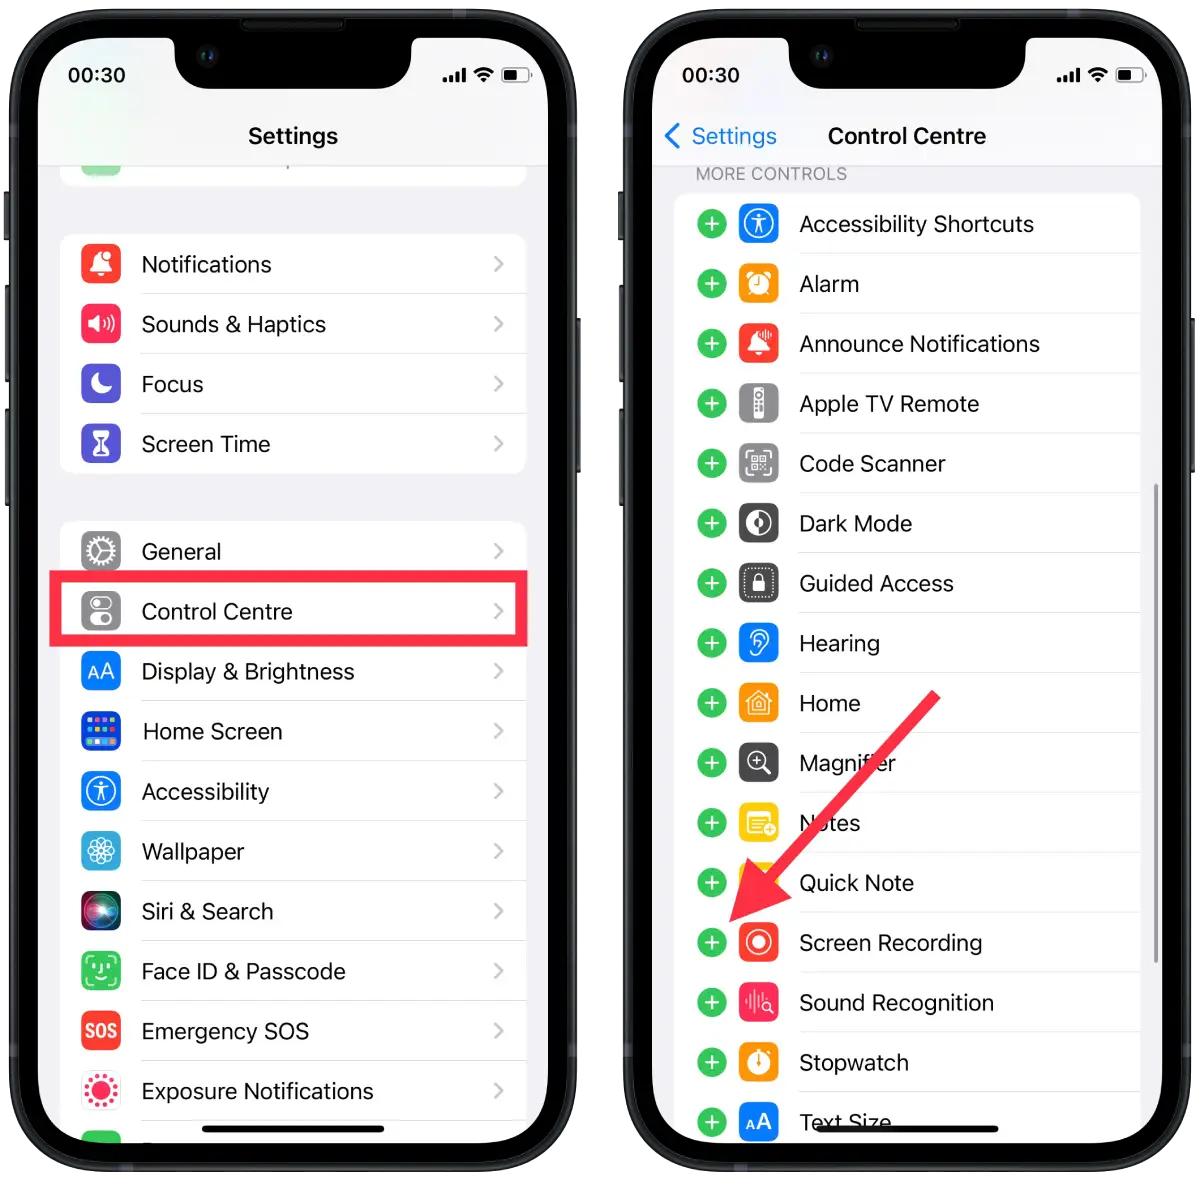
- Then start FaceTime.
- Swipe down to open the Control Menu.
- Click on the record button. After 3 seconds, the recording will start. To stop screen recording, press this button again.
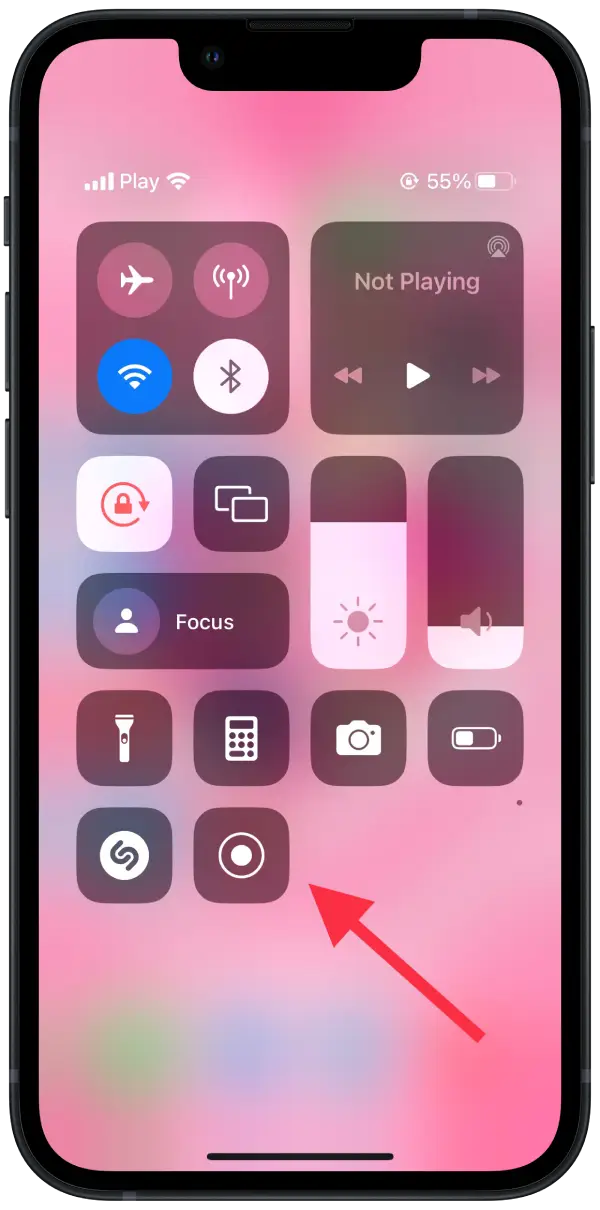
Once you have stopped the recording, the video will be saved to your camera roll. Keep in mind that while screen recording, anything that appears on your screen, including notifications and other sensitive information, will be captured, so be mindful of what you have on your screen when you start recording.
How to take a screenshot of a FaceTime call on a Mac?
To make a screenshot of a FaceTime call on a Mac, follow these steps:
- Then start or continue the FaceTime call.
- To take a screenshot, click the take a pic button.
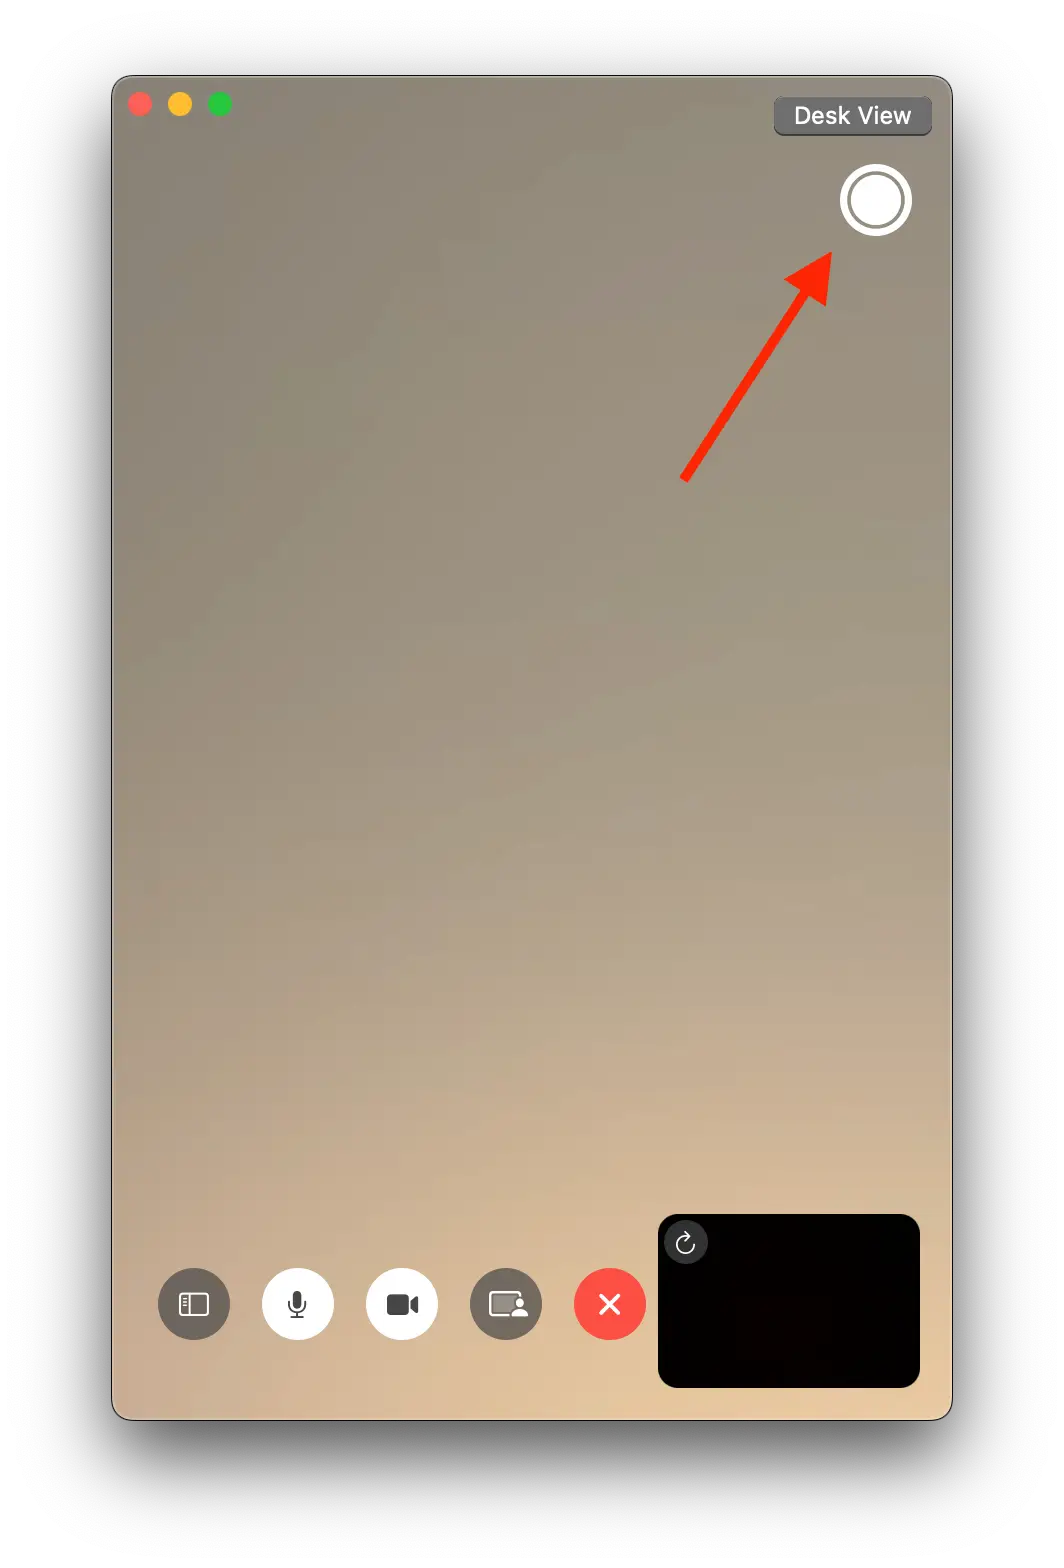
After these steps, the screenshot will be saved to the gallery.
Will someone know if you took a screenshot of your FaceTime?
When using FaceTime, the app will notify the user if someone takes a screenshot during a live video call. The notification appears immediately after the screenshot is captured and reveals the name of the person who took it. This feature is handy during group video calls since it is easy to identify who took the screenshot.
However, the notification only lasts for a brief period of time, and if the user is distracted or misses it, there is no way to retrieve it. This can be problematic since the user won’t have proof that a screenshot was taken if they miss the notification.
It’s worth noting that while FaceTime does notify users when a screenshot is taken, it doesn’t do the same for screen recordings. Users can add the screen recording option to the Control Center through the settings, allowing them to capture video and audio content without alerting others on the call.

