If you’re an active PC user, you’re probably familiar with the Windows operating system. It’s the most common operating system in the world. It’s pretty handy and user-friendly. However, if you want to do a bit more with your PC than the standard operations, you may begin to have problems understanding the Windows interface.
For example, some features will only be available to you if you have administrator rights on that computer. This is usually necessary to make changes affecting the system itself. Users often encounter problems when trying to install files with non-standard formats with administrator rights. For example, you may have a problem with an MSI file.
What are MSI files
MSI files are installation packages for the Microsoft Windows platform. This file format includes software for updating the OS or installing specific software packages. These files refer to OLE documents that contain particular databases that consist of sets of interrelated tables with specified information.
In addition, the MSI file can store user scripts or auxiliary DLLs. You may find them helpful when installing various software. This file can be accessed using Windows Installer, a standard software installer developed by Microsoft. An MSI file can also be opened with multiple file decompression programs such as Universal Extractor, The Unarchiver, or 7-Zip, which can open MSI and extract its contents. Just double-click on it with the left mouse button.
How to open MSI file with administrator rights
If you use Windows Vista, Windows 7, Windows 8, and Windows 10, when you right-click on an executable file (.exe), the Run as administrator option appears in the context menu. There will also be many other options to interact with the file. This option will appear for programs already installed and executable configuration files.
However, if you right-click on an MSI file, you will find that Windows doesn’t show the Run as Administrator option for this file type. Windows will not allow you to run an MSI setup file as an administrator with the default settings. However, there is a trick you can use to do this. If you need to run an MSI file as an administrator for something, it’s pretty easy to do. To do that, you have to use the command line.
If you rarely run MSI files, this is the best way to do it. However, if you often run an MSI file as an administrator, you can easily add the Run as administrator option to the context menu of MSI files. Once added, the Run as administrator option will appear when you right-click on the MSI file. To run a file as an administrator using the command line, you need the following:
- To begin, open the command prompt. To do that, type CMD in the Start menu or the search bar on the Start screen, and then press Ctrl+Shift+Enter simultaneously.
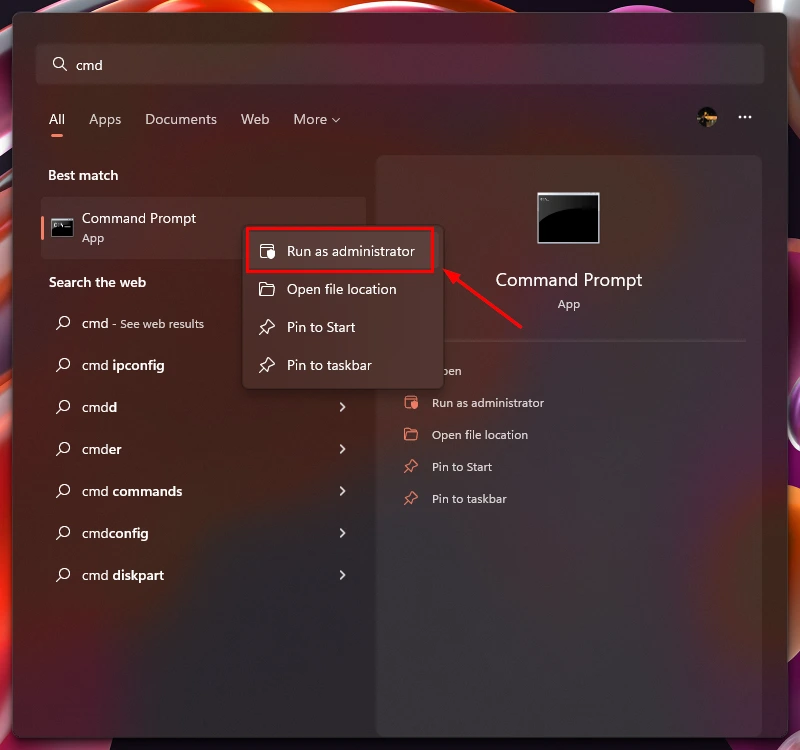
- You can also go to the Start menu and All Programs and Accessories. Here, right-click on the Command Prompt and select Run as administrator. When the UAC prompt appears, click YES.
- At the command line, you need to enter this command to run the MSI file: msiexec /a “pathtotheMSIfile”. (instead of pathtotheMSIfile, you have to specify the path where your MSI file is located, for example, if it’s in the Downloads folder, the way would be C:\Users\User1\Downloads\file.msi)
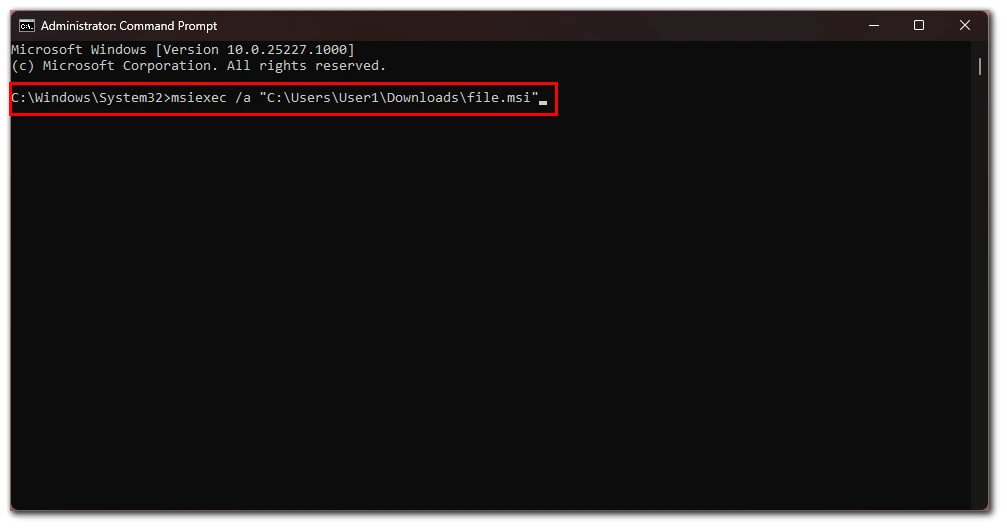
To get the path to the file, you can hold down the Shift key when right-clicking on the MSI file and then select the Copy as a path option. Then paste it into the command line with the right mouse button and the Paste option.
Remember that you have to run the command line as an administrator for this method. You can run any MSI file with administrator privileges using these simple steps.
How to force an MSI file to install using Administrator Mode
With a few changes in the Windows registry, you can add the ability to force the MSI files to run with administrative rights. After this setting, you can run MSI files through the context menu with administrator rights. To do this, you will need to:
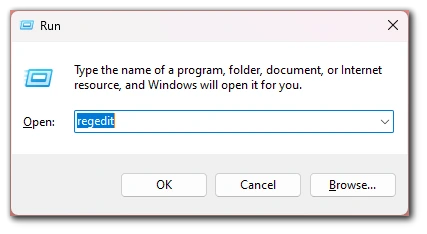
- Run the Registry. To do this, you must press Win + R and type regedit in the popup window.
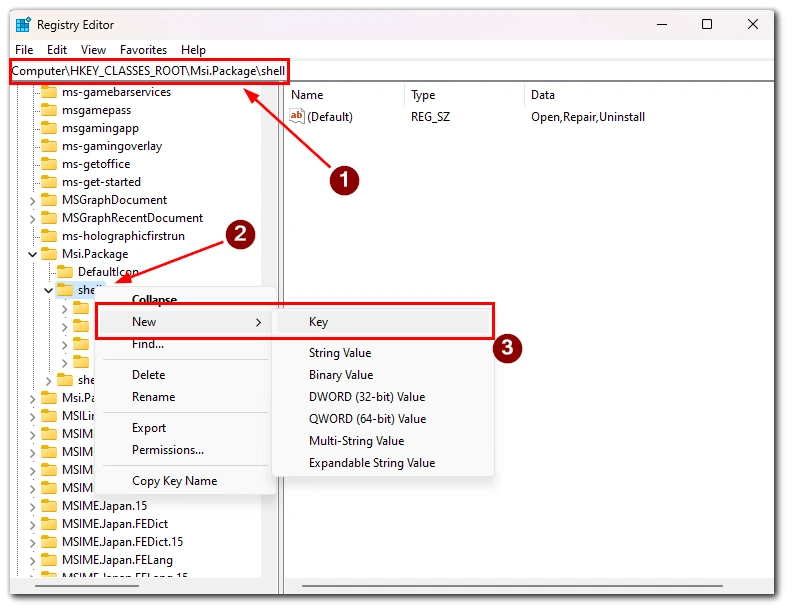
- In Registry, you need to go to
HKEY_CLASSES_ROOT\Msi.Package\shell - In the shell folder, you will need to create a new folder. To do this, right-click on the shell on the left side and select New>Key from the popup menu.
- Name it, runas.
- In the new folder, you will have to change the value of the command. To do this, right-click on it and click Modify. In the window Value data: enter Install as &administrator.
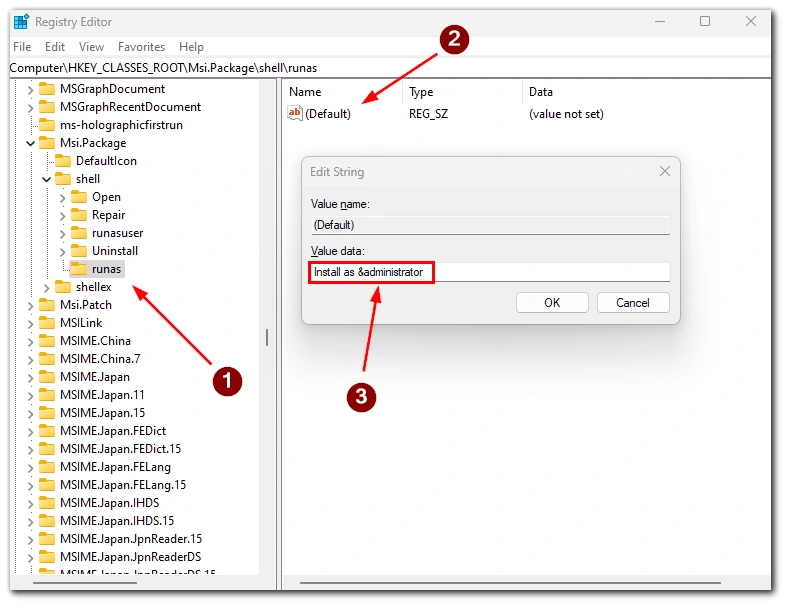
- After that, create another folder in the runas folder. Name it command.
- In this folder, you need to change the value for the command to msiexec /i “%1” and click OK.
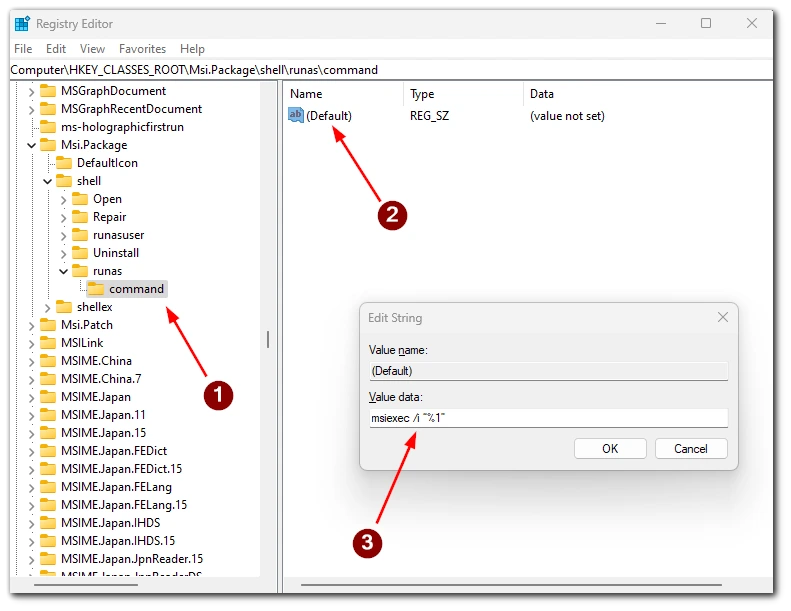
After that, close the register and try to run your MSI file. To do this, right-click on it and choose Install as administrator from the popup menu. In this way, you will be able to run all MSI files in the future.


seriously?
this is the best advice You can offer?
“simple steps” include the path to the msi file(s) and try to type the full path to Your “download ” map