For me, the easiest way to record an meeting in Zoom is using OBS software. OBS (Open Broadcaster Software) is free software that allows you to record video and broadcast it in real time. I will now tell you how to use OBS to record Zoom meetings.
First, make sure you have OBS installed on your PC. If you don’t have it yet, don’t worry, you can download it from the official OBS Project website. Installation is easy and only takes a few minutes.
Once the installation is complete, open OBS. Then add Sources and you can start recording. For more detailed steps on Windows PC and Mac, follow the next instructions.
How to download OBS on Windows using Steam?
To download OBS on Windows using Steam, you can follow these steps:
- To begin, open Steam and log in using your credentials.
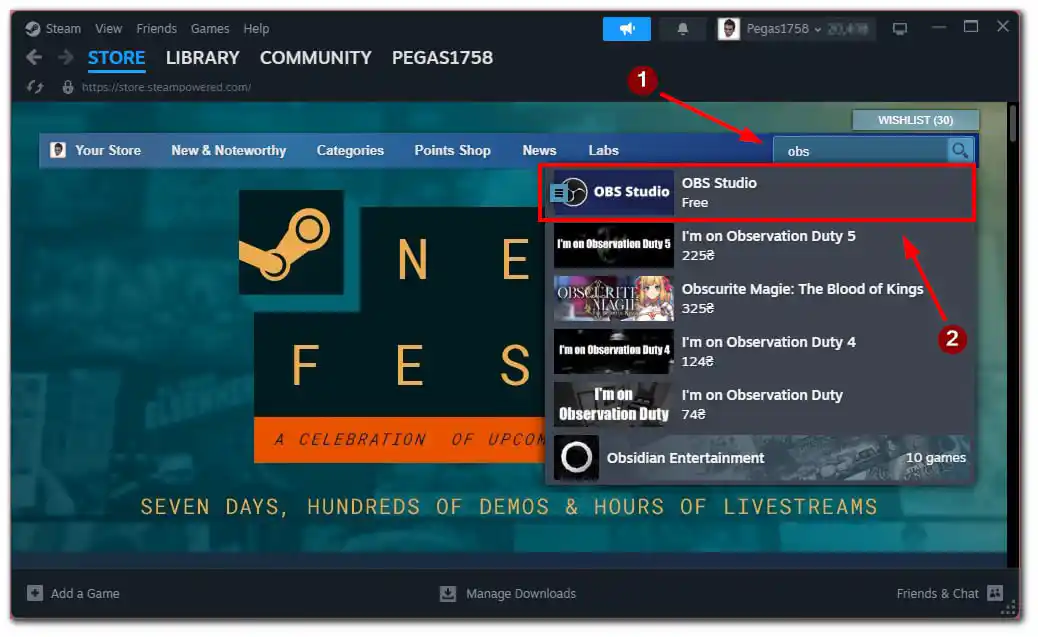
- Then click on the search button in the right corner and type “OBS” into the search box.
- From the list of apps select “OBS Studio“.
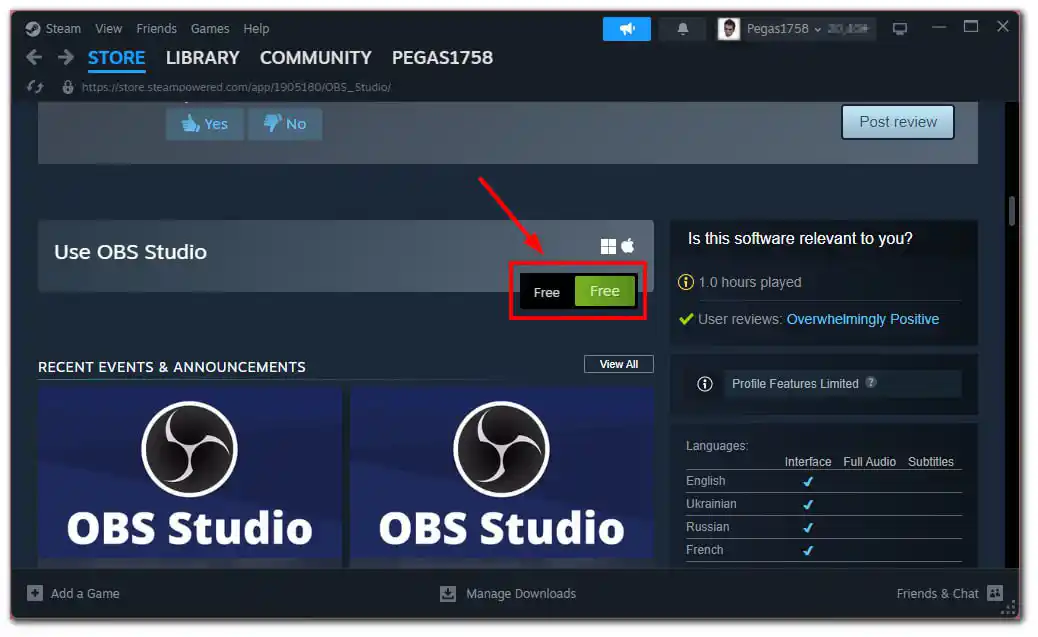
- On the app page, scroll down and select the “Free” button to start the installation.
- Once OBS is installed on your PC, you can run it from your desktop or from the Steam Library.
You now have OBS Studio installed on your computer via Steam. Follow the next steps to record the Zoom meeting with OBS.
How to download OBS on Mac?
To download OBS (Open Broadcaster Software) on your Mac, follow these steps:
- Open your preferred web browser.
- Go to the official OBS website.
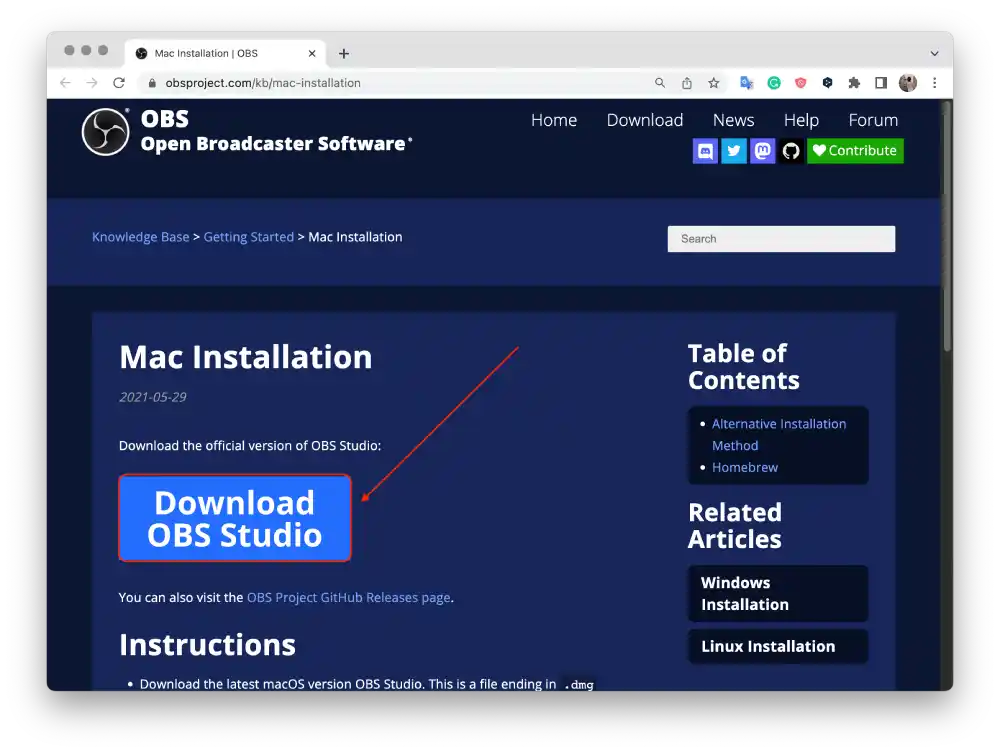
- Once on the website, click on the “Download” button located at the top right corner of the page.
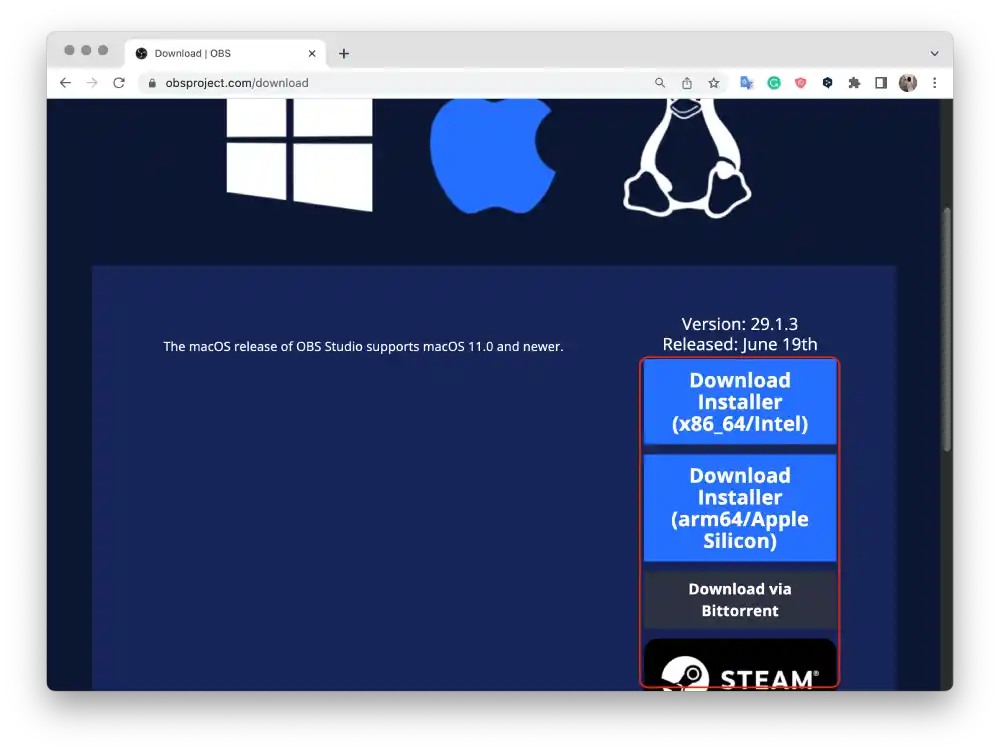
- Click on the Apple icon and select installer (X86_64/Intel) or (arm64/Apple Silicon).
- Your browser will start downloading the OBS installer file.
- Once the download is complete, locate the downloaded file.
- Double-click the OBS installer file to open it.
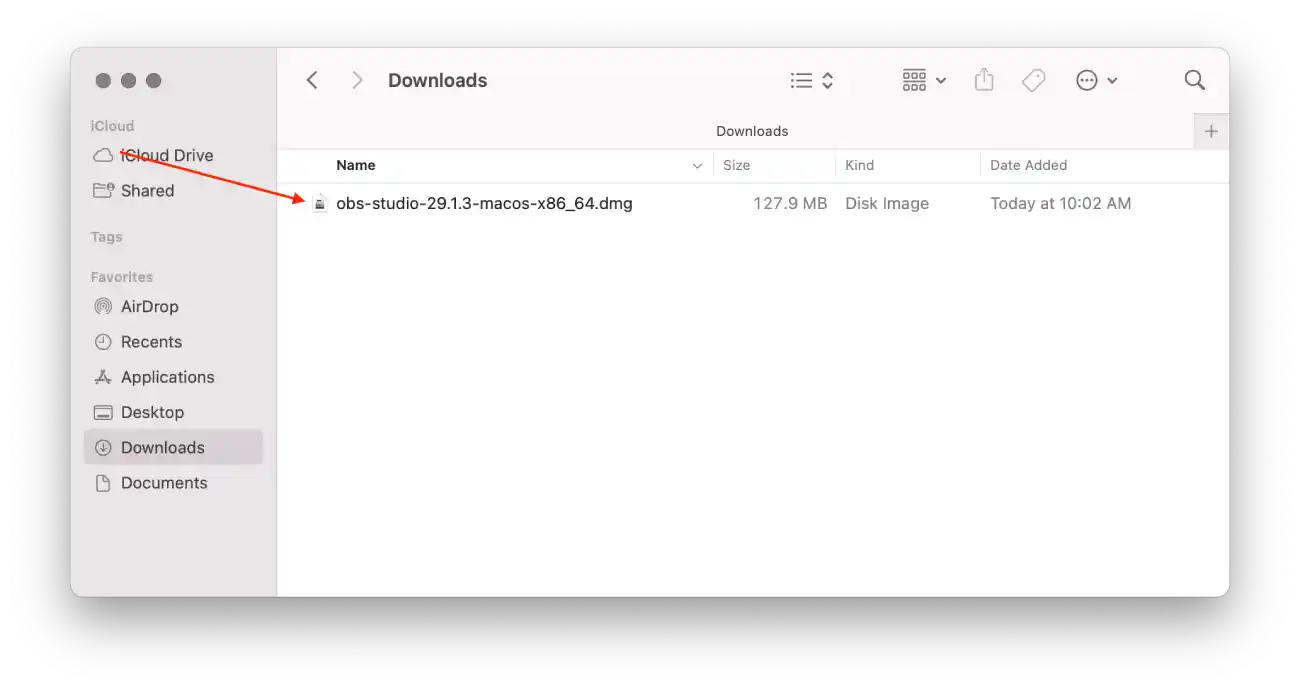
- Drag the OBS icon and drop it into the “Applications” folder shortcut within the window.
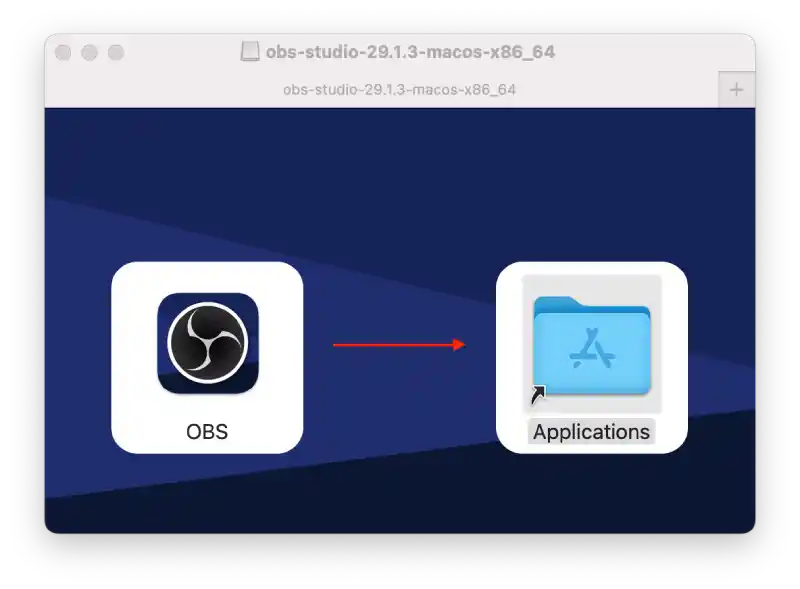
- This will start the installation process, and a progress bar will appear.
You have successfully downloaded and installed OBS on your Mac. You can now configure OBS according to your needs for recording or live streaming.
What to do to record the Zoom meeting with OBS on Windows?
With these steps, you will be able to record Zoom meetings and save them for the future. So that you can review them later and use this information. First, you must install the OBS program on your PC or laptop. After that, follow these steps:
- The first step is to start Zoom and OBS.
- After that, you need to click on ‘+’ in the bottom ‘Sources’ panel of the OBS program.

- Then select ‘Window Capture’.

- Next, a new window will open in which you have to name your file and save it.
- Then choose the monitor you want to display your video on from the drop-down list and uncheck the ‘Capture Cursor’ box and press ‘Ok’.

- In OBS, press + again in the Sources section, then select ‘Capture Audio Input’.

- Rename the capture source if you want to separate it from another source and avoid confusion, then press OK.
- Then you need to select the input device from the drop-down list, then press ‘OK’.
- Next click ‘Start Recording’, you can also use ‘Start Broadcasting’ if you need to broadcast the conference elsewhere.

- Then open the Zoom window full screen.
- When you’re finished recording, return Zoom to windowed mode and select ‘Stop Recording’ in OBS.
Also, note that the sound in the recording will be doubled if you use speakers. This is because your microphone picks up the output sound from your device. To avoid this, use headphones.
What to do to record Zoom meetings using an app on a PC?
Also, you can record Zoom meetings without installing any third-party programs. Since Zoom has a built-in function for recording meetings. However, at the same time, all the participants in the meeting will be notified that you’re enabling the recording. To record Zoom meetings using an app on a PC, follow these steps:
- The first step is to open the Zoom program on your PC or laptop.
- After that, you need to log in to your account.
- Then select the ‘Home’ tab and click on ‘New Meeting’.

- After that, click on ‘Record’ as the Zoom meeting starts.
To finish the Zoom meeting, click on ‘End’. You can then watch a recorded Zoom meeting. This way you can start recording the meeting at any time.
What to do to record the Zoom meeting with OBS on Mac?
To record a Zoom meeting using OBS on Mac, follow these steps:
- Open the OBS app on your Mac.
- In OBS, click on the “+” icon in the “Sources” box at the bottom of the screen. Select “Window Capture” from the drop-down menu.
- Then click on the “Start recording” button.
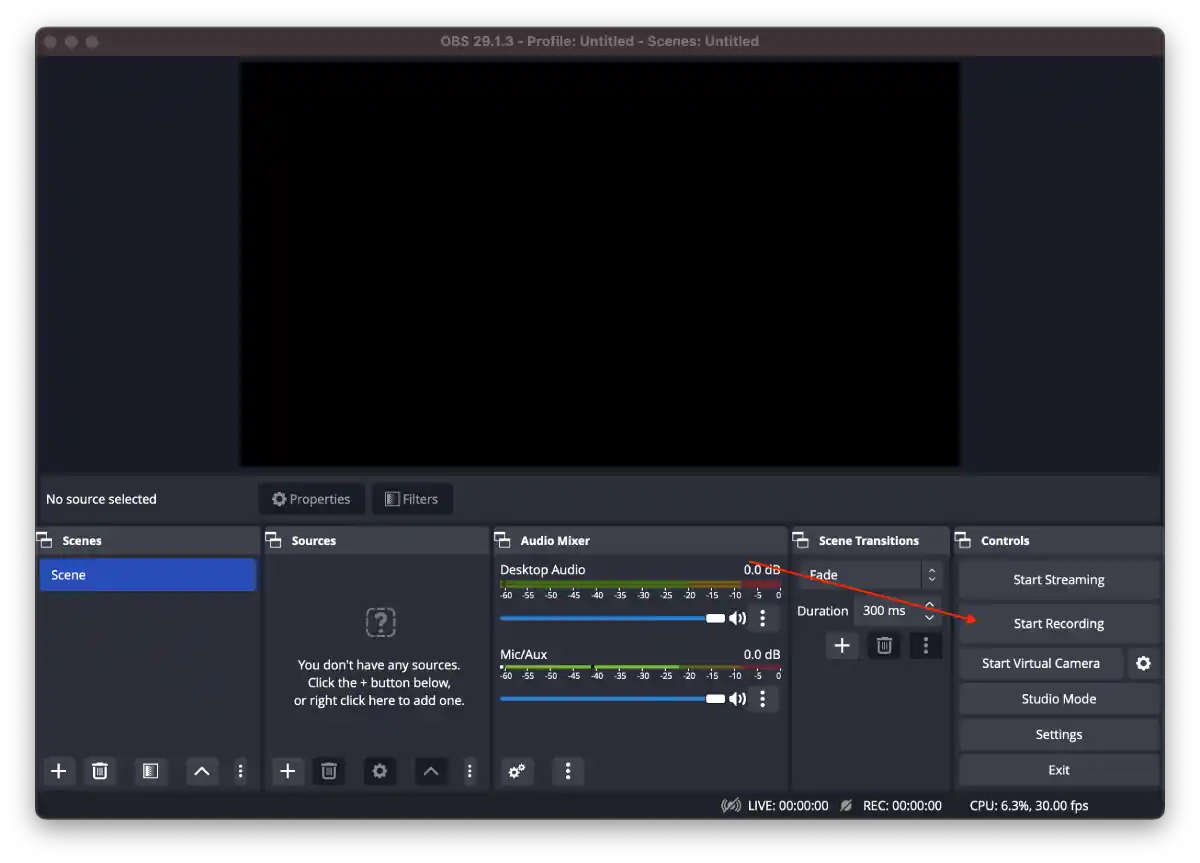
- Once recording has started, you can open the Zoom app.
- Start the meeting.
- After the meeting is over you can click on the “Stop recording” button.
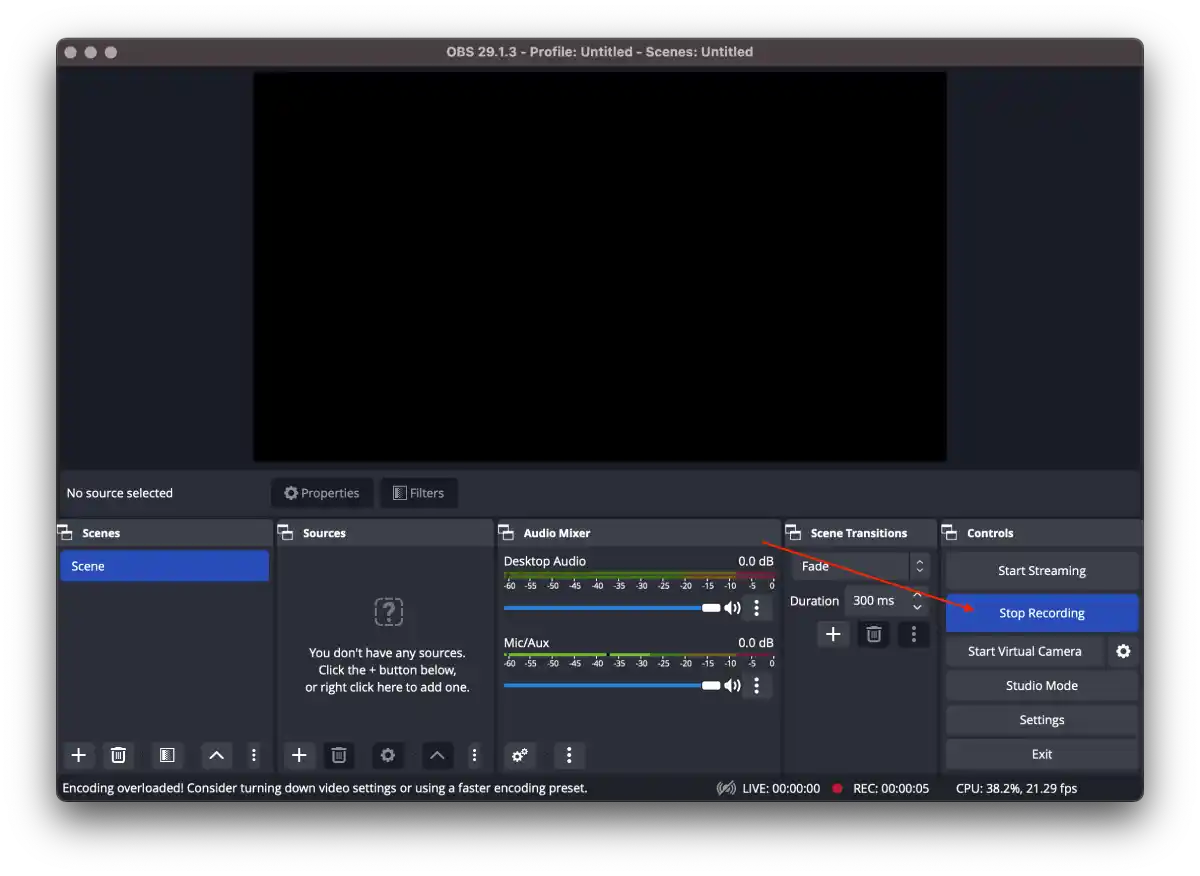
Remember to test the setup before important meetings to ensure everything is working properly. OBS provides additional customization options for recording, such as adjusting audio levels, adding overlays, or capturing multiple sources simultaneously, which you can explore to enhance your recording experience.
What to do to record Zoom meetings using an app on iPhone?
The algorithms for recording Zoom meetings using an app on iPhone are different. Since there is no built-in function in the app on the iPhone to record meetings. However, after some time in the Zoom app, there is such a possibility with a subscription.
However, if you do not have a subscription to the paid Zoom account and you continue to use the free version, you will also be able to record meetings but in a slightly different way. You’ll need to use the built-in features of the iPhone, not the Zoom app.
On your iPhone, you can turn on the screen recording which will save your entire meeting to the gallery in the video section. That way, you can do whatever you need to do with the video. Edit, cut some moment, send it in a messenger to colleagues or friends because, in fact, you’ll have a regular video on your iPhone, in which the screen recording was broadcasted.
What to do to add screen recording in the control center?
If you need to make a screen recording of a Zoom meeting, you need to add the screen recording function in the control center. To do this, you need to follow these steps:
- The first step is to open the settings on your iPhone.
- Next, select the ‘Control Center’ section.
- Then scroll through and tap on the ‘+’ icon in the screen recording section.

- After that, swipe to open the control center and tap on the recording icon. The recording will start after 3 seconds.

After these steps, all you have to do is tap on the record button and then start the meeting in Zoom. You can also go to the gallery and trim the crucial moments from the video.

