You can print various file types from different apps like Notes, Preview, Word, TextEdit, and Photos on your Mac. To do so, click on ‘File’ and choose ‘Print’ from the drop-down list.
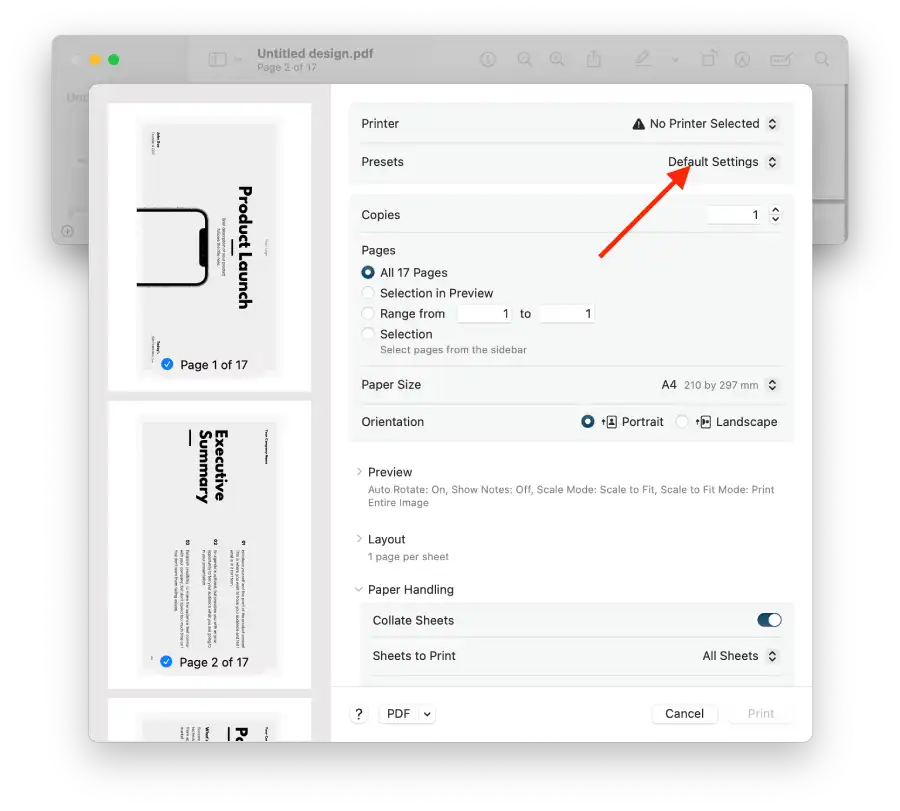
In the print settings, select the appropriate options for the printer, paper size, orientation, number of copies, page range, and presets before clicking ‘Print’.
How to print file on a Mac?
Printing any file on a Mac typically involves a universal process that can be used across various apps.
You don’t need a specialized printing app like drivers or printer utilities to print documents on your Mac. MacOS provides convenient tools for printing from many standard apps.
To print on Mac, you need to follow these steps:
- Open what you want to print. It can be a PDF in Finder, Note, Calendar, or something else.
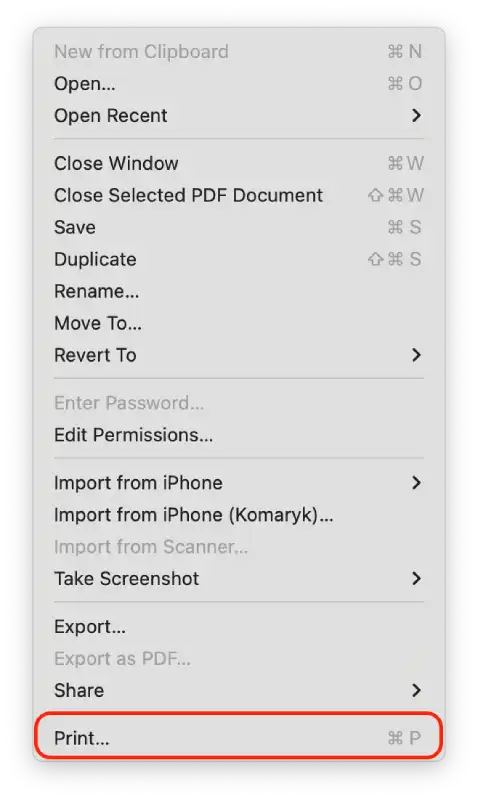
- At the top of any app, click on File.

- From the list, select Print.
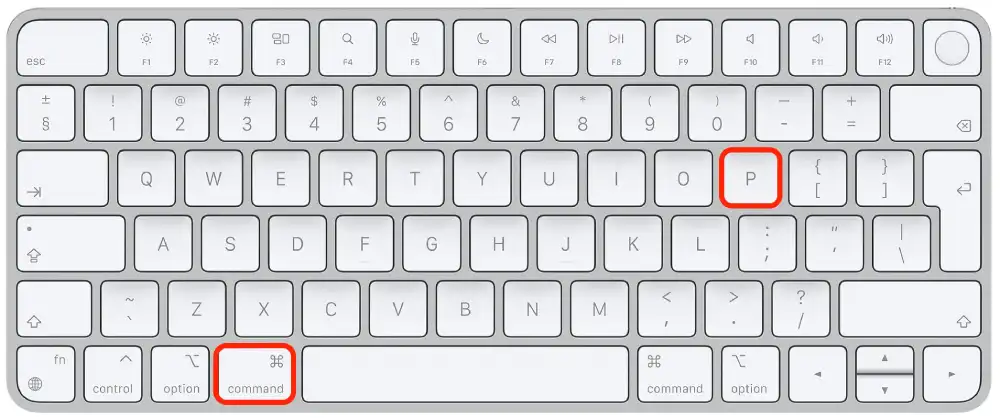
- Alternatively, you can use the keyboard shortcut Command + P.
- In the new window, click on the Printer option.
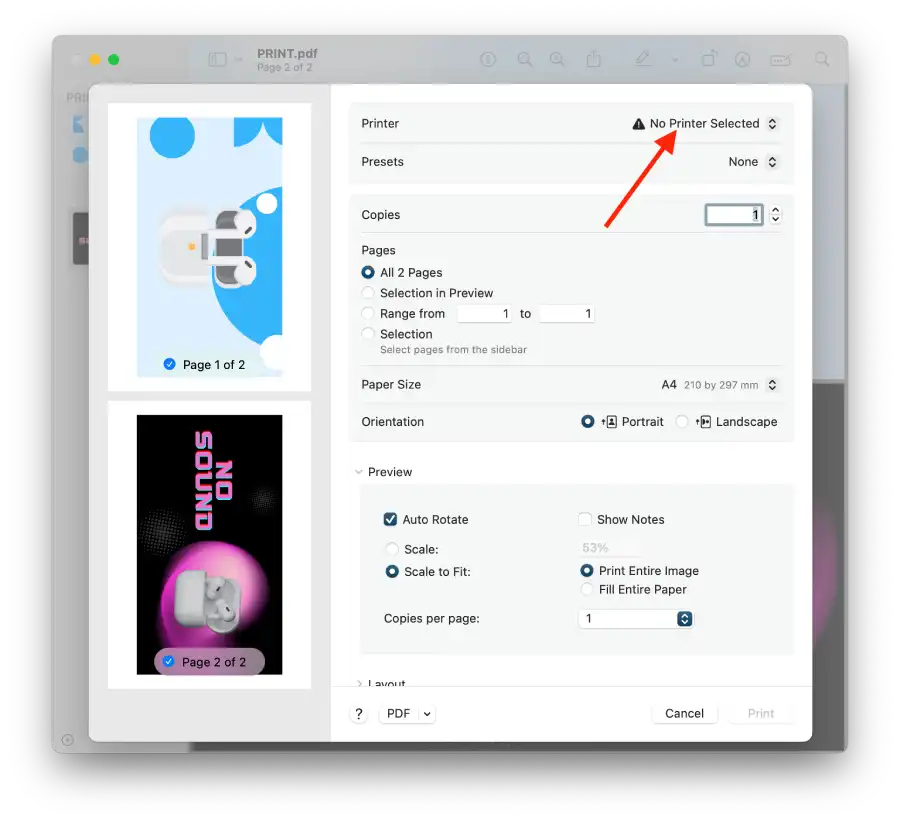
- Click Add Printer.
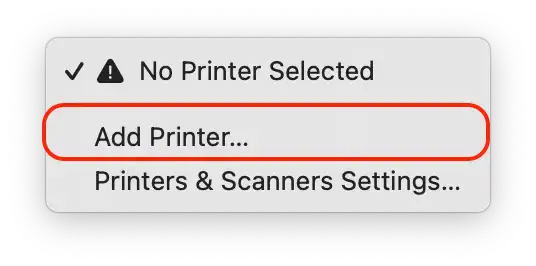
- In the new window, click Printer and click Add.
- Then, select the number of copies.
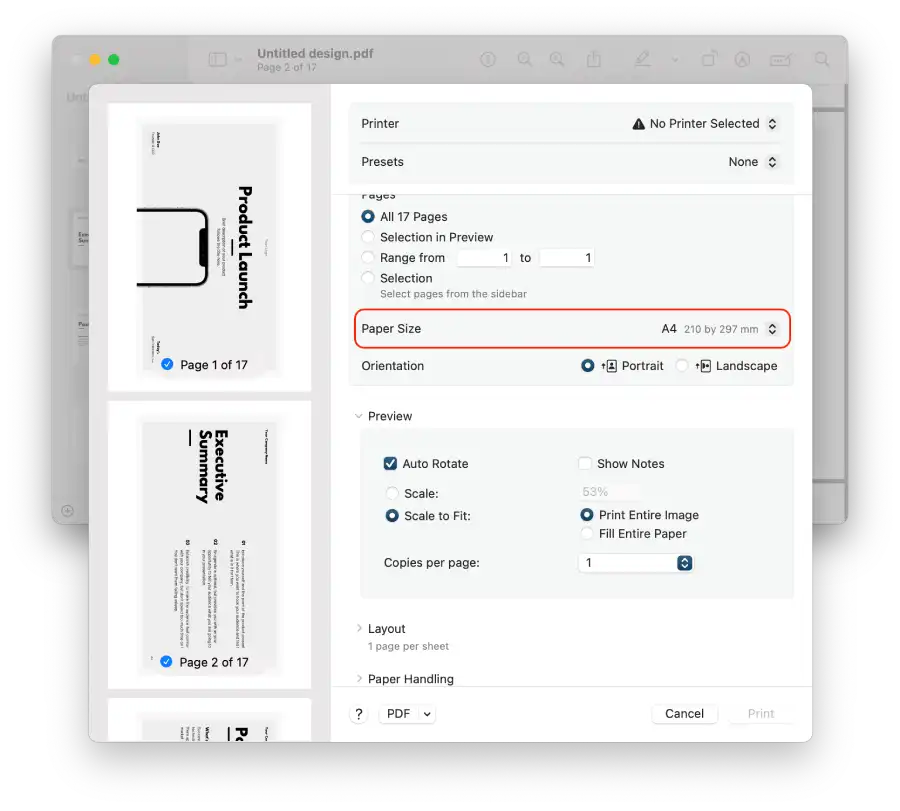
- Select which pages to print, sheet size, and orientation.
- In the Preview section, you can select auto-rotate and specify the scale.
- If necessary, select the necessary options for layout.
- Click Print.
After pressing the “Print” button, the file will be sent to the printer, and it should start printing. Once done, retrieve your printed document from the printer’s output tray.
How to print different paper sizes on a Mac?
Depending on the purpose of the document, different tasks require different paper sizes. For example, promotional brochures or legal documents may require Legal size, while photographs intended for framing may require standard photo sizes. Presentations, portfolios or business proposals often look better when printed on appropriately sized paper.
In order to choose a paper size for printing on Mac, you need to:
- In the print window, click Paper Size.
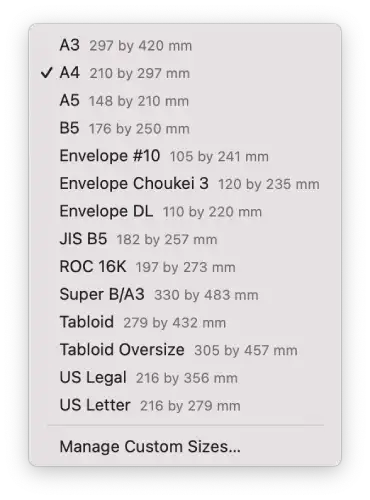
- From the drop-down list, select the appropriate option. The size in inches is written next to each size.
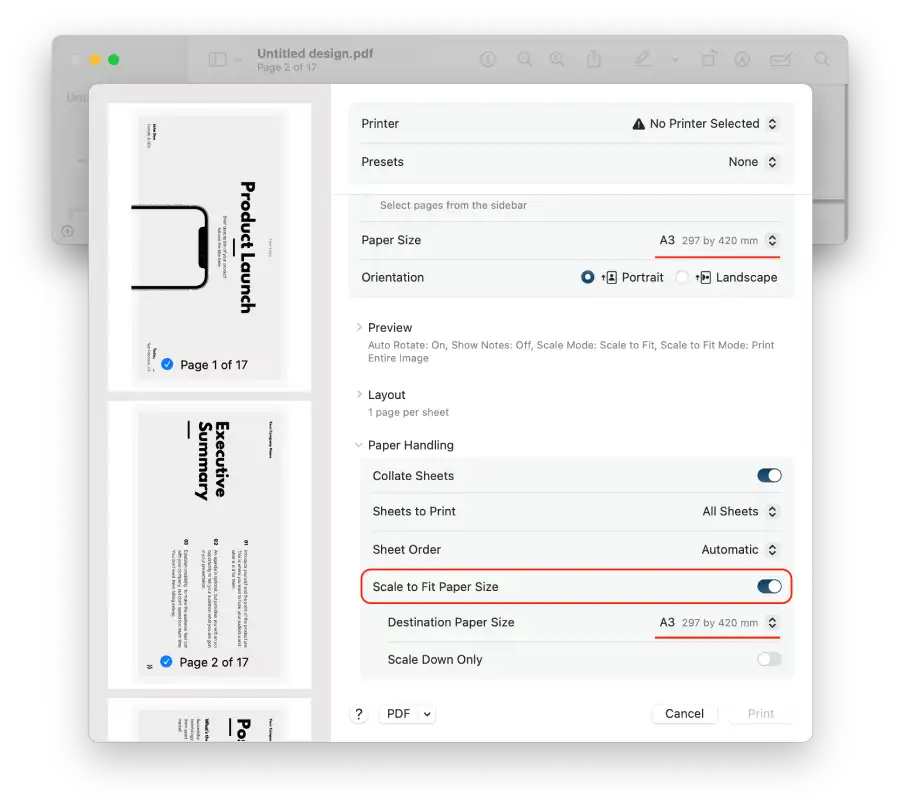
- Then be sure you check Scale to fit the paper size box. Select the paper size on which you want to print.
How to use preset for print on Mac?
Mac print settings can be varied, depending on what document settings you need: paper size, print quality, color or black-and-white mode, and more. However, frequently used settings can be saved as a preset so you don’t have to enter them manually each time. This is convenient and saves time, especially if you frequently print documents with the same settings.
A print preset is a collection of print options that you can save under a convenient name and quickly select when printing other documents.
To set a preset for printing on the Mac:
- In the print preset window, specify your settings: select the printer, paper size, print quality, and others.
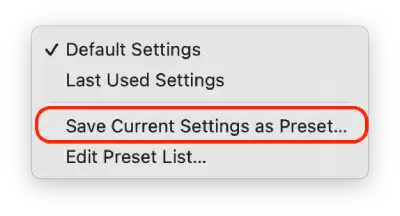
- At the top, click on “Preset“.
- Select the “Save Current Settings as Preset” option from the list.
- Enter a name for your preset and click on “OK“.
Once you save your preset, it will be available in the preset list whenever you print a document. So, instead of having to configure all the settings manually, you simply select the desired preset from the list, and all the ready-made settings will be automatically applied to the document.
How to pause or cancel printing on a Mac?
When you start printing a document, a printer icon appears on your Mac’s Dock. Clicking this icon opens the printer window. Your print job is probably already finished if you don’t see this icon. However, you can always open the printer window manually. To do this, you need to:
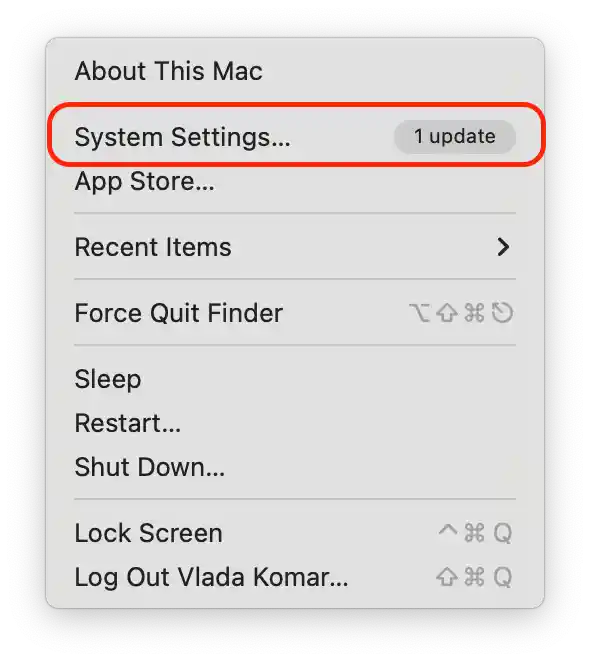
- Open System Settings.
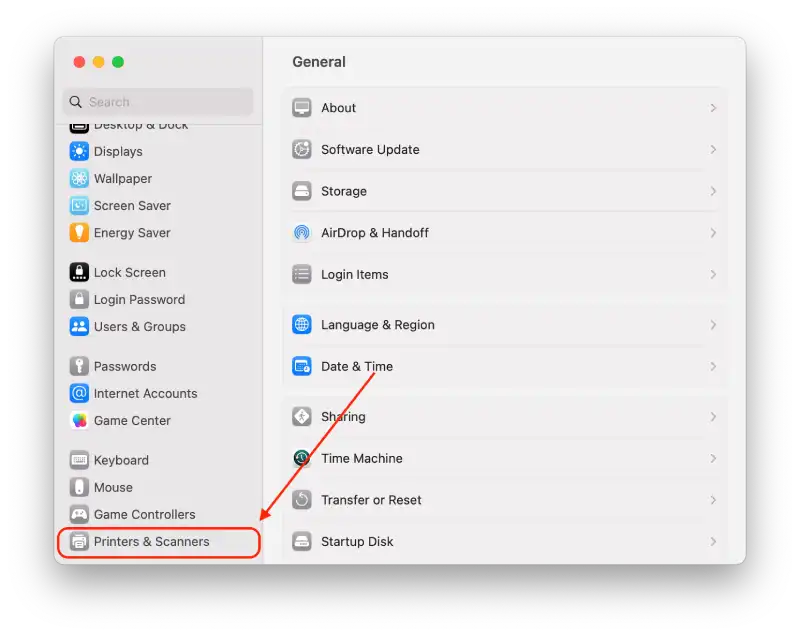
- Select the Printers and Scanners section.
- Select your printer.
- Click on Open Print Queue.
- To pause printing, click Pause.
- To resume printing – click Resume.
- To cancel printing – click on the “X” button next to your job in the printer window.
If you cancel a job and decide to change your document, you must send it to print again from the source app.

