Google Sheets offers many features, including the ability to print spreadsheets. Printing a spreadsheet in Google Sheets is an important skill for anyone who works with data, as it allows you to create hard copies of your work for record-keeping or to share with others who may not have access to the internet.
However, printing a spreadsheet requires more than just clicking a button. It’s important to ensure that the printed version looks how you want it to, with proper formatting, legible text, and accurate data. Let’s look at all the nuances that may arise for you.
How to print a single sheet in Google Sheets
Printing a single spreadsheet in Google Sheets is a simple process. Follow these steps to print a single spreadsheet in Google Sheets:
- Open the spreadsheet you want to print in Google Sheets.
- Click File in the menu bar and select Print from the drop-down menu—alternatively, press “Ctrl+P” on a Windows PC or “Command+P” on a Mac.
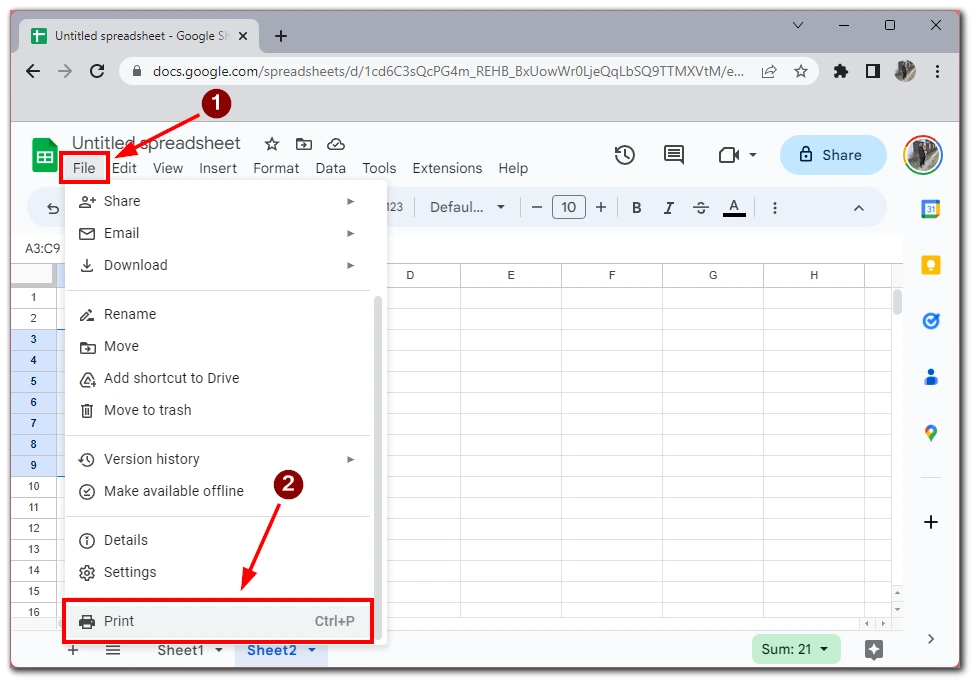
- The Print dialog box will appear. In this box, you can adjust the print settings, such as Page orientation, Paper size, and Margins, or add formatting like Page Breaks.
- Then click on Next.
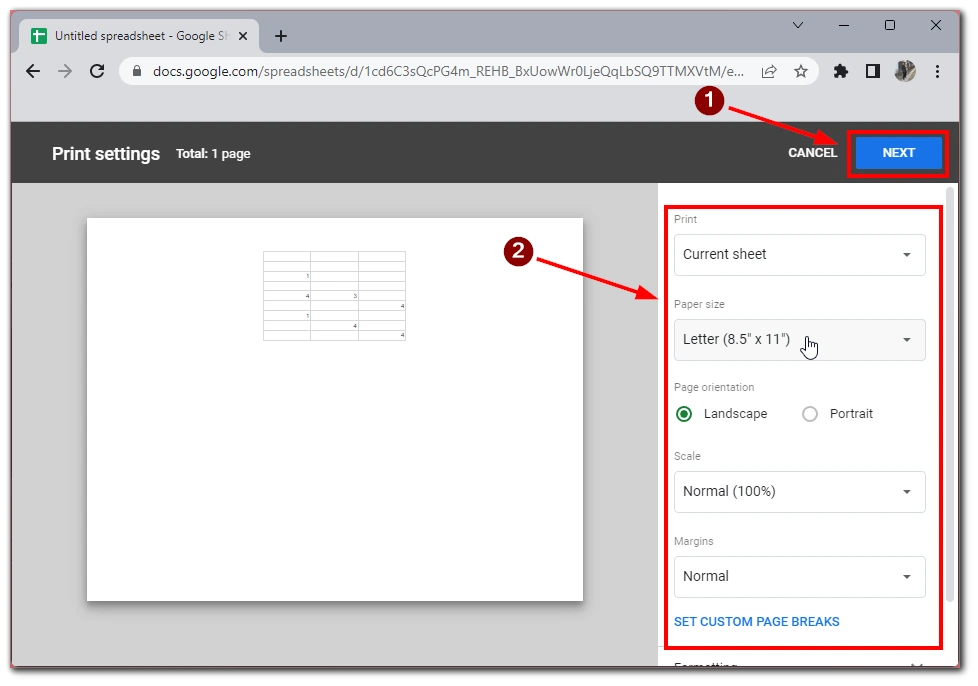
- You will be taken to the preview window, where you can view how your document will look and send it to a connected printer or save it as a PDF file to print later.
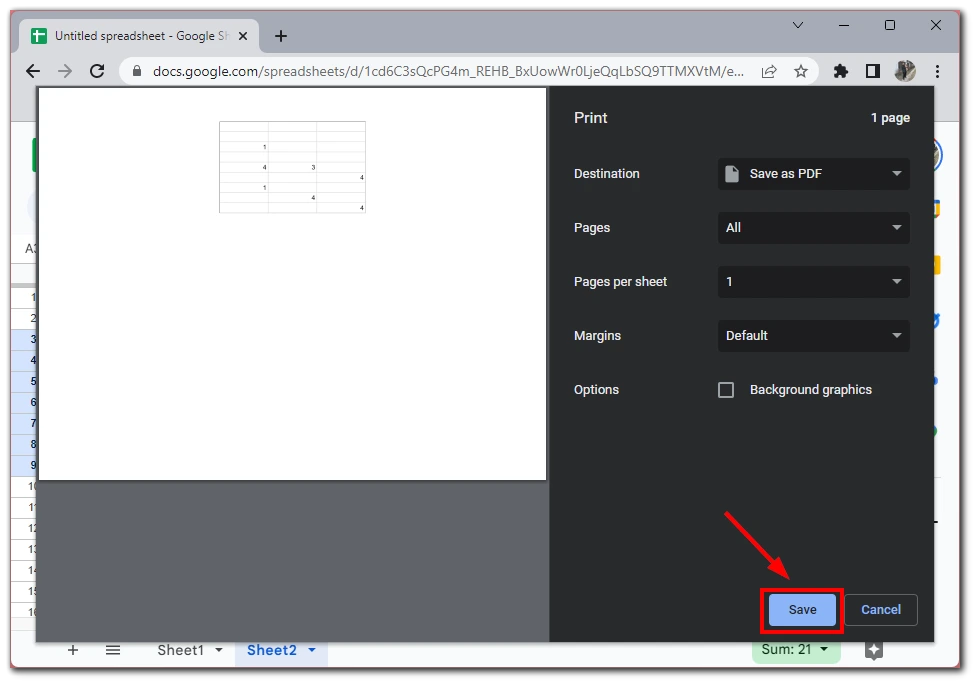
Following these simple steps, you can easily print a spreadsheet in Google Sheets. Previewing the spreadsheet before printing and adjusting the page setup as needed is important to ensure that the printed version looks professional and polished. With these tips, you can confidently print your spreadsheets and share them with others.
How to print multiple sheets in Google Sheets
Printing multiple sheets in Google Sheets is a bit more complex than printing a single sheet, but it is still easy. Most of the steps will be the same as in the case of a single sheet. To do this, you will need the following:
- Open the first sheet you want to print in Google Sheets.
- Click File in the menu bar and select Print from the drop-down menu. Alternatively, press “Ctrl+P” on a Windows PC or “Command+P” on a Mac.
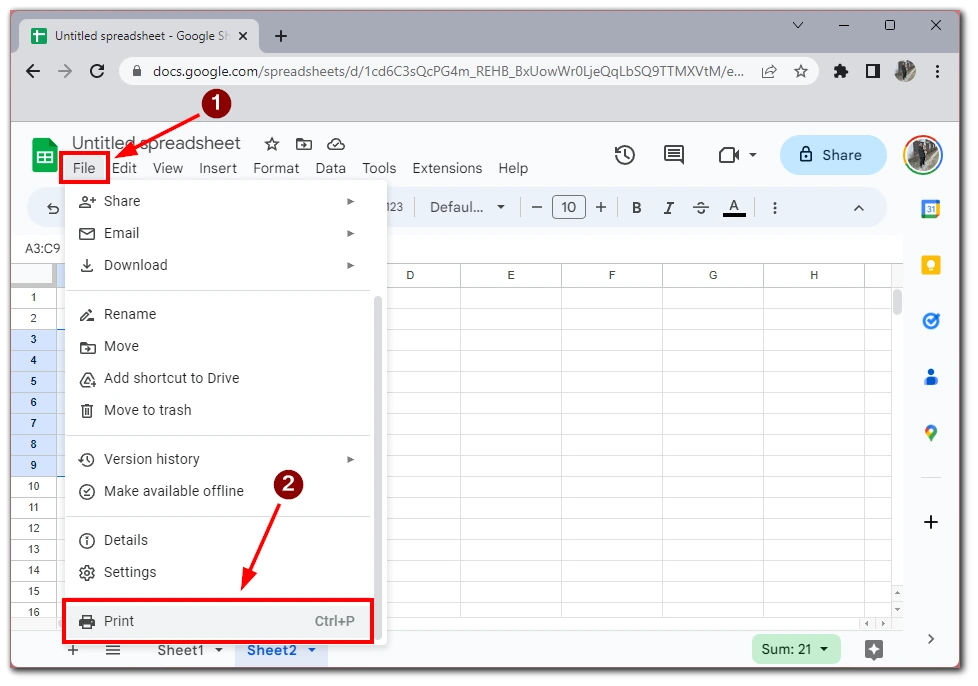
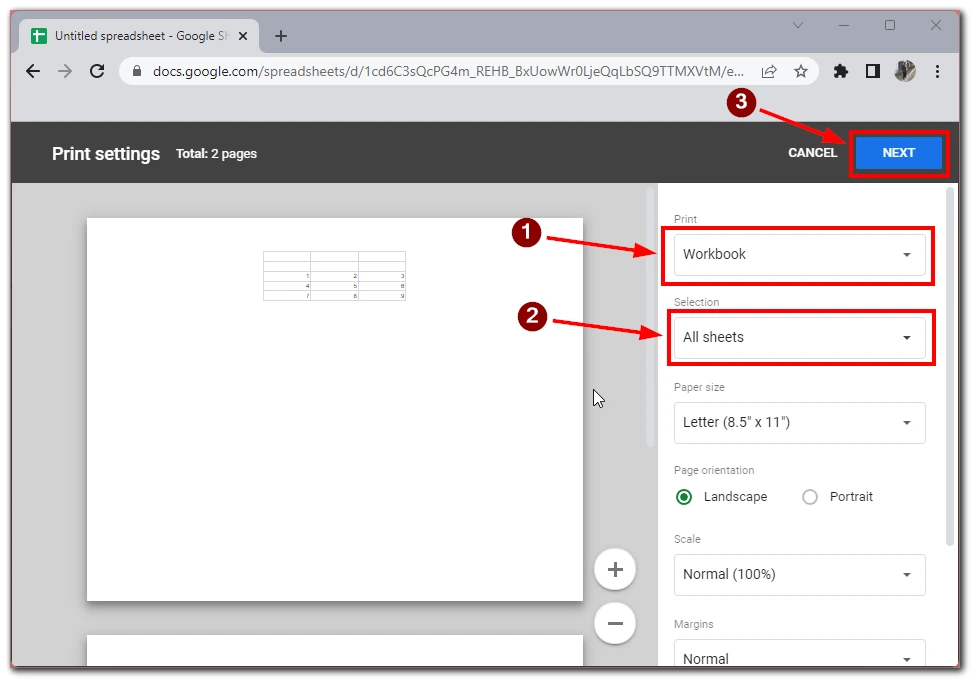
- After that, you will need to choose Workbook under the Print option.
- Then under Selection, specify the desired sheets that you need to print.
- Adjust all the settings for your future document and click Next.
- You will be taken to the preview window of your future document. Select the desired printer or save the document as a PDF file.
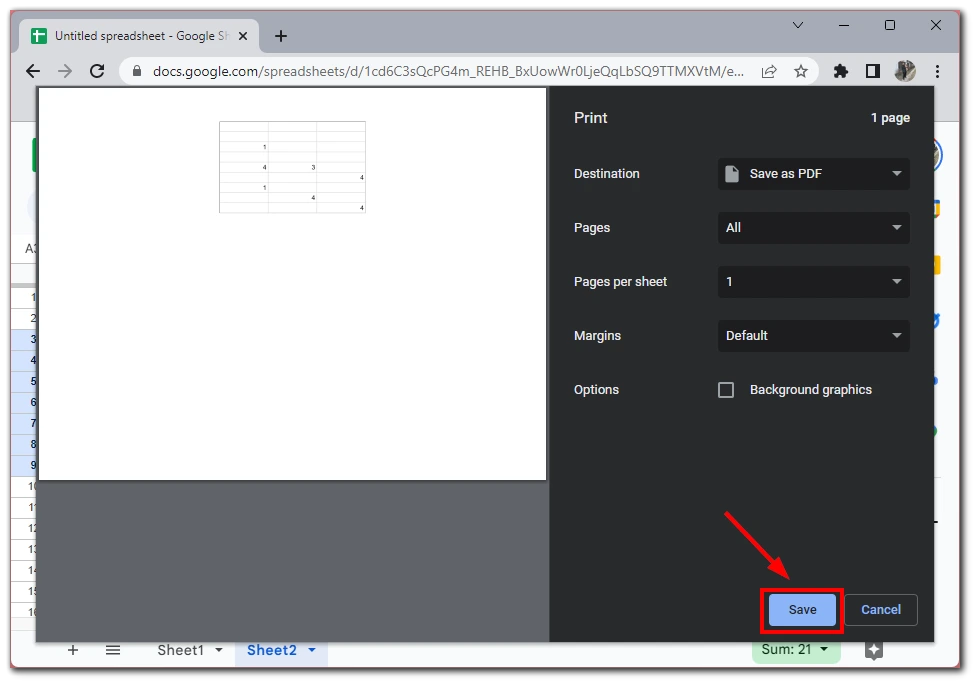
This method lets you print multiple sheets simultaneously, saving time and effort. However, it’s important to note that this method may not be ideal if you need to print sheets with different page setups or if you want to customize the printing options for each sheet individually. In that case, you should print each sheet in a row.
How to print only selected areas in Google Sheets
Printing only selected areas in Google Sheets is useful when you don’t want to print the entire sheet, but only a portion of it. Here’s how to do it:
- Select the cells you want to print by clicking and dragging your mouse over them. You can also hold down the “Shift” key while clicking on cells to select multiple areas.
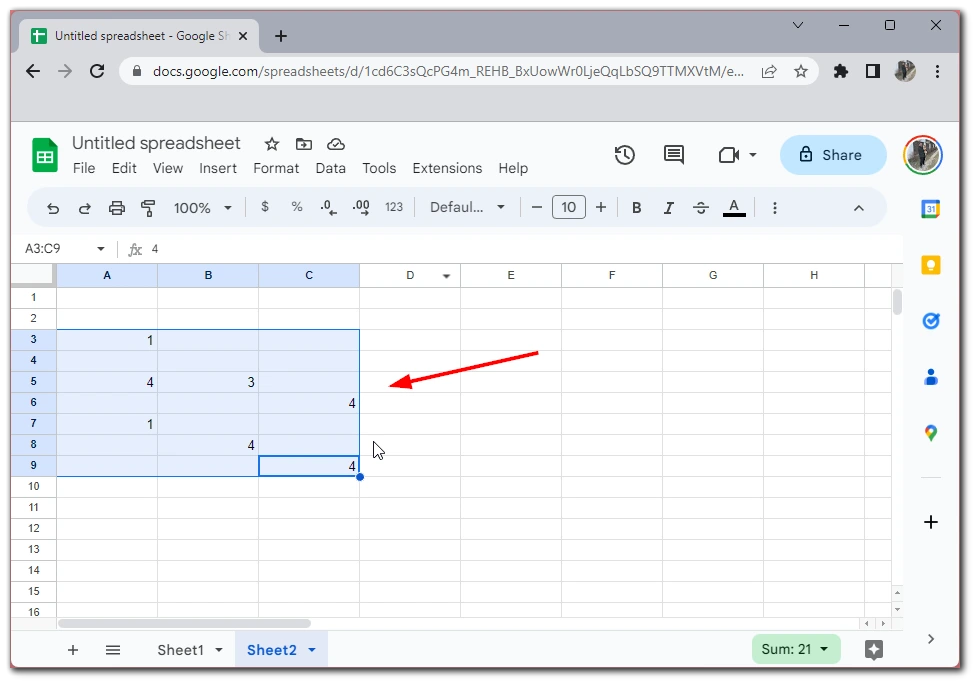
- Click on File in the menu bar and select Print from the drop-down menu.
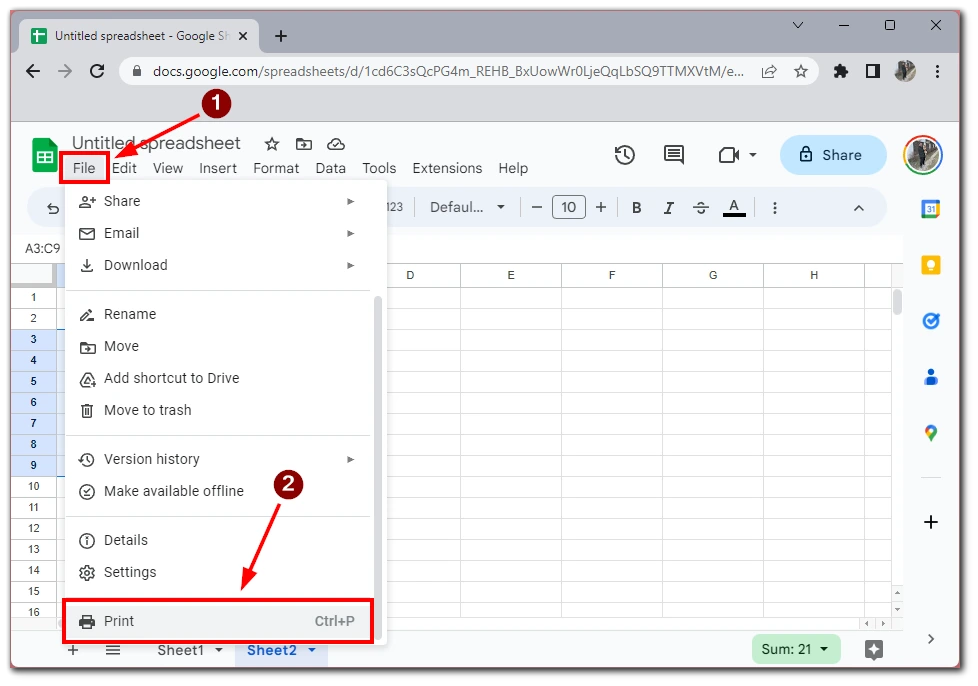
- In the Print dialog box, select Selected cells under the Print section. Then adjust all settings of your document.
- Preview your selection by clicking on the Next button. This will allow you to see how your selection will look when printed.
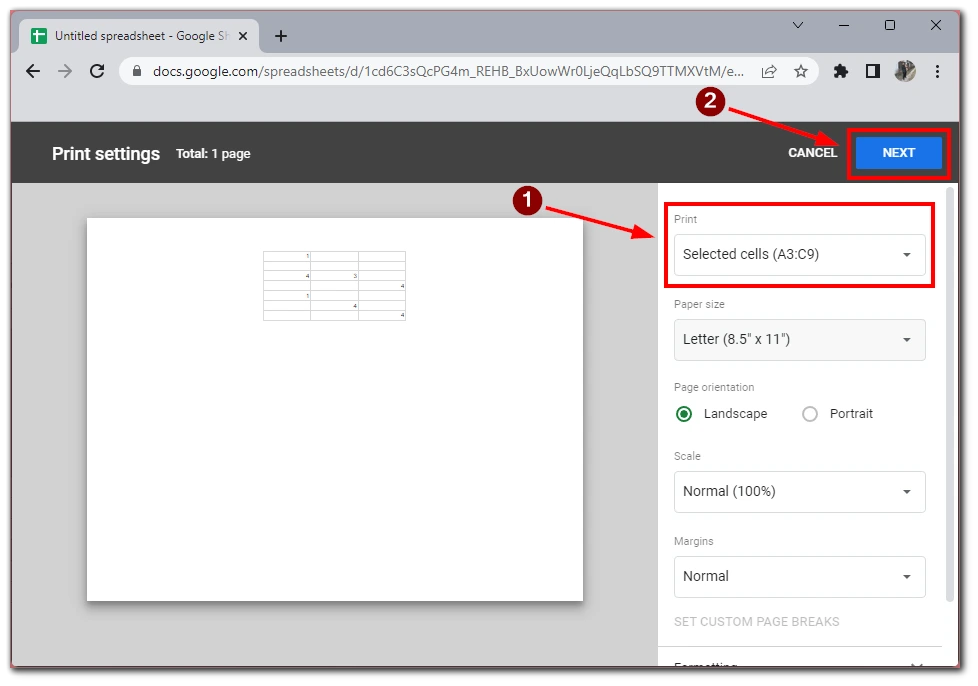
- Adjust the print settings as needed, such as the number of copies or the printer, and click Print to print your selection or Save to save the file as PDF.
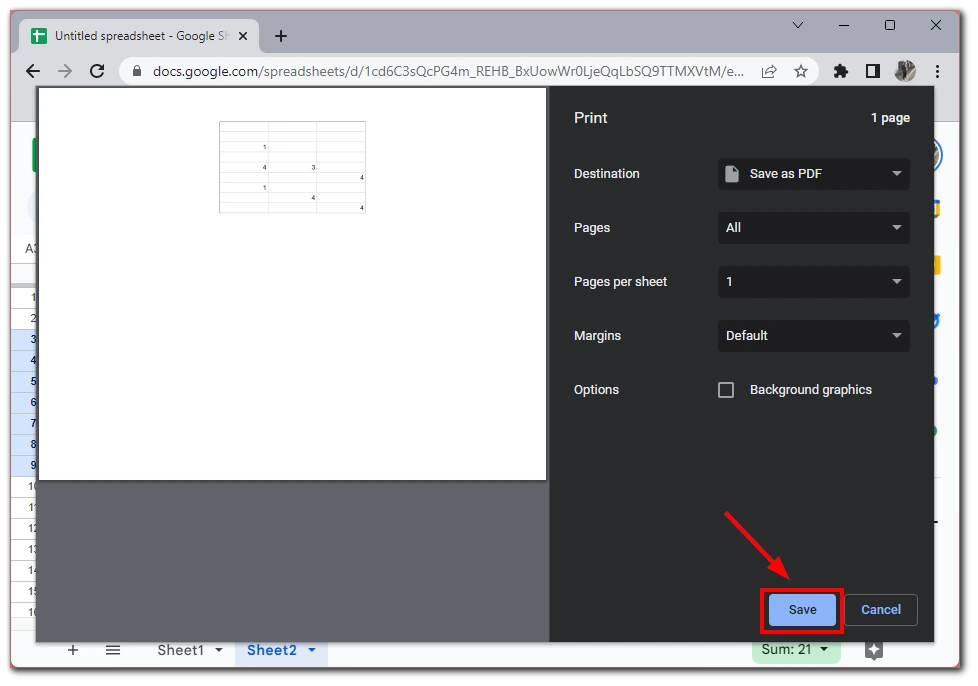
It’s important to note that when you print selected cells, only those cells will be printed, even if they are part of a larger table. For example, if you select a range of cells in the middle of a table, only those cells will be printed, and the rest of the table will not be included in the printout.
How to print a Spreadsheet in Google Sheets on a mobile app
Printing a spreadsheet in Google Sheets on a mobile app is a great option when you’re on the go and don’t have access to a computer. I also want to point out that the mobile applications for iOS and Android are not very different, and the instructions for printing will be the same. Here’s how to print a spreadsheet in Google Sheets on a mobile app:
- Open the Google Sheets app on your mobile device.
- Navigate to the spreadsheet you want to print.
- Tap on the three dots icon in the top right corner of the screen.
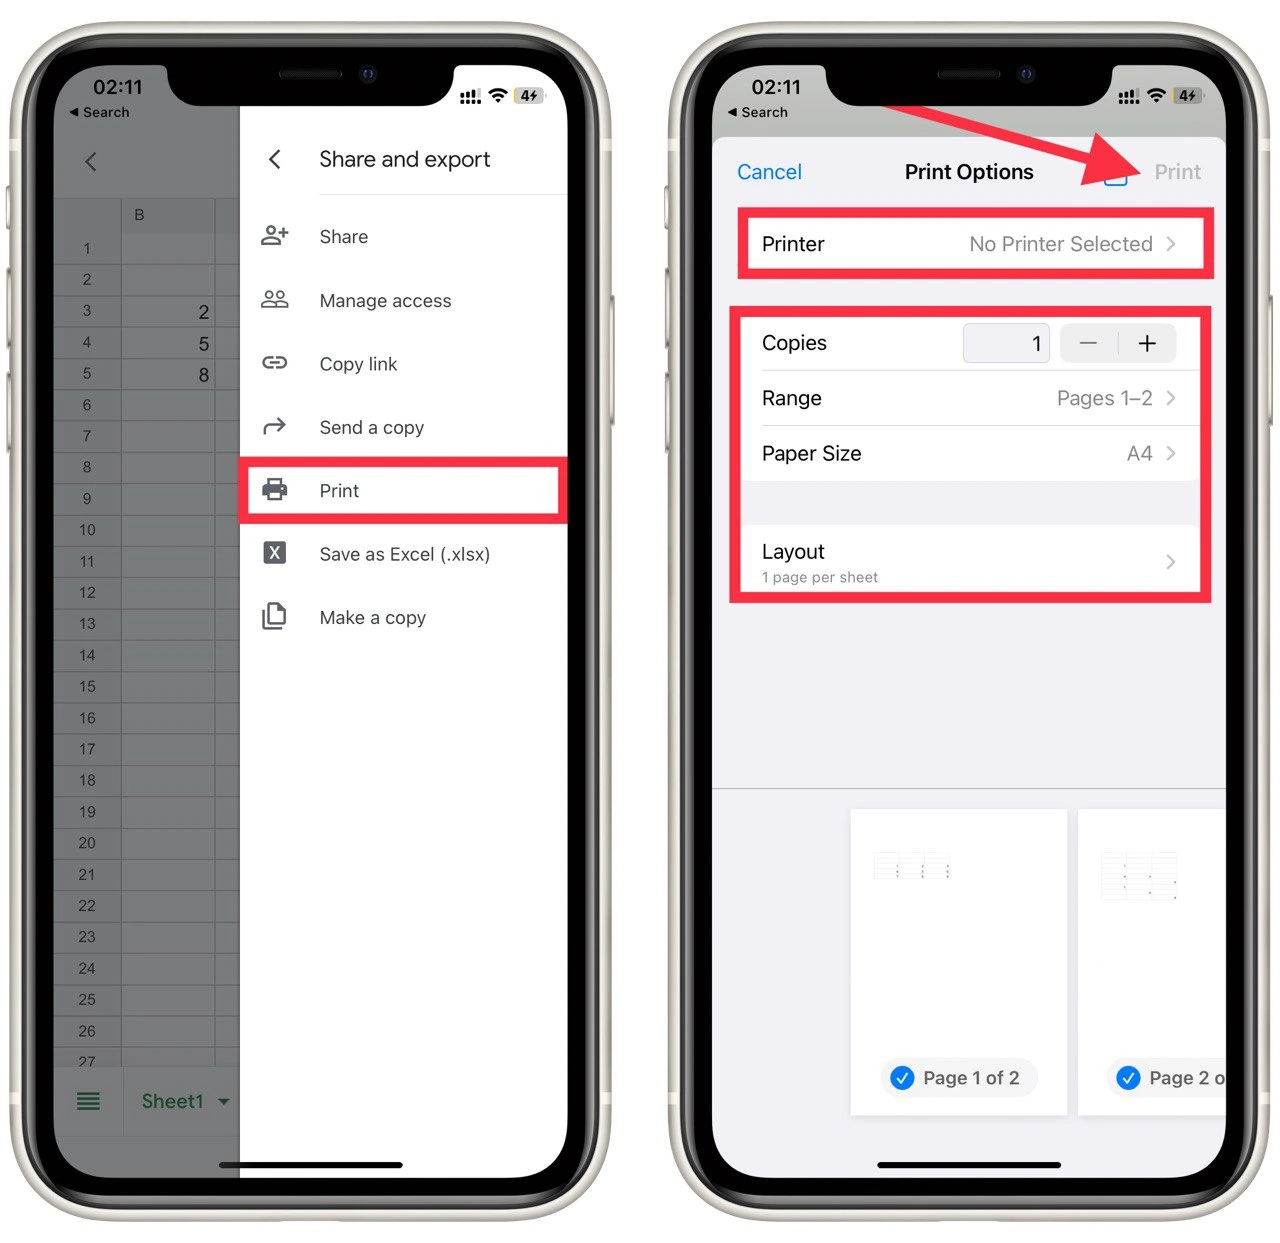
- In the side, menu, tap on Share and export.
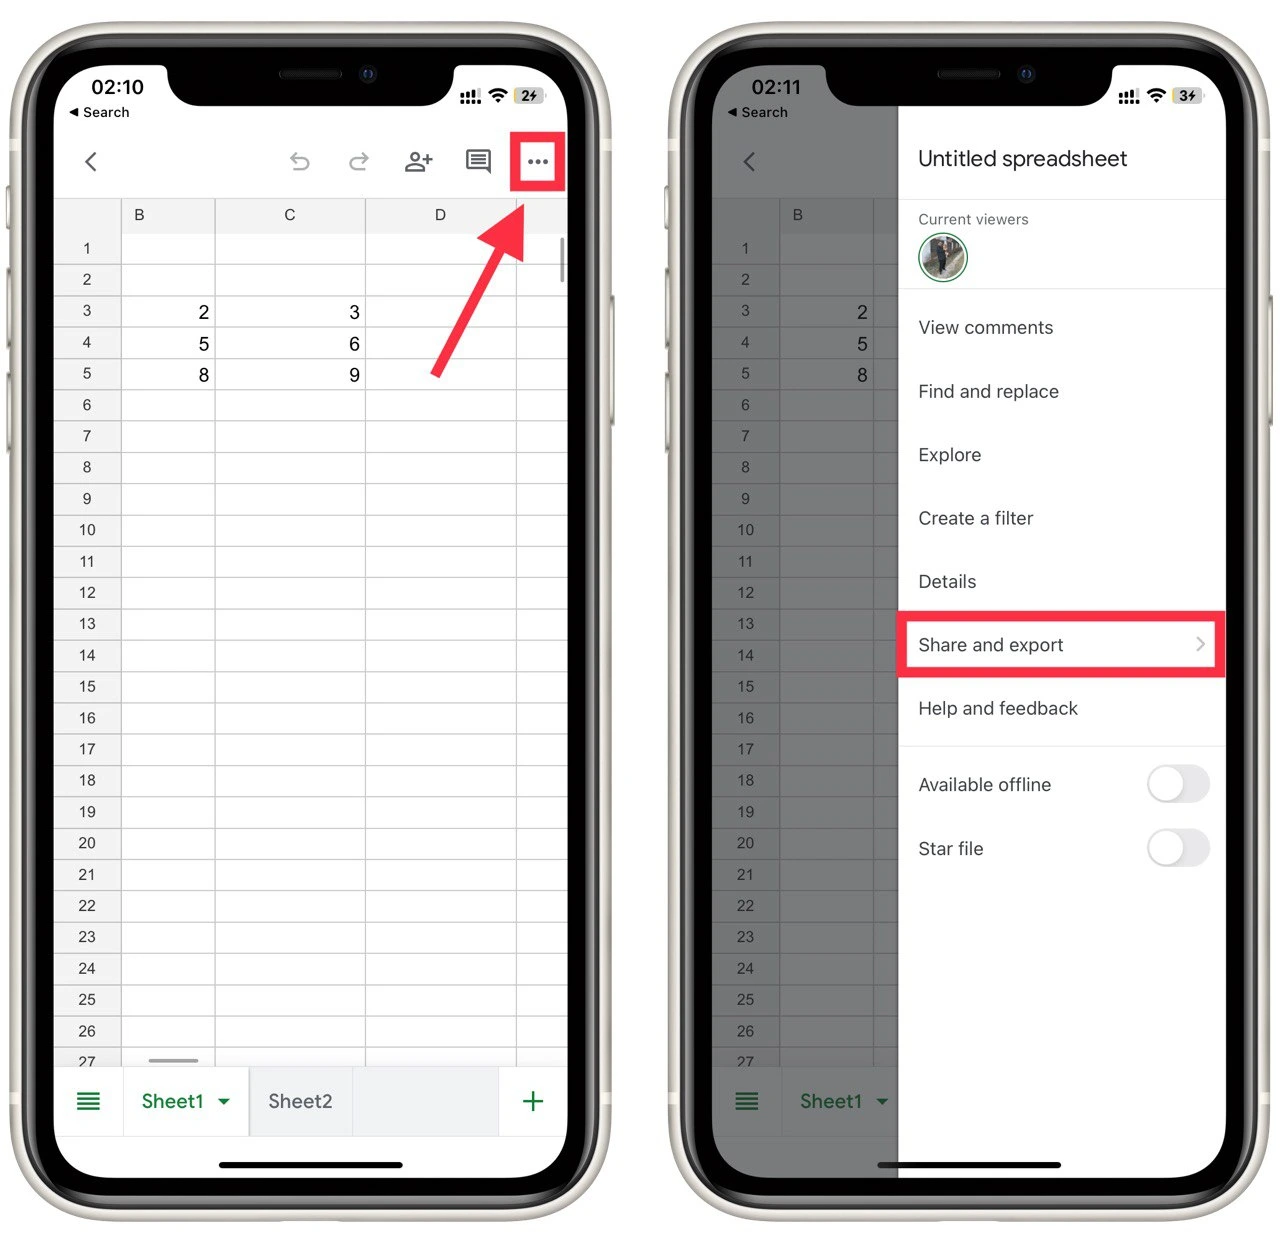
- Select Print from the drop-down menu.
- Choose the printer you want to use.
- Select any additional print options, such as the number of copies, double-sided printing, or paper size.
- Tap on the Print button to start printing.
It’s important to note that the options for printing on a mobile app may be limited compared to printing from a computer. For example, you may be unable to choose a specific range of cells to print or adjust the margins and scaling.
However, if you need more customization options, you can always save the spreadsheet to your Google Drive and access it from a computer to print with more advanced settings.

