Microsoft Word is the most popular service for working with text documents. Microsoft has created a convenient service with many valuable tools and features. In addition, Microsoft Word is different because it has many integrations with other Microsoft Office services, such as OneDrive or Outlook. However, among the disadvantages, many highlight that there are so many features in Microsoft Word that some are very unobvious. Users do not always understand how to use this or that tool in Word. For example, many users have recently been wondering how to add a Header only to the first page of a document.
The thing is that by default, the Header is applied and present on all pages at once. However, not everyone knows this function can be applied only to one page. To do this, you need to activate the Header and then go to the settings tab to set the correct parameters that will display the Header only on the first page. Let’s look at how the Header works and what you need to apply to the first page only.
What is a header in Microsoft Word?
Let me start by telling you more about what a header is in Word and how it works. If you’re not interested in learning more about this feature, you can skip to the next section of this article to go straight to the steps you need to enable this option.
Headers in Microsoft Word are a standard element of any page in your Microsoft Word document. By default, it sits above the text box where you enter text and is invisible. To activate it, you’ll need to click a special button in the toolbar, and then you can fill the Header with any text you want.
However, you should understand that the Header is embedded in every page of your document, and if you plug it in, it will apply immediately to all pages. The Header usually includes short information about the document’s title, author, or section you are currently reading. Although by default, it applies to all pages at once, there is a way to make it active only on some pages. Below you will find detailed steps to do this.
How to add a header on the first page only in Microsoft Word
To create a unique header only on the first page of your Microsoft Word document, you need to activate Headers and then, in the unique settings tab of Headers and Footers, enable alternative text for the first page. Let’s take a detailed look at what you need to do to do this. To do this, you need to:
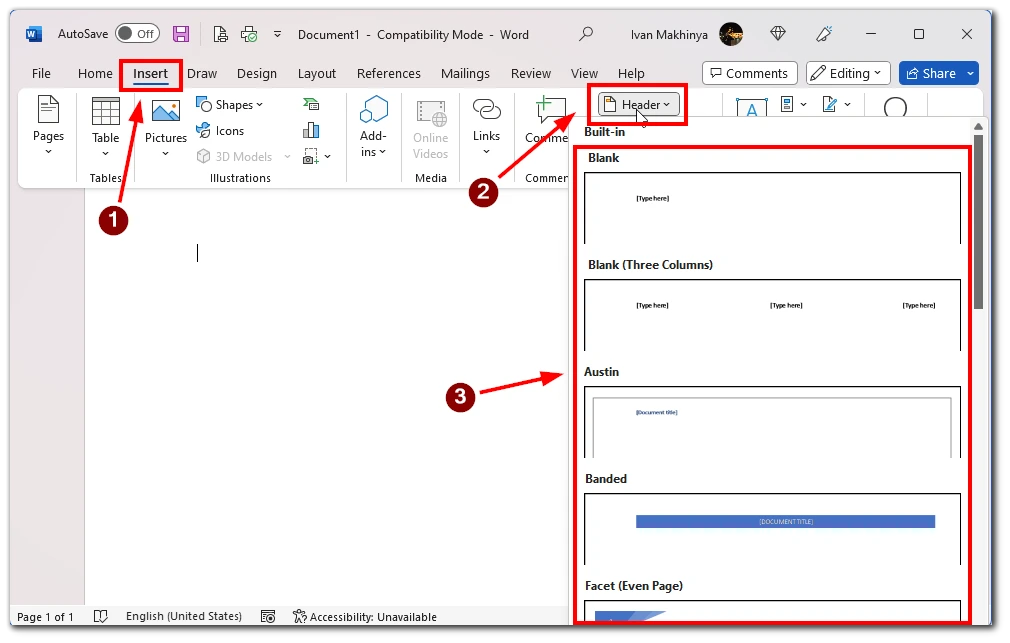
- To start, go to the Insert tab above the toolbar.
- Click on the Header button.
- Select your Header style.

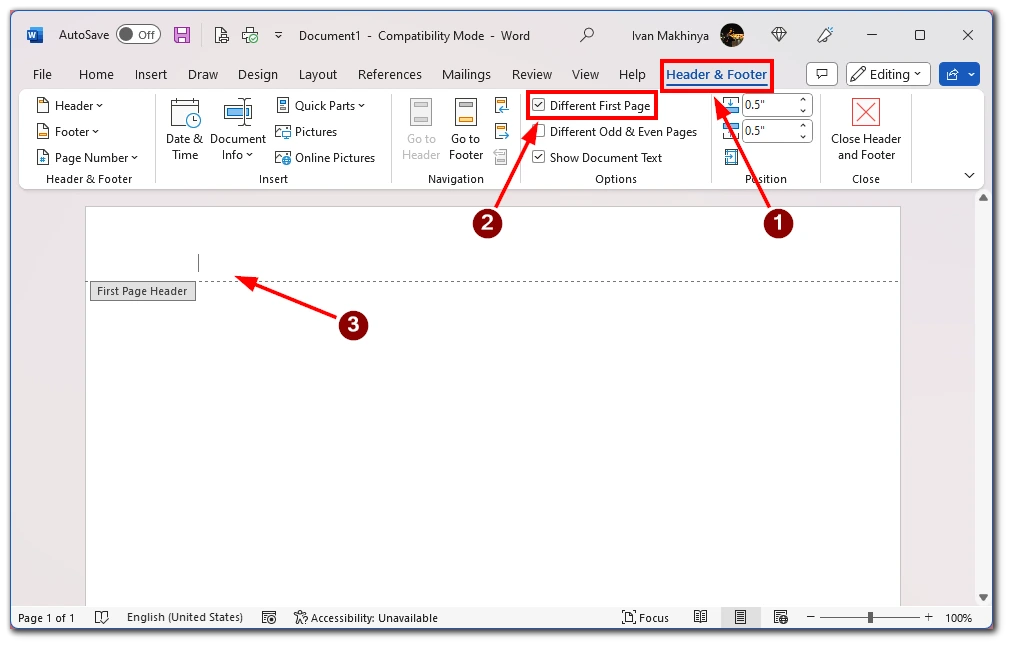
- Then you will have a new Header & Footer tab in the list of tabs. Click that tab.
- This is where you need to check Different First Page.
- In the end, all you have to do is edit your Header text, which will automatically apply only to the first page of your document.

Also, in this tab, you can adjust other header options. You can even insert any picture or other media into it. You must click on the red Close Header and Footer buttons to disable the Header. Note that you can automatically put information about the author and the file’s name into the Header or Footer. To do this, use the button Document Info.
What is a footer, and how to add it on Microsoft Word?
Let me briefly explain what a footer is and how it works. As you may have already understood, this function works together with the Header. Like the Header, it is always located on the page, not above the workspace, but below the workspace. To activate the Footer, you need the following:
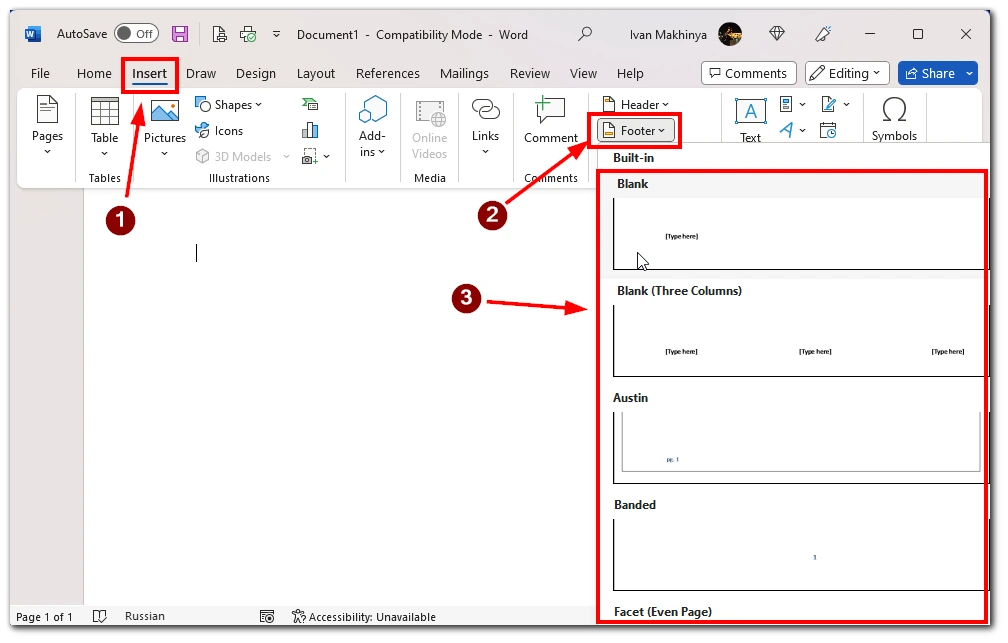
- Go to the Insert tab.
- Find and click the Footer button.
- Select the style of your future Footer.
- Enter the text you want there.

Note that the Footer is also duplicated on all other pages in your document. You can also use the Header & Footer tab to edit the footer formatting. In the Footer, usually put information about complex terms or a short description of various additional things that someone who reads your document should know.


