Microsoft PowerPoint is a great tool for creating visually appealing and impressive presentations. With a huge number of templates and features, you can create slides to captivate your audience. Among its many features is the ability to add and manage images, which is very important to make your content more effective.
Simply adding images is not enough. Your choice of visuals must be appropriate to the topic and content of your speech. A good presentation is not just meant to hold the audience’s attention, it aims to inspire, educate and evoke emotion.
To maximize the impact of visuals, it’s important to know how to manipulate and enhance images in PowerPoint, such as highlighting certain elements to draw attention.
How to Highlight Part of an Image in PowerPoint
Adding images can transform a simple presentation into an engaging and visually appealing experience. But sometimes, you might want to emphasize a specific object within a photo. PowerPoint allows you to do this with ease using a few built-in tools.
Step 1: Adding an Image to Your Slide
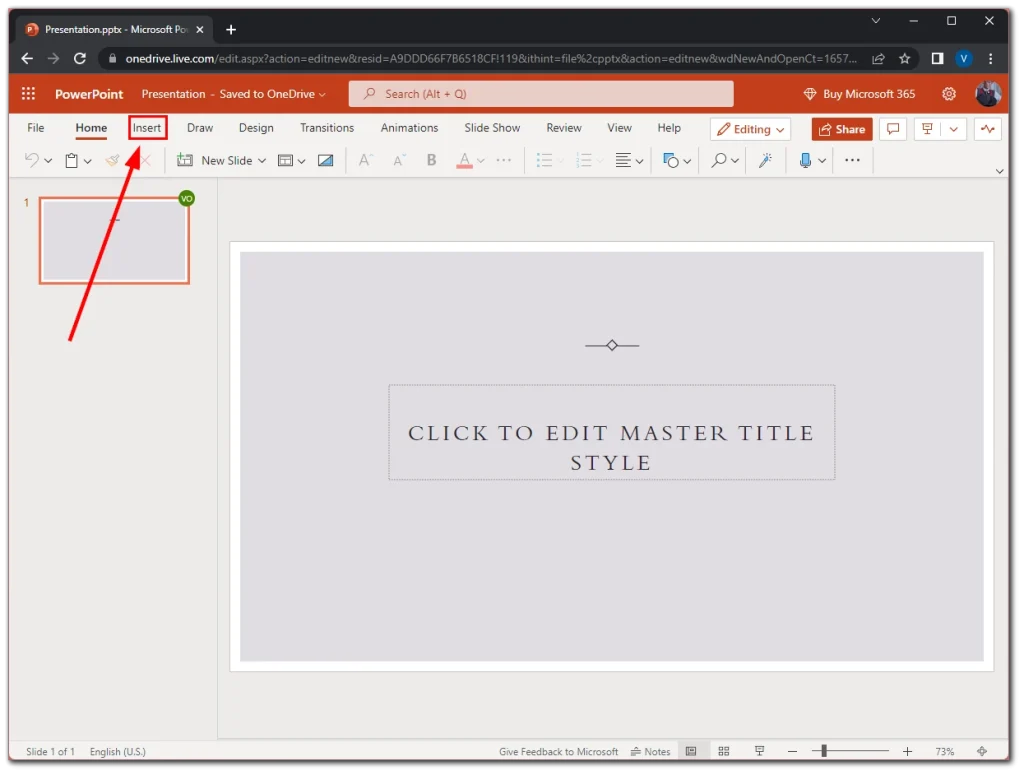
Open your PowerPoint presentation and select a slide.
Click the “Insert” tab.
Select “Pictures” and choose where to add the image from (e.g., your computer, online sources).
Optionally, use PowerPoint’s design tools to synchronize the image with your slide text automatically.
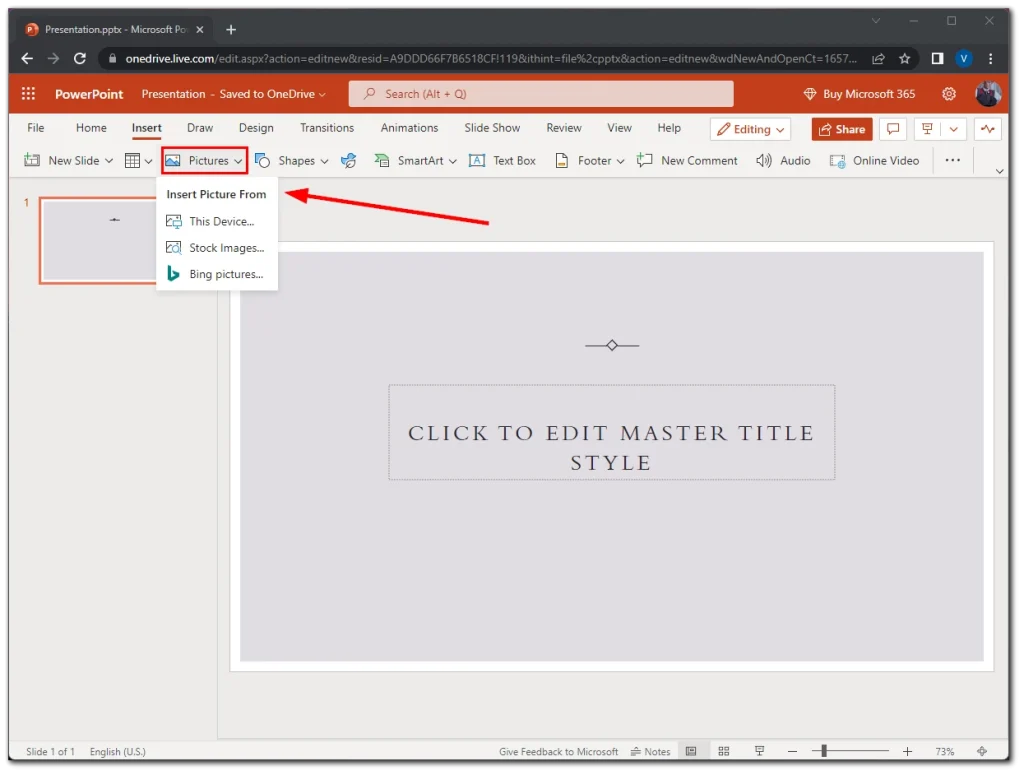
Once the image is in place, you’re ready to highlight the desired area.
Step 2: Highlighting a Specific Part of the Image
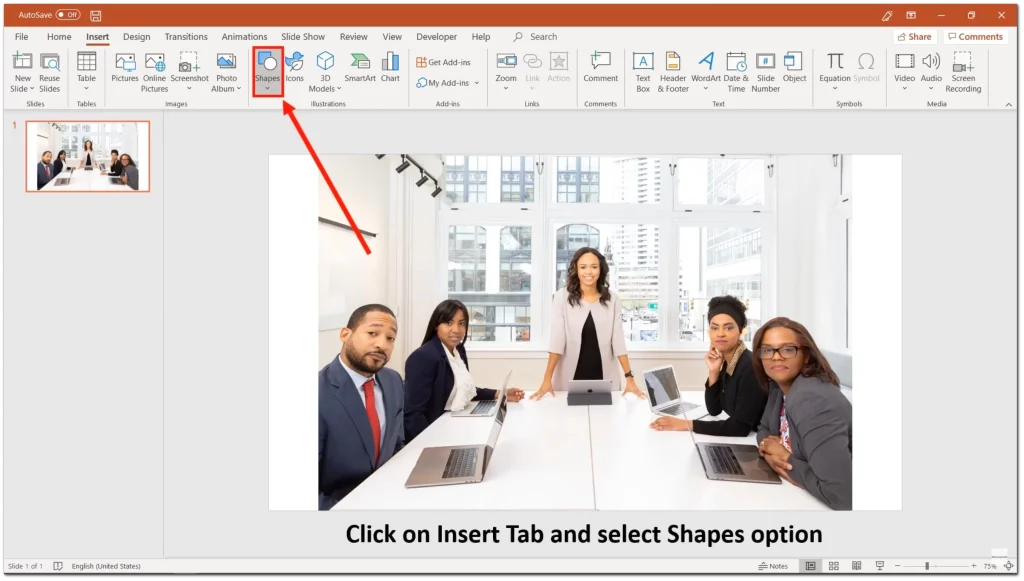
Go to the “Insert” tab and click “Shapes”.
Select the desired shape, such as a rectangle or oval.
Place the shape over the part of the image you want to highlight. You can resize or move it by dragging the edges or corners.
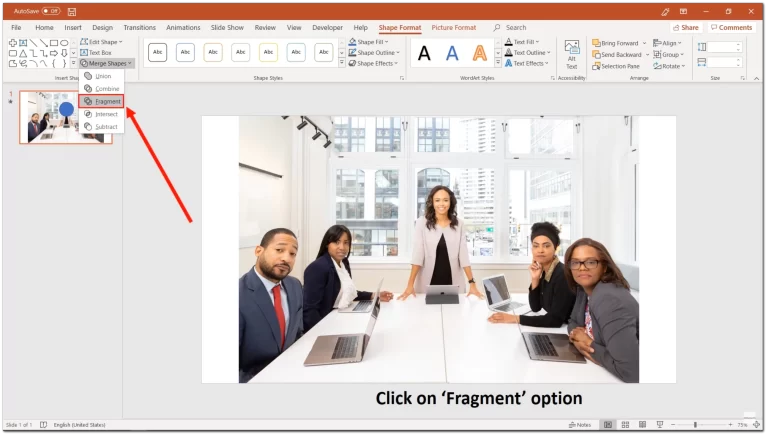
While holding down Ctrl (Windows) or Command (Mac), click the image first, then the shape to select both.
Navigate to the “Shape” tab, click “Merge Shapes,” and choose “Fragment”.
Step 3: Applying Effects
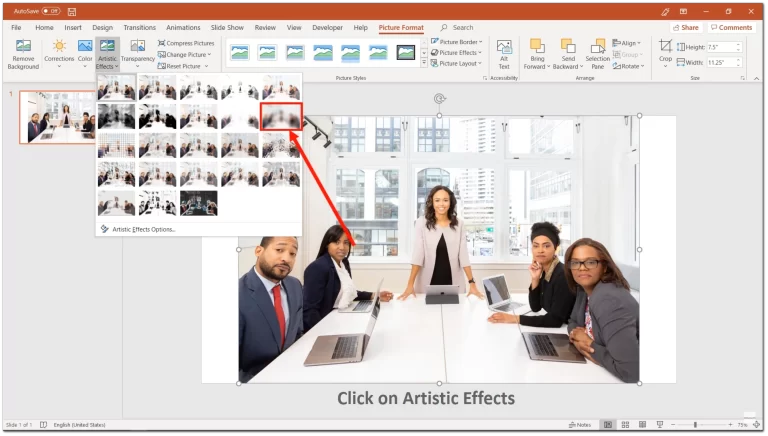
Go to the “Picture Format” tab and click “Artistic Effects.”
Select the blur effect to make the rest of the image less prominent, allowing the highlighted part to stand out.
For additional customization, right-click the image and select “Format Picture”. Adjust the blur intensity or explore other effects to suit your preferences.
Important Note
The option to highlight images using these features is only available in the paid version of PowerPoint. A Microsoft Office subscription is required to access these advanced tools.
By mastering these techniques, you can create presentations that are not only visually stunning but also effectively communicate your key messages.


