At first I thought grouping notifications was an unnecessary feature.But in fact, if you choose a convenient option for you, your locked screen will become more organized. The default for all apps is “Automatic”, but I prefer “By app”.
The “Automatic” option can group notifications received at close times to create compact clusters. And analyze the types of notifications and their contents to make a grouping decision. For example, notifications with the same content or from the same sender can be grouped together.
If you select the “By app” option, notifications will simply be grouped into separate categories.
So let’s explore this in more detail.
How to do notification grouping Snapchat on iPhone?
The “notification grouping” feature for iPhone apps is the ability to group notifications from the same app into one group. In order to group Snapchat notifications, you need to follow these steps:
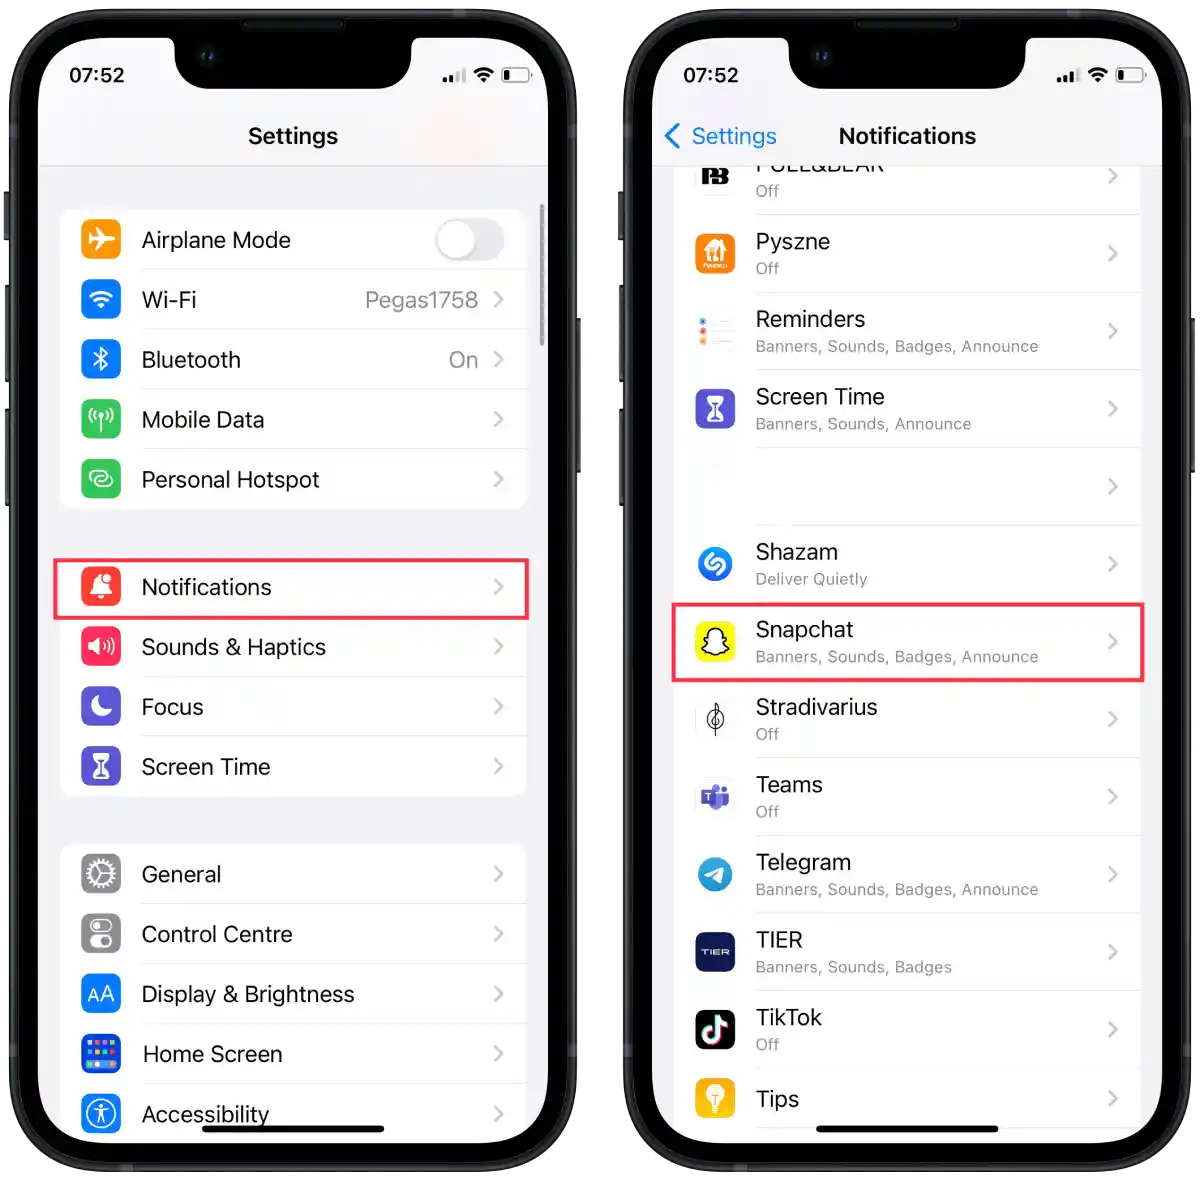
- Open the Settings on your iPhone.
- Then go to Notifications.
- Then under “Notification style,” scroll through and tap on Snapchat.
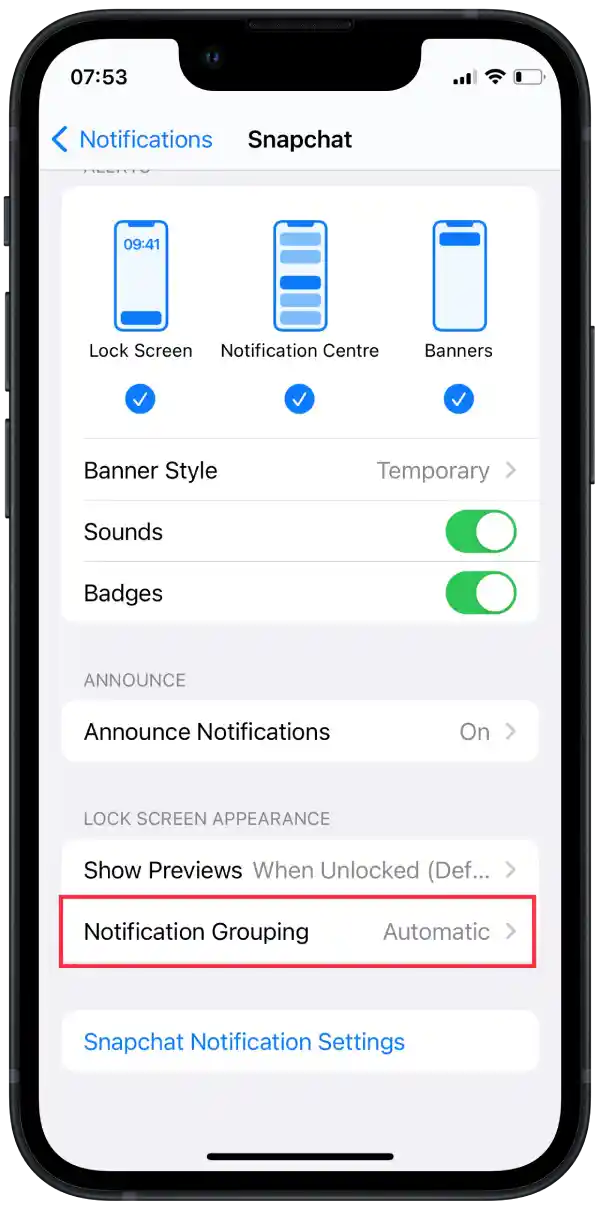
- In the new window, tap on the “Notification grouping” section.
- Then select one of the suggested options “Automatic”, “By app” or “Off”.
These options mean the following:
- Automatic – When you select this option, iOS decides how to group notifications independently. It takes into account various factors such as the time the notification was received, the types of notifications, and the user’s previous activity. iOS will automatically group notifications when it deems it most appropriate.
- By app – If you select this option, notifications from each app will be grouped into separate categories. For example, all notifications from the Facebook app will be grouped together, while notifications from the Snapchat app will be grouped into different category.
- Off – If you select this option, notification grouping will be disabled. Each notification will be displayed separately on the Lock screen or in the Notification Center without being grouped by application.
The option you choose depends on your preferences and how you want to manage notifications on your device. “Automatic” is usually the most recommended option, as iOS tries to provide the most convenient notification experience based on context and your activity. “By app” is useful if you prefer to have notifications from each app in a separate category. And “Off” if you want to see each notification separately without grouping.
How does notification grouping Snapchat work?
Instead of each notification being displayed separately on the lock screen or in the Notification Center, they can be grouped into one general category that can be expanded to view details or collapsed to save space.
When notification grouping is turned on for a particular app, all subsequent notifications from that app will automatically be grouped together. When you expand a notification group, you will see a list of individual notifications that you can view and handle individually.
By default, notifications are automatically grouped together. The “Automatic” option in the notification grouping feature on iOS allows the operating system to decide how to group notifications based on various factors.
How to manage previews Snapchat notifications?
To manage previews for Snapchat notifications on your device, you can follow these general steps:
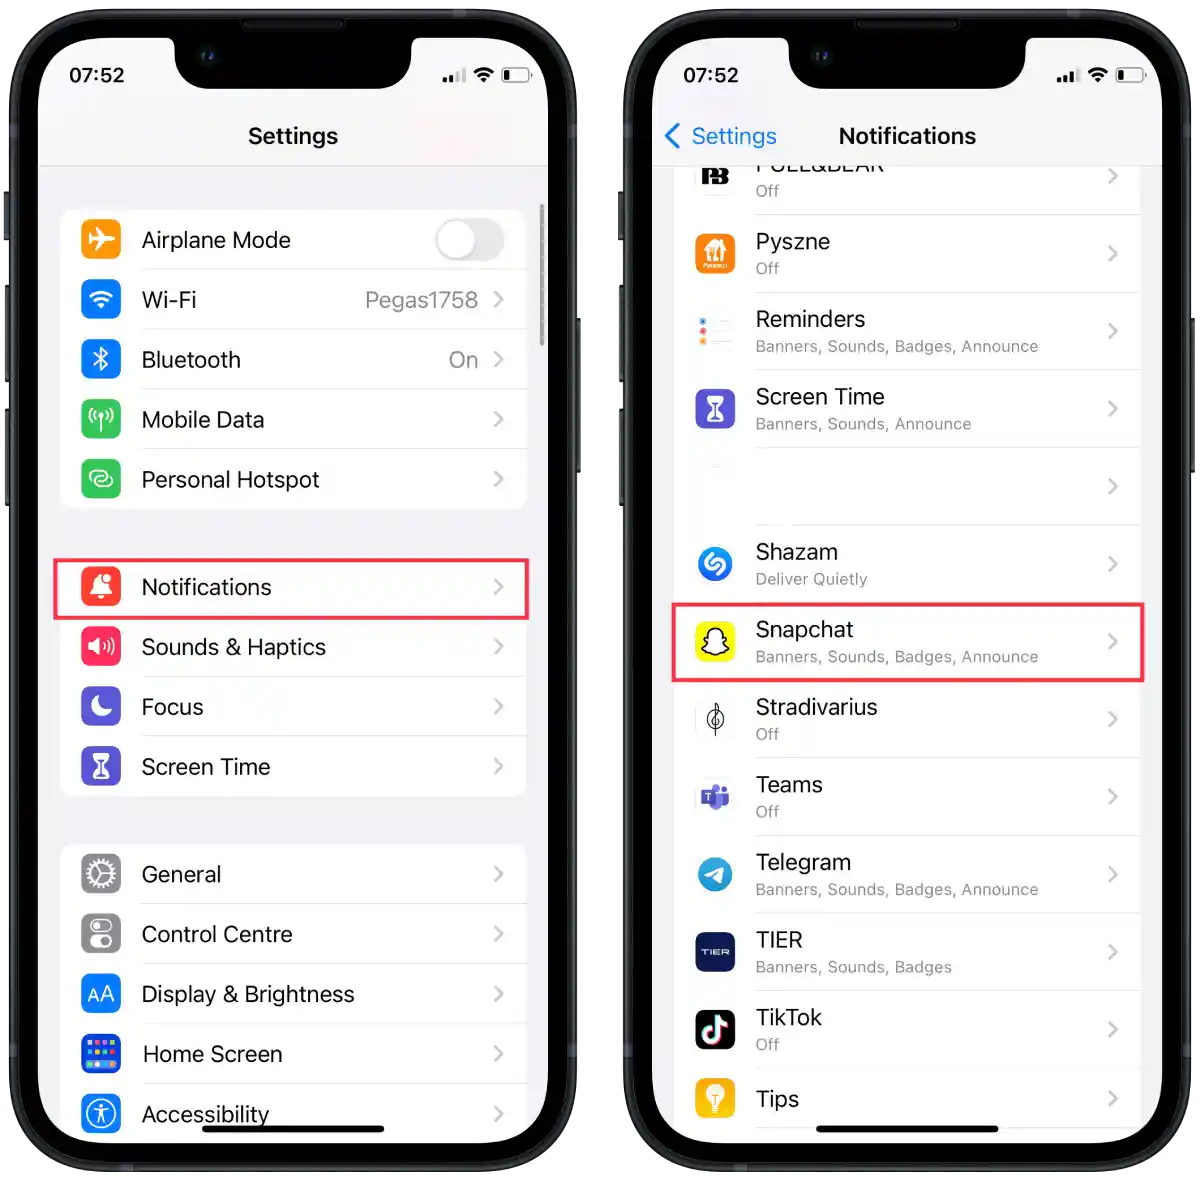
- Open the Settings on your iPhone.
- Then go to Notifications.
- Then under “Notification style,” scroll through and tap on Snapchat.
- In the new window, tap on the “Show previews” section.
- Then select one of the options “Always”, “When unlocked” or “Never”.
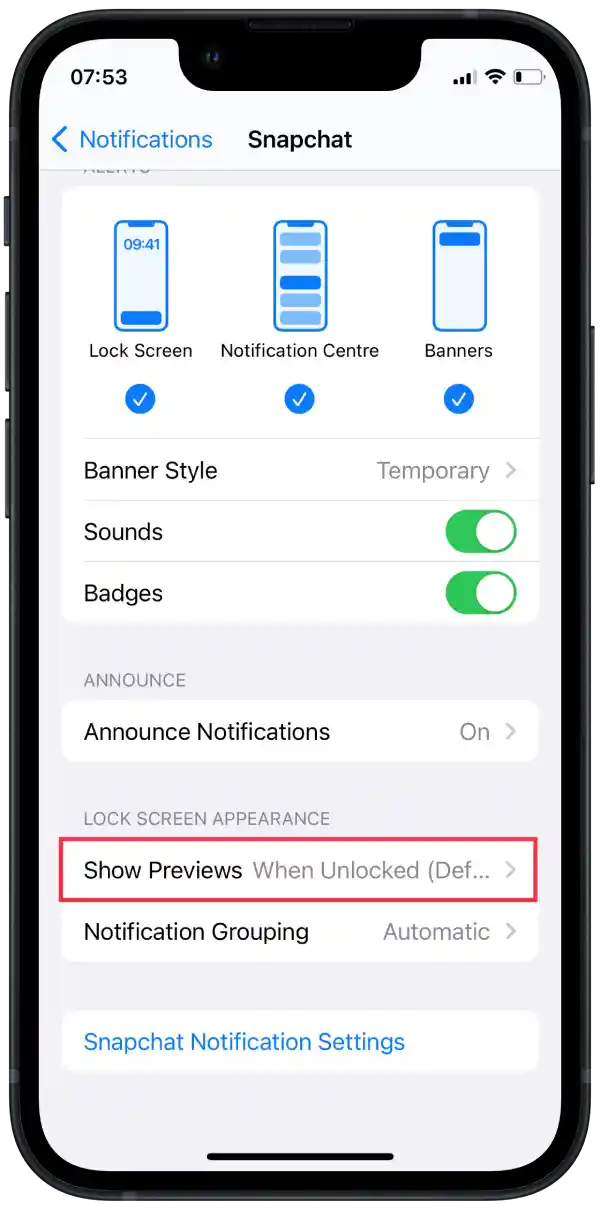
The following preview options may be available for Snapchat:
- Always – This option will show Snapchat notification previews on the lock screen and in the Notification Center even when the device is locked.
- When Unlocked – This option will only show Snapchat notification previews when your device is unlocked. The lock screen will only show the Snapchat icon or general information about the notification you received, with no preview of the message content.
- Never – This option completely disables Snapchat notification previews. You will only see the Snapchat icon or general information about the notification you received, without previewing the content of the message.
Select the desired option depending on your privacy and usability preferences.
How to disable Snapchat notifications?
To disable Snapchat notifications on your iPhone, you can follow these steps:
- Open the Settings on your iPhone.
- Then go to Notifications.
- Then under “Notification style,” scroll through and tap on Snapchat.
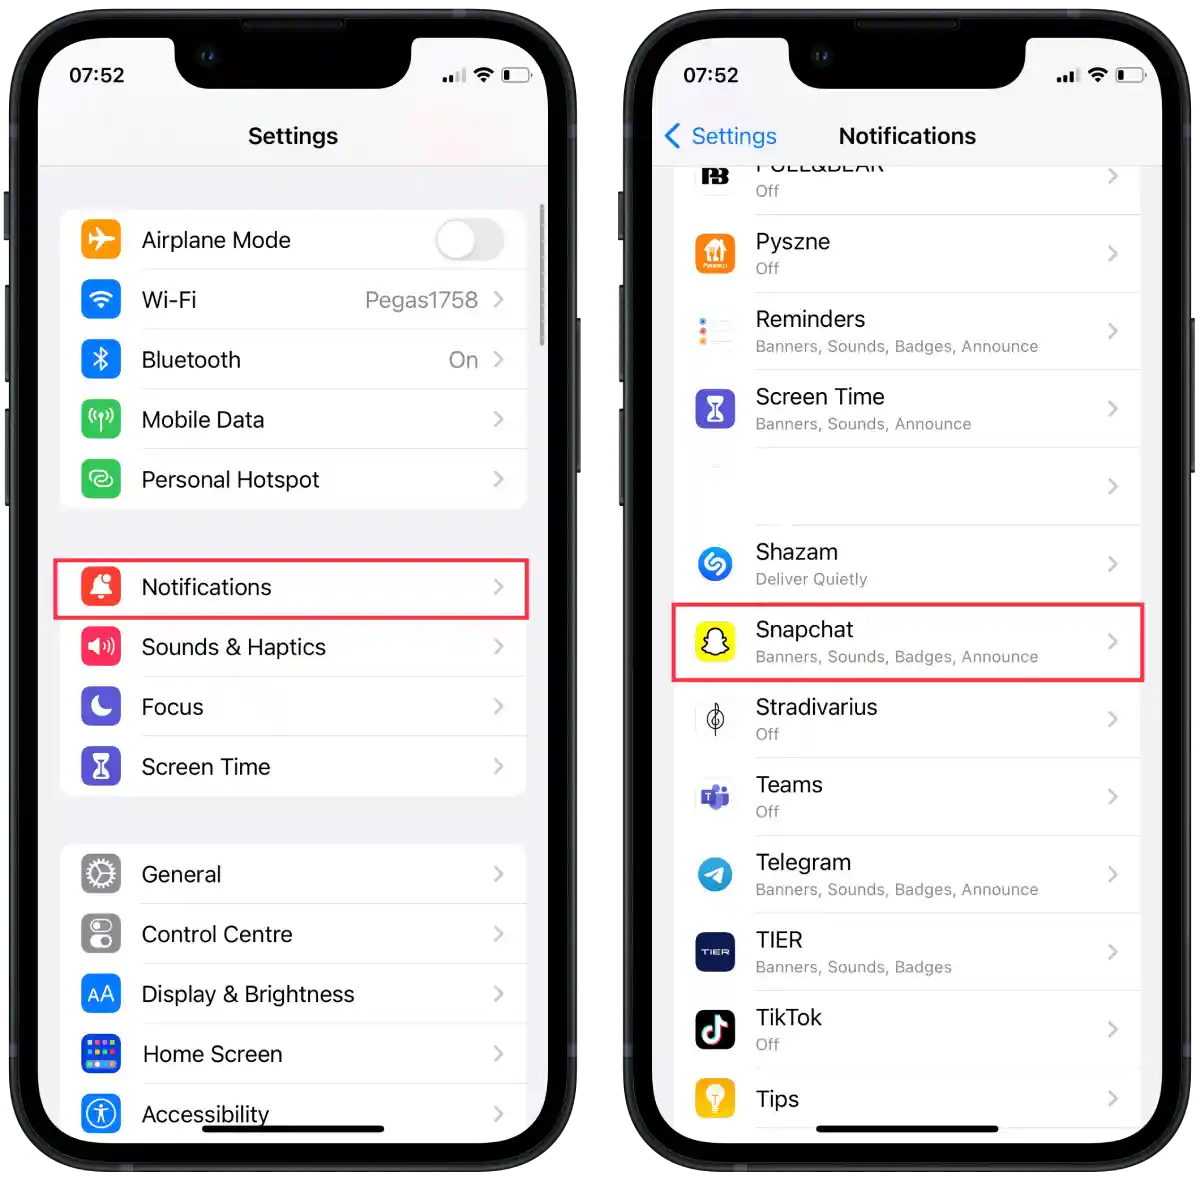
- Drag the slider on the “Allow Notification” section to display it in gray.
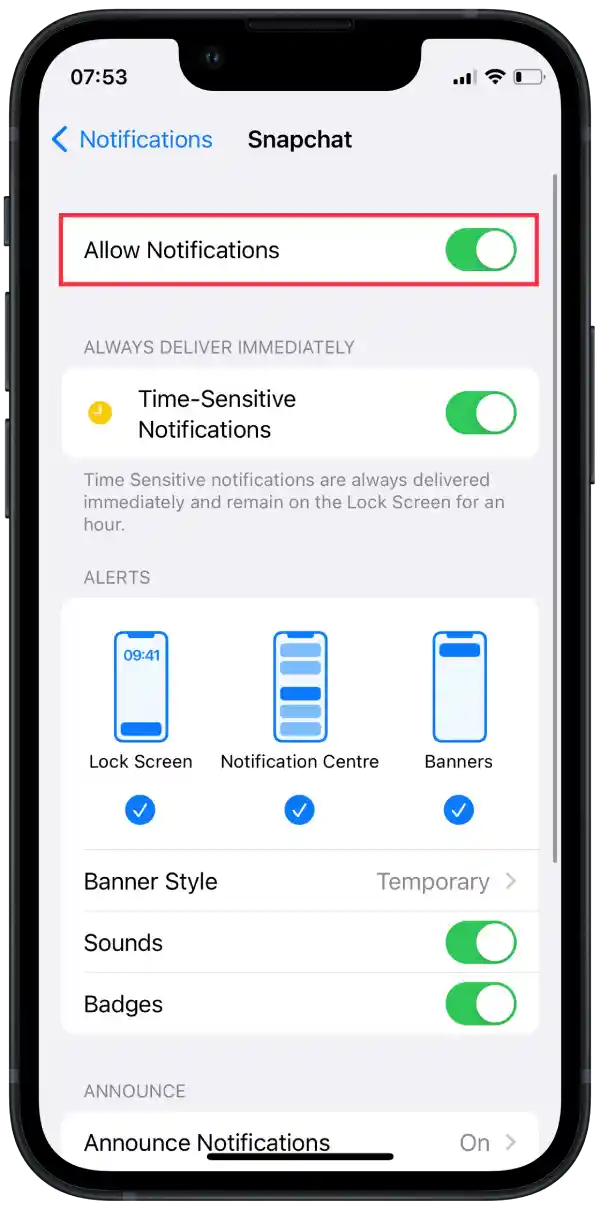
Disabling Snapchat notifications means that you will no longer receive alerts, sounds, icons, or banners for new messages, snapshots, or other Snapchat activity.

