Updating your Windows 10 PC operating system can help improve the overall performance of your PC. You can enjoy new and added features, enhanced privacy, and security measures, not to mention bug fixes and issues from the previous version update. However, sometimes when you update, a bug sometimes appears that can ruin everything. You should know that it can be fixed.
What do you need to fix Windows 10 update error 0x80244018
All modern devices require periodic software updates. This is especially true for PCs. Operating system developers are constantly releasing new updates that include various bug fixes or security updates for your PC.
This is particularly true of the Windows operating system. Microsoft is constantly releasing new updates that are designed to improve the system, add various new features, or fix bugs.
Over the many years of Windows, Microsoft has come up with a pretty handy tool to update your operating system.
Today, you can use Windows Update to download the latest update. However, sometimes when using this function, users may encounter the error 0x80244018.
Well, here’s how to fix this error. Let’s move step by step.
What is error 0x80244018
0x80244018 error usually occurs when you try to install Feature Update via Windows Update on a Windows 11 or Windows 10 PC. In this case, the attempt to install the update will fail with the error code 0x80244018.
The main reason for this error is that your PC is connected to the internet through a proxy server.
Keep in mind that there are other possible causes and reasons for error 0x80244018 when upgrading your Windows 10 PC or installing Microsoft Store apps. Identifying this will help you focus your efforts on how to fix it so you can continue the update.
How to fix error 0x80244018 in Windows
If you come across such a problem, don’t be scared. In fact, fixing it’s quite easy. To do this, you need to:
Disable Proxy Server
Since the error description says that your PC is connected via a proxy server you can try to disable or remove any proxy server from your PC. Then rerun the update and see if that solves the problem.
The problem may also be caused by a VPN service. This is due to interference that blocks the connection between the Windows client PC and the Windows Update server. In this case, disable the VPN, if you have previously installed it.
Disable antivirus and download manager
Antivirus and network monitoring software can prevent or block downloads of applications from the Windows Store.
According to user feedback, Avira Security Suite and AVG security packages have been found to be involved in the blocking. Therefore, if you’re using these antiviruses, try temporarily disabling real-time protection. To do this, right-click on the antivirus icon located in the taskbar and select the corresponding item.
If you have download managers installed on your PC, it will be better to disable or uninstall them. Download managers can sometimes interfere with the Microsoft Baseline Security Analyzer (MBSA). They can even prevent the analyzer from downloading the Mssecure.cab security update.
Check your network and Internet connection
Check if your Internet connection is stable. This may also cause problems with your update. If you can try to reconnect your device to another network or access point. Often this helps to solve problems with the update.
Restart the BITS service
You may be experiencing error 0x80244018 because the Background Intelligent Transfer Service (BITS) has been manually stopped or disabled by a third-party app. To start it up, follow these instructions:
- Open the system services with the “services.msc” command from the Run window (press “Win + R”).
- Then, find and double-click the BITS service to expand its properties.
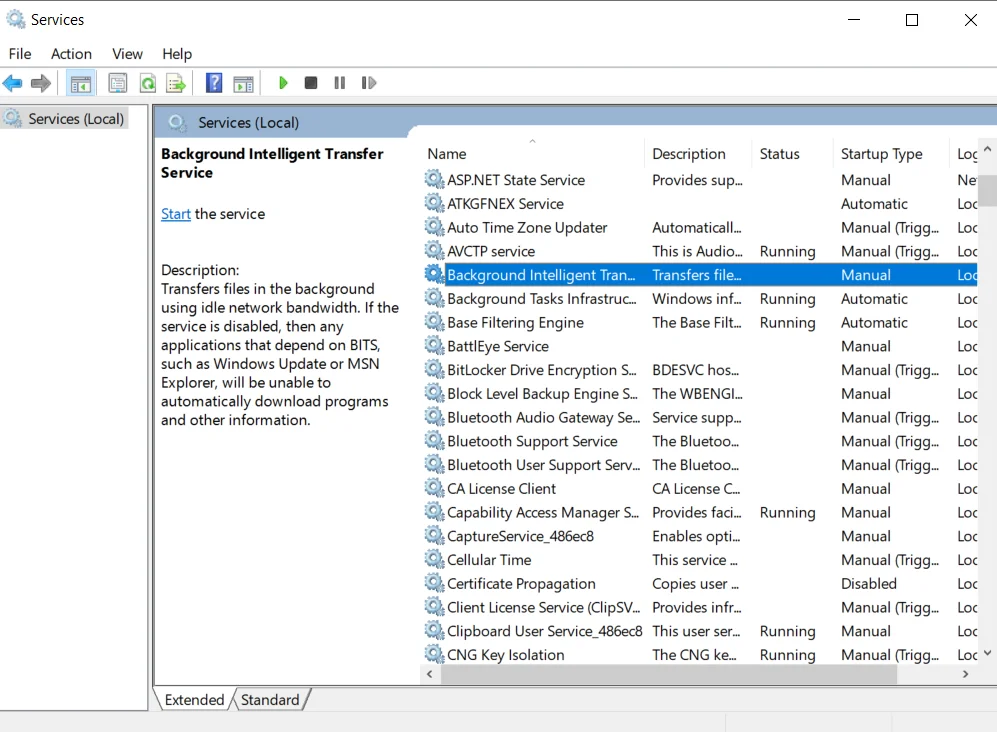
- After that, click on the “Startup type” drop-down list and change the value to “Automatic (delayed start)”.
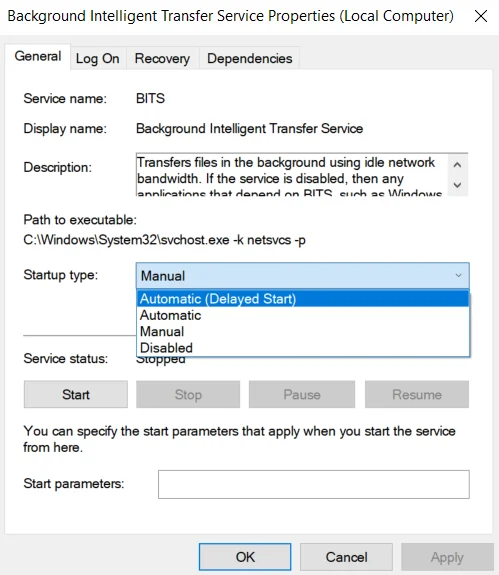
- Next, force the service to start and save the changes to “OK”.
Run the Windows Update Troubleshooter
Windows has a built-in troubleshooter called the Windows Update Troubleshooter. Try running it and then re-run the update. See if the procedure completes without errors.
To do this, you have to follow these steps:
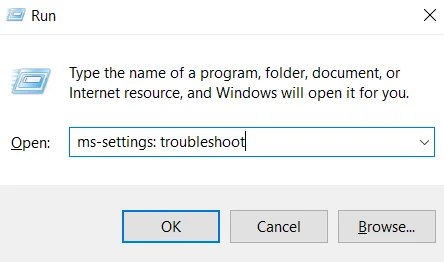
- First of all, press “Win + R”.
- Then, type the “ms-settings:troubleshoot” command in the text field.
- After that, click on the “Additional troubleshooters” link.
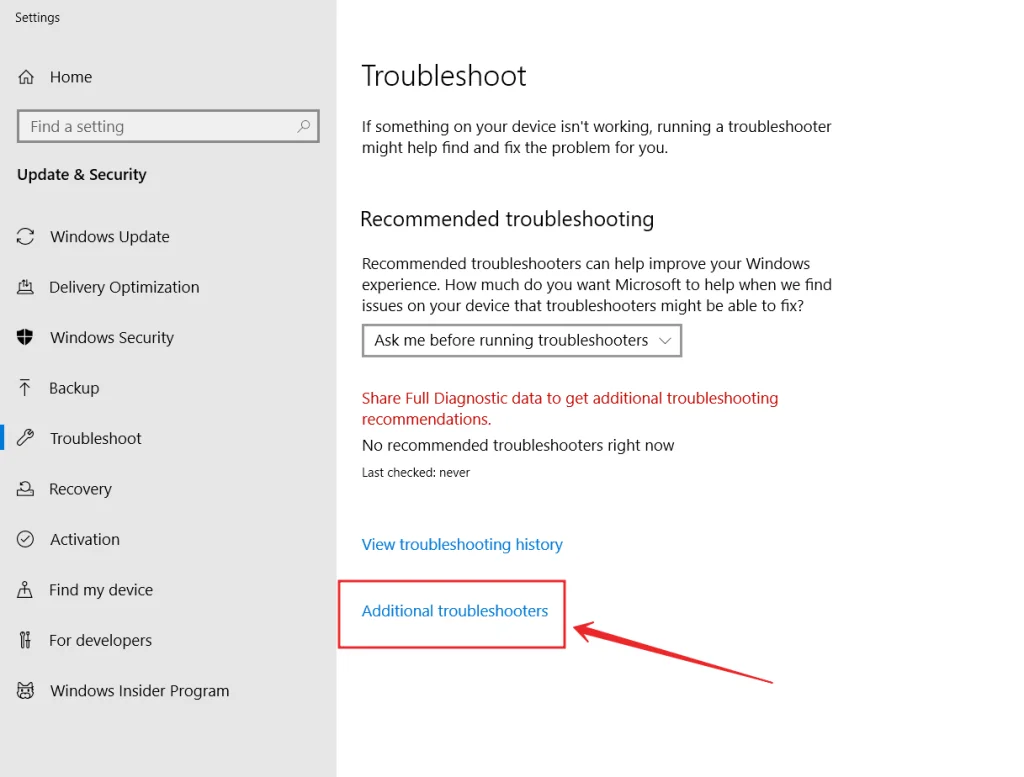
- Finally, click on the “Windows Update” option.
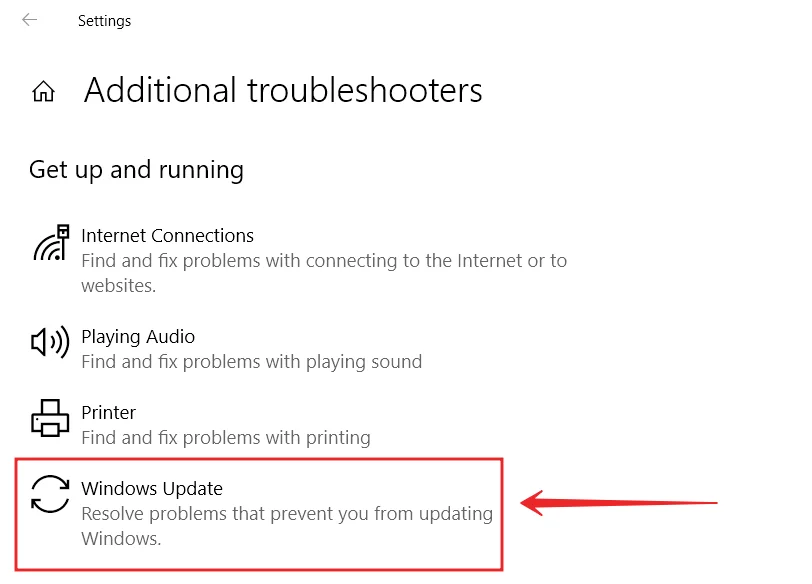
Wait for the utility to complete the initial scan. If any inconsistencies are found, confirm the request by clicking the “Apply this fix” button.
When finished, restart your PC and see if the app is interrupted by error 0x80244018.
Update with Windows 11/10 ISO
If you’re updating via Windows Update or using the Windows Update Assistant you might need an internet connection. You can use the Windows 11/10 ISO to update, this method doesn’t require you to be connected to the internet when updating.
All you need after downloading the ISO image is that you can disconnect the device from the internet, mount the ISO image, then double-click setup.exe to start the Windows in-place update process. Once the update process is successfully completed, you can connect your PC to the Internet, check for updates, and install any available updates.
A clean installation of Windows 11/10
If that doesn’t work you can create a copy of all the files you need on a removable drive. Then simply perform a clean installation of Windows 11/10 on your PC.




[…] How to fix Windows 10 update error 0x80244018 […]