There are several ways to find out which graphics card is installed in your computer. First, I recommend you look in the Advanced Display section of your computer’s settings. There you will see which graphics card your monitor is connected to. Another good way to find out what graphics card you have is to look in Task Manager.
Alternatively, you can use Device Manager, which lists all the devices connected to your computer. Windows 10 and 11 also have a utility called DirectX Diagnostic Tool. It will allow you to find out information about your computer’s hardware.
Recent tips also include using third-party applications to diagnose your system. In addition, you can simply remove the lid of your system unit and see what graphics card you have installed.
Let’s go over all these points in more detail below.
How to see your PC graphic card in Settings
The easiest way to find which video card model is installed on your PC is to check the settings. Since your monitor is directly connected to the Video card, you can find information about it in the details of your monitor. To do this, you need to:
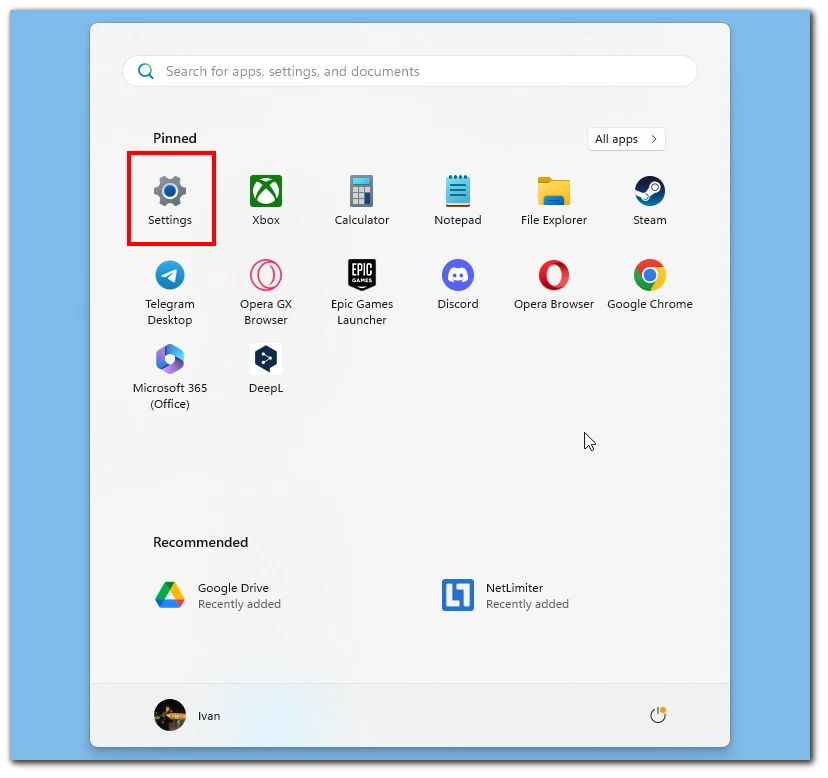
- Click on the “Start” button or press the “Windows” key, then click on the “Settings” gear icon, represented by a cogwheel.
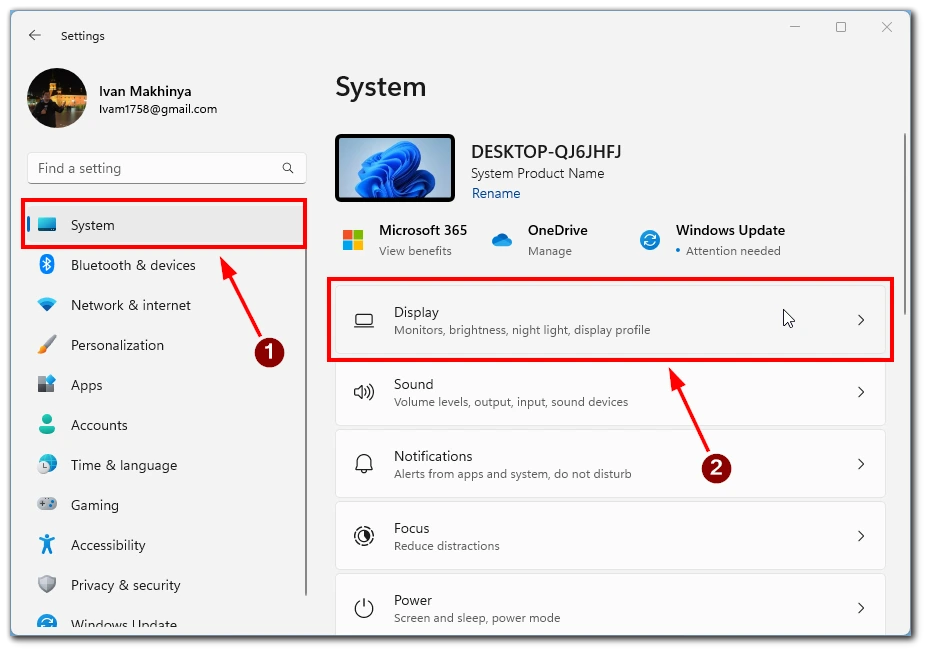
- In the Settings window, select the “System” option.
- On the right side, click on “Display.”
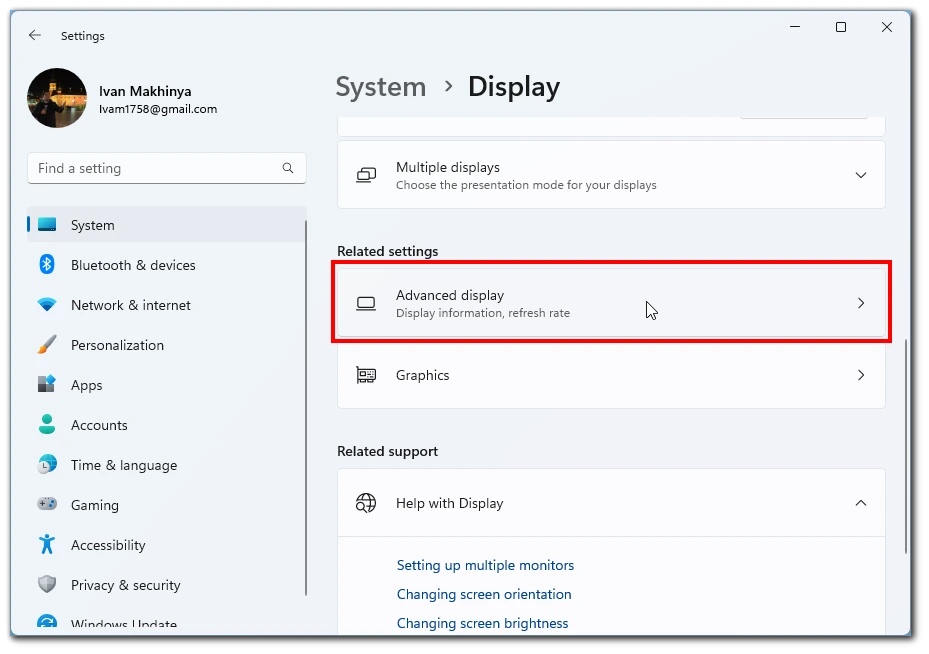
- After that, scroll down and click on “Advanced display”.
- Here, you will find information about your display, including the graphics card name and model.
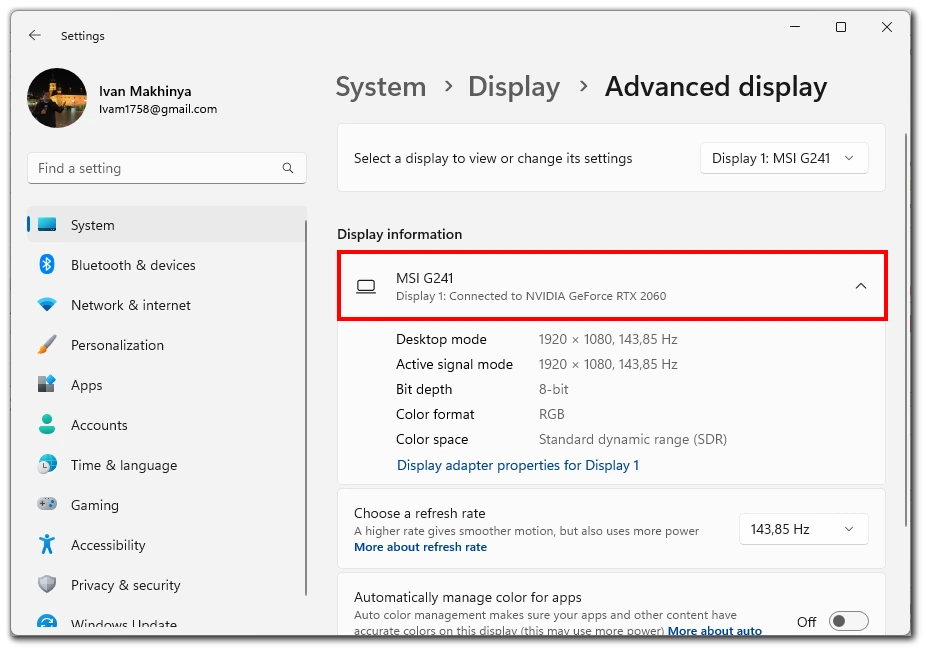
Note that this method only works if your monitor is connected to the graphic card and not to the HDMI on the motherboard. This is because the HDMI port on the motherboard is connected to the process-integrated graphics card.
How to check your PC graphic card using Task Manager
The Task Manager is another built-in utility in Windows that allows you to view system performance, including graphics card information. Here’s how you can use it:
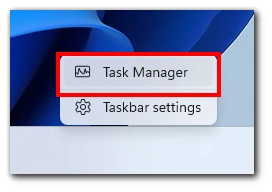
- Right-click on the taskbar and select “Task Manager” from the context menu that appears. Alternatively, you can press “Ctrl + Shift + Esc” to directly open Task Manager.
- In the Task Manager window, click on the “Performance” tab at the top.
- On the left sidebar, you will find different categories. Click on “GPU” to see details about your graphics card, including its utilization, memory usage, and more.
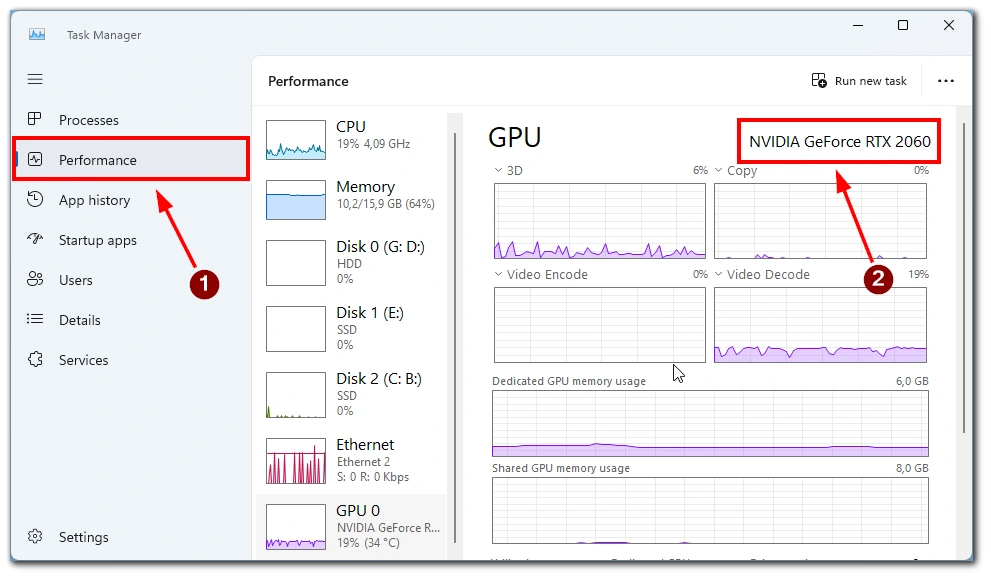
You can also get information about other components of your computer such as CPU, memory or storage. Simply select the desired section. This way also works for both Windows 10 and Windows 11.
How to check your PC graphic card using the Control panel
Windows Control Panel offers another way to identify your graphics card, albeit a bit more old-fashioned. Here you will have to use Device Manager, which has information about all devices connected to your computer, both external and internal. Here’s how you can do it:
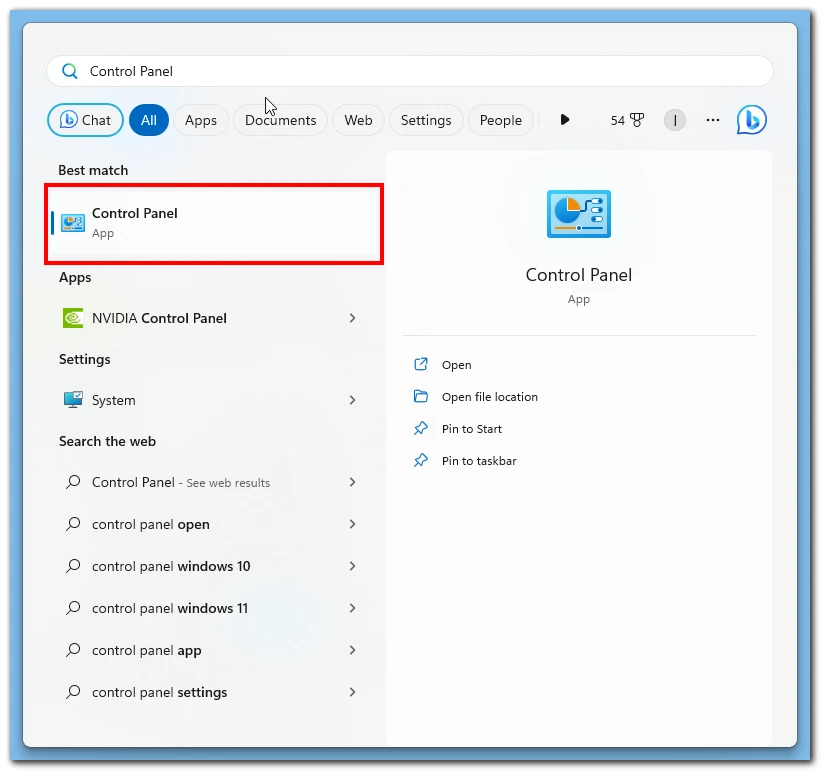
- Press the “Windows” key, type “Control Panel,” and select it from the search results.
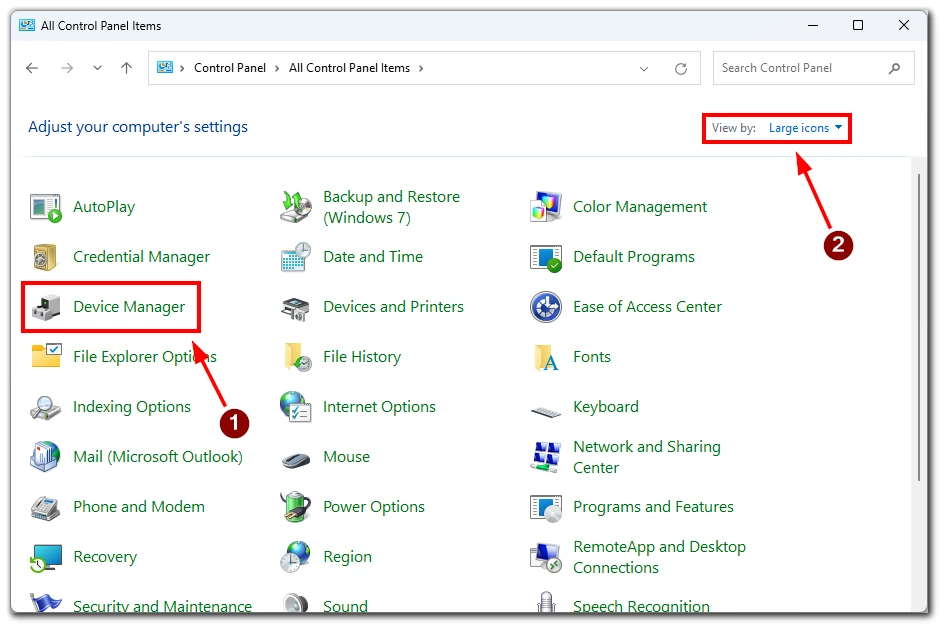
- In the Control Panel, set the view to “Large icons” or “Small icons” and click on “Device Manager.”
- In Device Manager, you’ll find a list of various hardware categories. Locate and click on “Display adapters” to expand it. This will display your graphics card model.
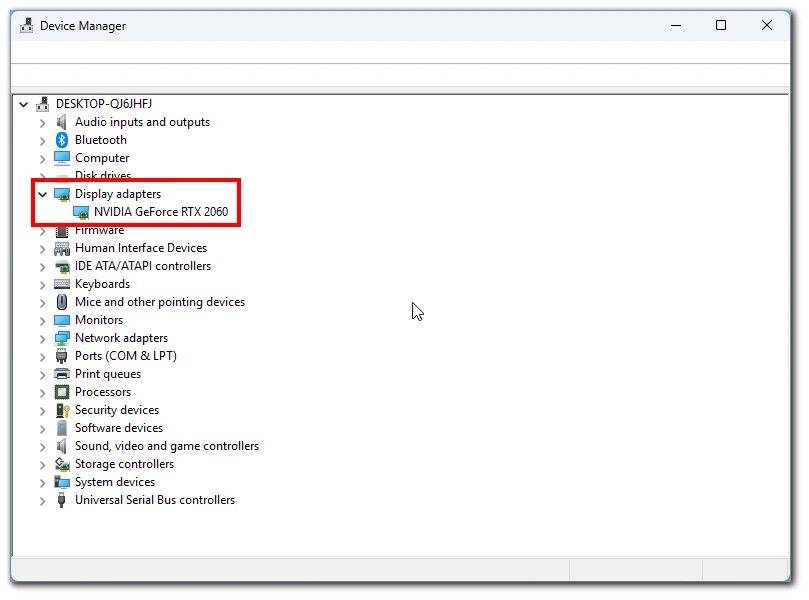
As I already mentioned above, you can find here all the information you need about your connected devices. If you double-click on your video card, you will be taken to Properties, where you can see what drivers are installed on your video card and other details.
How to check your PC graphic card using the diagnostic tool
Windows provides a built-in diagnostic tool that can help you identify your graphics card. Here’s how to use it:
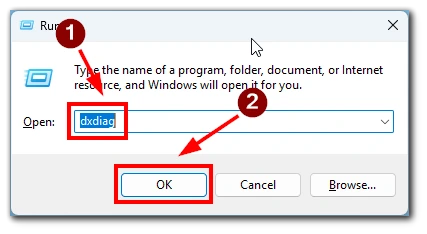
- Press “Windows + R” to open the Run dialog box.
- In the Run box, type “dxdiag” and press Enter. This will open the DirectX Diagnostic Tool.
- In the DirectX Diagnostic Tool window, navigate to the “Display” tab. You’ll find information about your graphics card, including its name, manufacturer, and driver version.
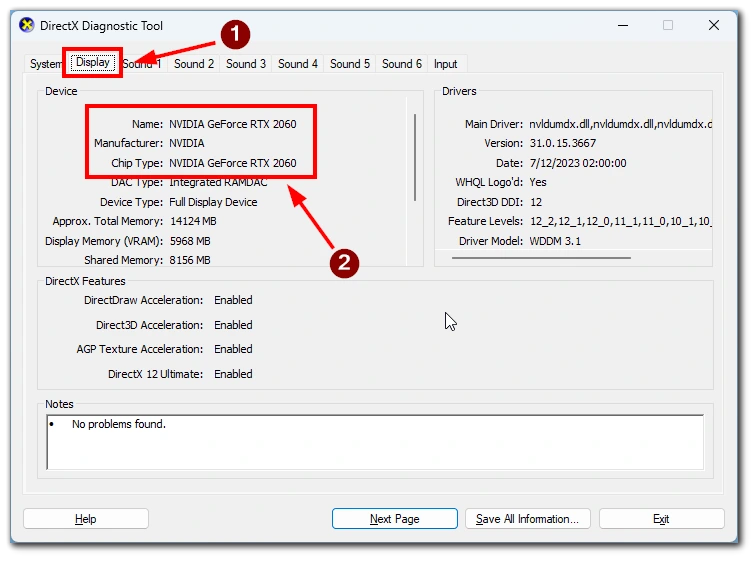
Here, in different tabs, you can also find information about connected audio and external devices.
What third-party apps can you use to check the graphic card you have on your PC
While Windows offers various built-in tools to identify your graphics card, third-party applications often provide more detailed information and additional features. Some popular options include:
- CPU-Z: Although primarily designed to provide CPU information, CPU-Z also offers detailed insights into your graphics card.
- GPU-Z: This application focuses solely on graphics card information, offering comprehensive details about your GPU’s specifications, temperature, clock speeds, and more.
- Speccy: Speccy provides a detailed overview of your entire system, including the graphics card. It offers a user-friendly interface and presents information in an easily digestible format.
All three of these applications are free and a bit “old-school”. Although they don’t have a new design, they will give you complete information about your video card and how it works. You can also use the official applications from AMD or Nvidia, which can be downloaded from their website, to configure and update your graphics card.
How can you find GPU in your PC body?
If you don’t want to turn on your computer and you need to find a graphics card inside your PC, it’s usually easy to do. Video cards are one of the biggest components of any computer. However, be careful as you can easily break some components of your PC. It is better just to remove the cover and inspect the hardware without touching or pressing anything.
After you have removed the cover, notice the large rectangular piece inserted into the long port on your motherboard. You can also look at the connector where you plug in your monitor – this is the graphics card.
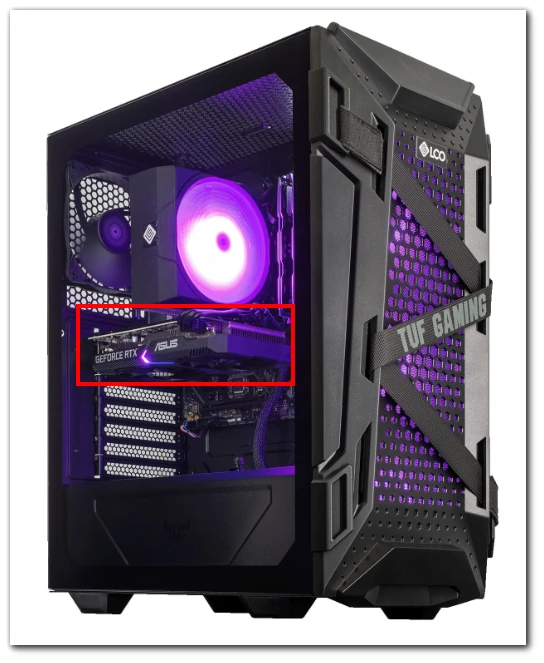
In the picture above, you can see an example of a graphics card installed on a PC. It should have active cooling on the bottom of the graphics card, usually two or three fans. Note that most graphics cards do not have the exact model number written on them, but they may have the series or manufacturer, so that you can find information about it on the Internet.


