There are times when it’s necessary to use the Android mobile operating system. However, if there’s no smartphone with a similar system nearby, you can try to install the Android emulator on your laptop or PC.
What do you need to emulate Android on a PC
Installing Android on a PC or laptop can be required in two situations: first, when you need to test the work of apps created for this mobile operating system, and you don’t have a smartphone on android, or when you have an old weak iron, but you want to use it, and decided to put it on an operating system that will be enough power.
However, you should know that you don’t need to install Android directly through the BIOS as you do with Windows or Linux. If your PC hardware allows, you can download and install a special program designed to emulate Android OS on your PC.
Well, here’s how to emulate Android on your PC.
What emulator do you need to try Android 11 on a PC
If you’re a developer or an enthusiast, you can try the latest version of Android 11. There are currently two ways to try Android 11. The best way to try and test Android 11 is to install it on a supported device. However, then not everyone has a supported device. The next option is to set up the Android Emulator to run Android 11.
By now you probably know that there are several Android emulators for installing and running Android on Windows, The problem with most of them is that they may not offer Android 11 specifically.
Fortunately, you can use the official Android Studio to set up the emulator to run Android 11. The best part is that running Android 11 using Android Studio is also quite easy. It provides all the features of an Android device. You can simulate phone calls, and text messages, test your apps, access the Play Store, and more.
How to install the Android Studio emulator on a Windows PC
If you want to install the Android Studio emulator on your Windows PC, you have to follow these steps:
- First of all, follow this link to download Android Studio from the official website.
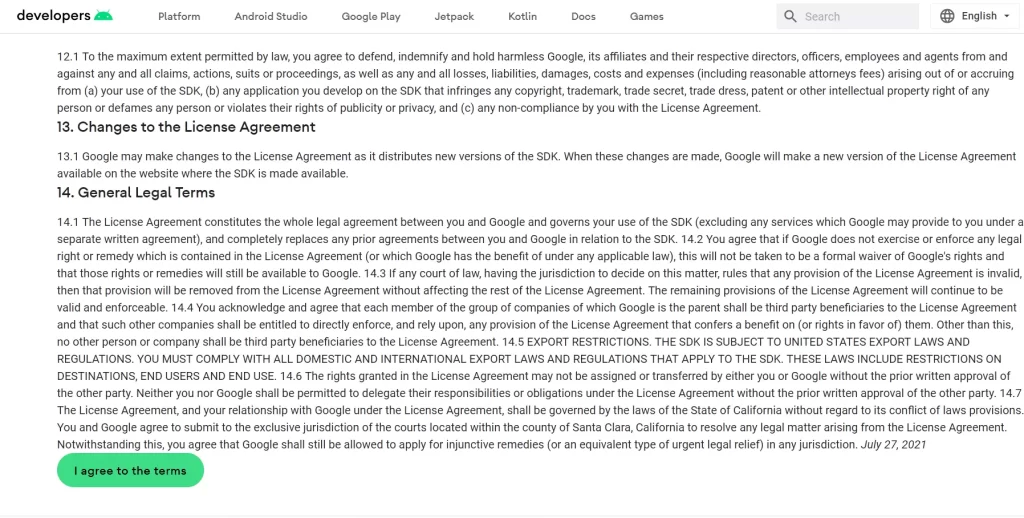
- Then, scroll down and click on the “I agree to the terms” button.
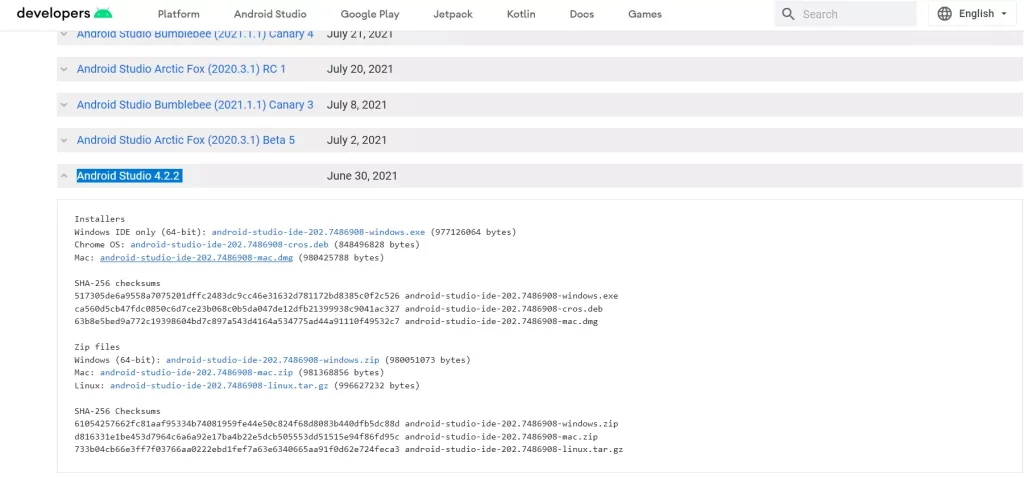
- Find the latest release of the Android Studio and click on the link for Windows to download it.
- Once download is complete, launch the .exe file and start the installation process.
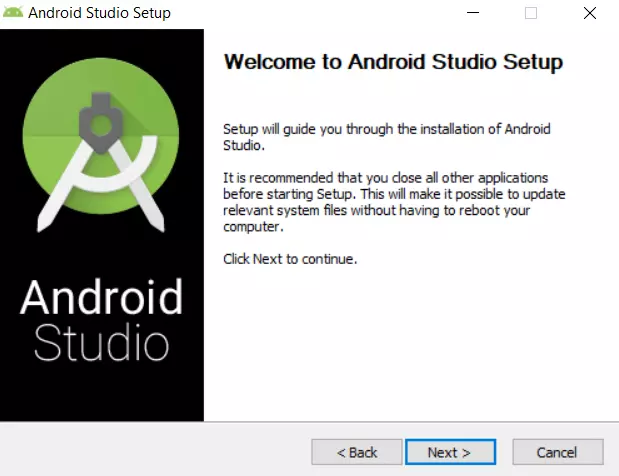
- In the opening window, click “Next” to begin.
- Make sure that both “Android Studio” and “Android Virtual Device” are selected and click the on “Next” button.
- After that, select the location where you want to store the files and click “Next”.
- Finally, click “Install”.
Once you have completed these steps, you will be able to install the Android Studio emulator on your Windows PC.
When you press the “Finish” button, the Android Studio program starts automatically.
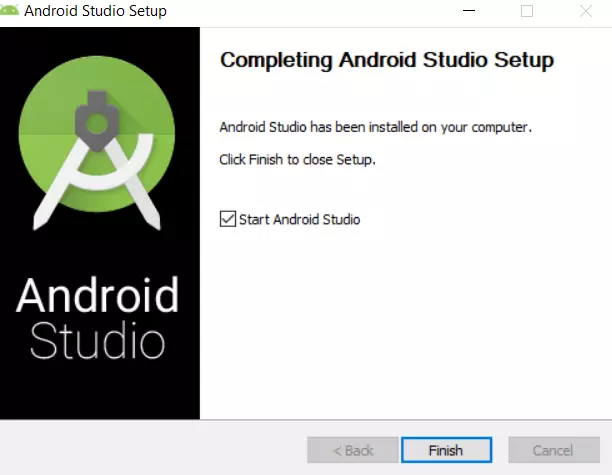
If not, start it manually. Keep in mind that it may take a minute to start Android Studio the first time. So wait a while if it doesn’t start immediately.
How to set up Android Studio
Once you have installed and launched the Android Studio emulator on your Windows PC, you have to set up it. If you want to do this, you have to follow these steps:
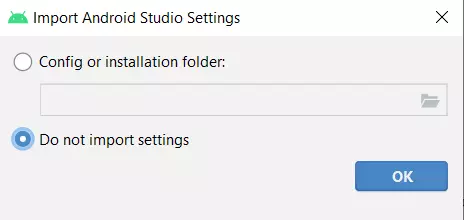
- After launching Android Studio you will get the following dialog box. Select the default “Do not import settings” switch and click “OK” to continue.
- When you get the following screen, click either on the “Send usage statistics to Google” or “Don’t send” button depending on your personal data privacy views.
- After that, just click “Next”.
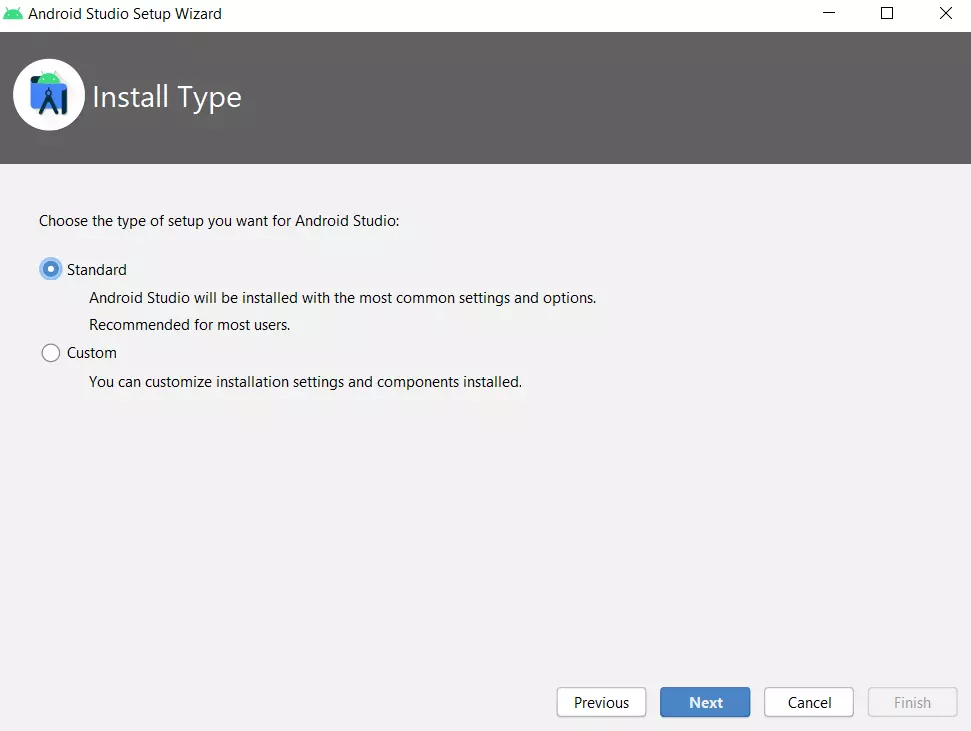
- Select “Standard” option and click “Next”.
- Select a user interface style.
- Finally, click “Finish”.
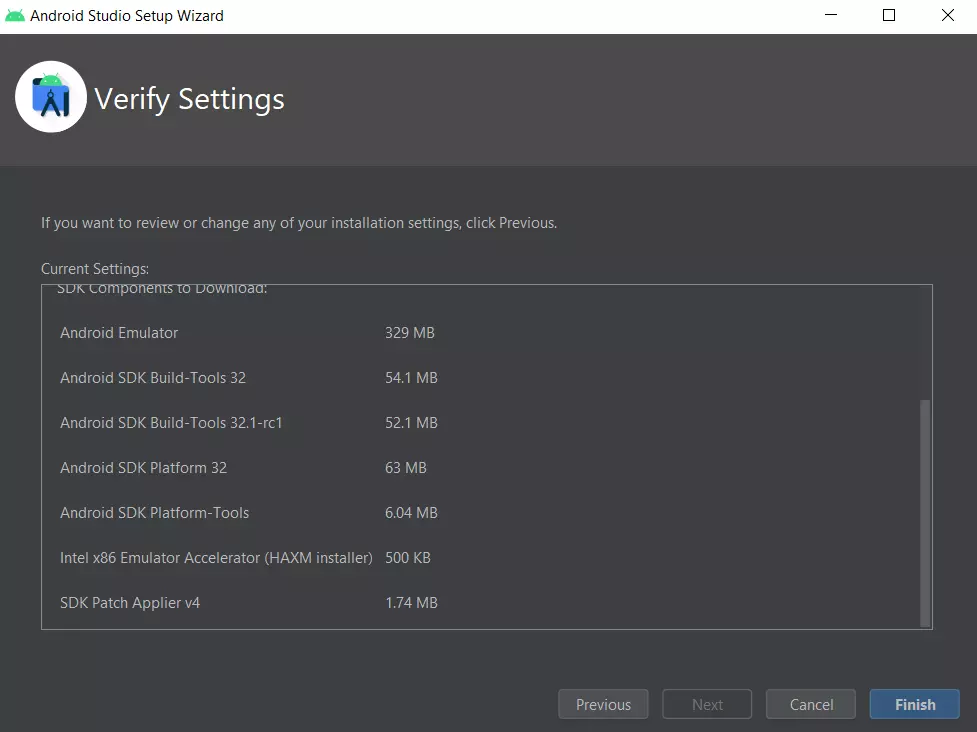
Once you have completed these steps, just click “Finish” again to end the setup process.
How to create a virtual device in the Android Studio emulator
If you want to create a virtual device in the Android Studio emulator, you have to follow these steps:
- Once you have set up the program, you will see the “Welcome to Android Studio” window.
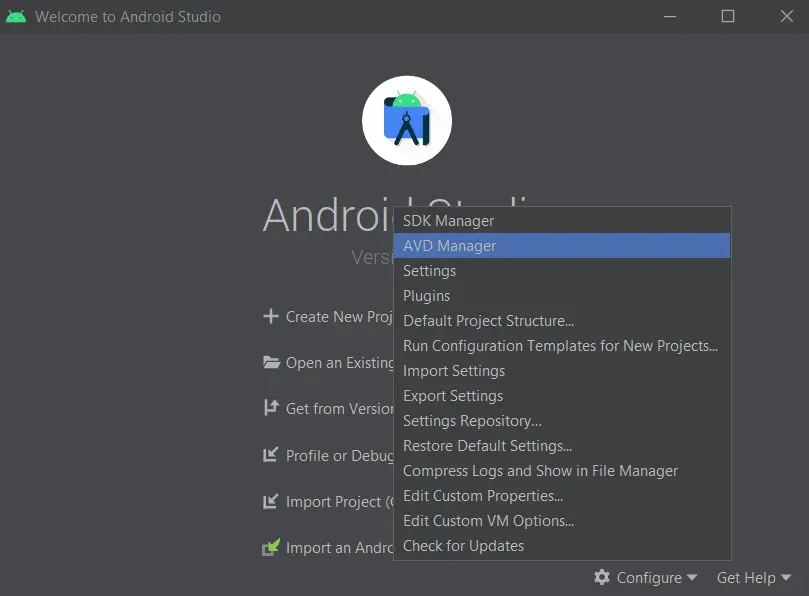
- Click on the “Configure” icon at the bottom of the window and select “AVD Manager”.
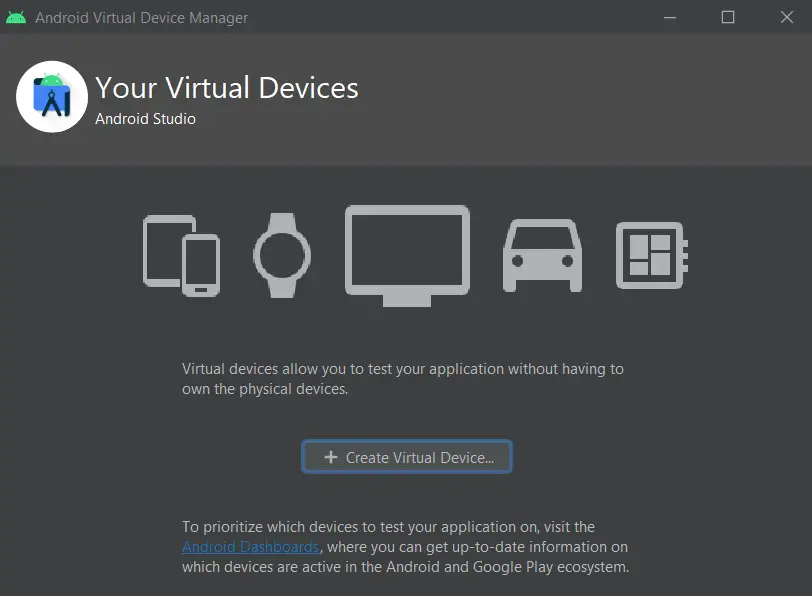
- After that, click on the “Create Vitrual Device” button.
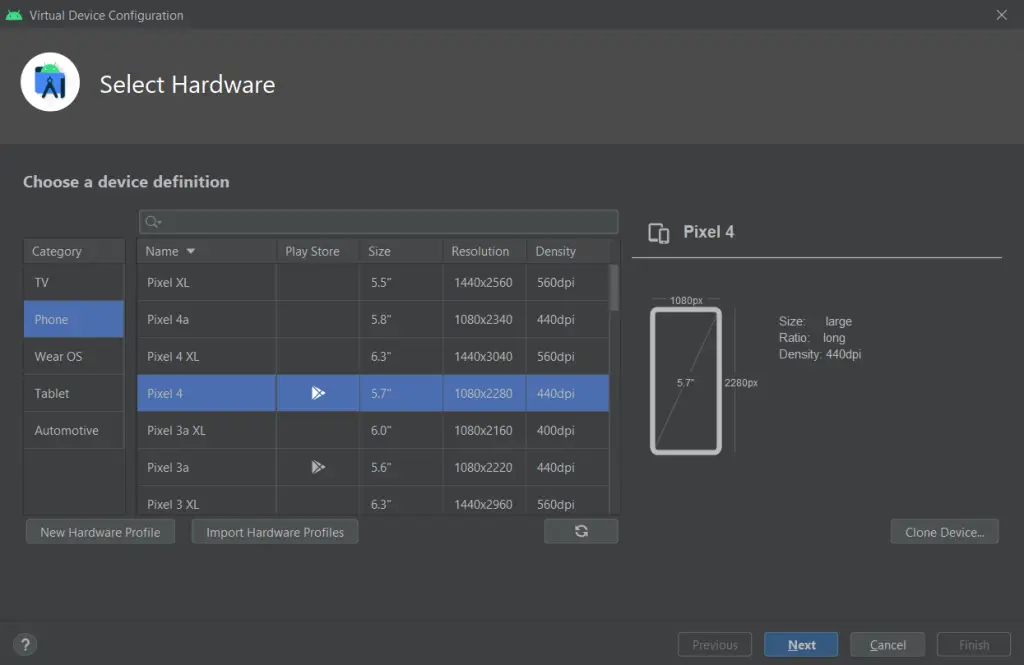
- Now, select the smartphone or tablet from the list of devices and click “Next”.
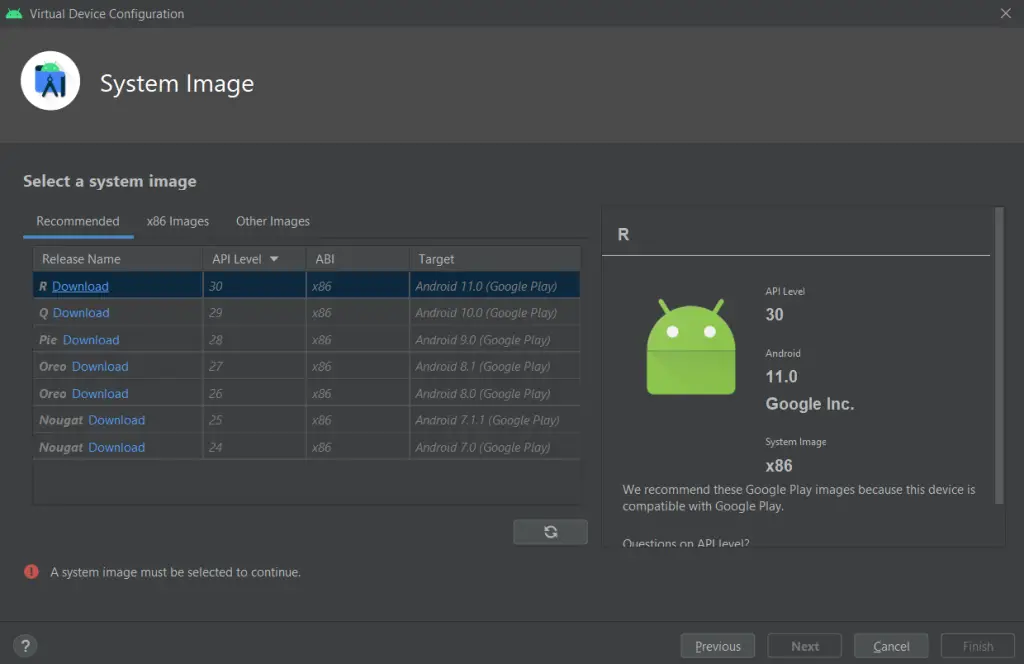
- Then, select the “Android 11.0” option and click on the “Donwload” link.
- Choose “Accept” and click “Next” in the appearing window.
- Once the download is complete, click “Next” again.
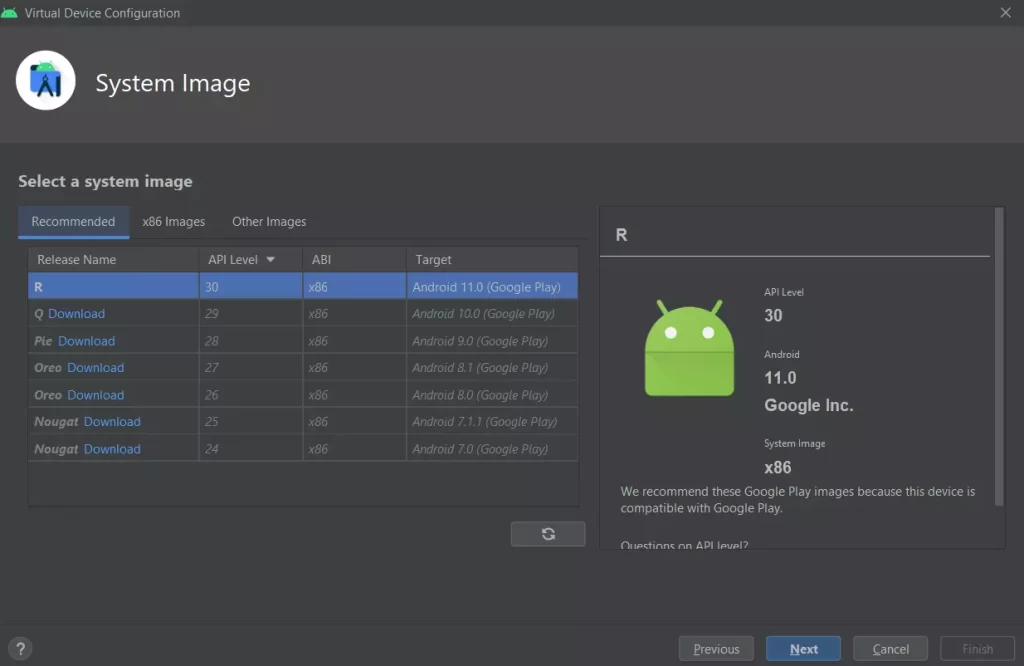
- Enter “AVD Name” and click “Finish”.
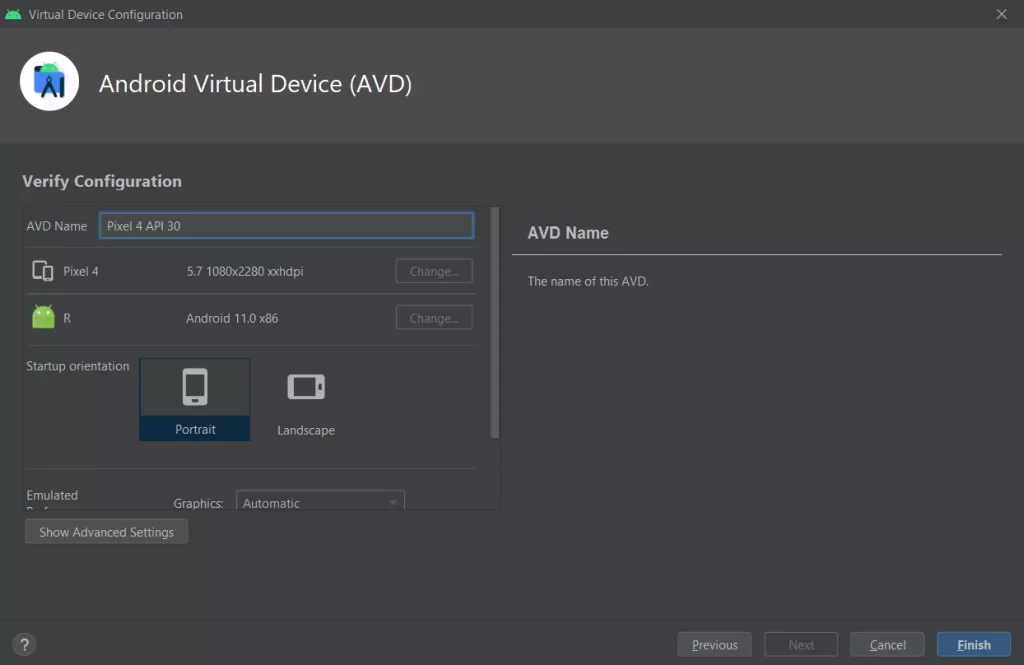
Once you have completed these steps, you will be able to create a virtual device in Android Studio.
Finally, you can launch the emulation of Android 11.0 by clicking on the “Play” (triangle) button in the “Actions” section.
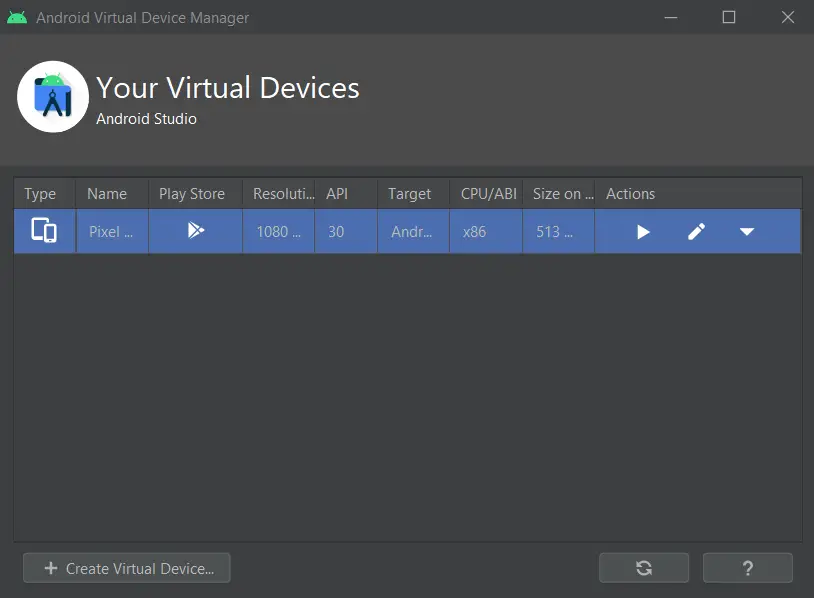
So, here’s what it looks like:
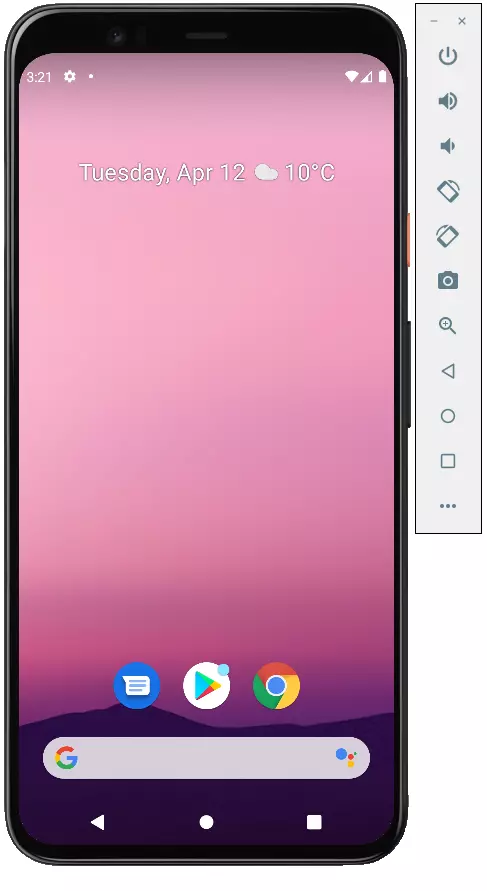
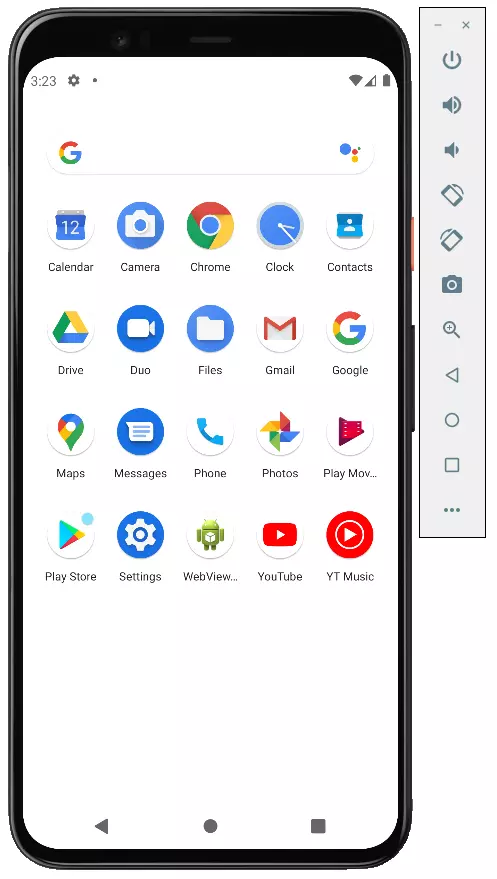
Well, as you can see and understand, it’s not so difficult to emulate Android on your PC. Android Studio helps you to make it possible. Anyway, there are also other apps and programs which can help you to do almost the same things. Read more about some of them below.
What is Nox App Player (NoxPlayer)
Nox Player is a very famous emulator with excellent user reviews. It’s well compatible with a wide variety of games, and, interestingly, allows you to use different versions of Android within one emulator, which allows you to either install a newer version if necessary or if you have a weak PC or laptop, an older one, which may be more performant on specific hardware.
Of additional interesting nuances – support not only for Windows 10, 8.1, and Windows 7, but also the Mac OS version of the emulator, design themes, macro recording, and, what is also important – official help in English, which is a rarity for this kind of products.
Another important detail: among all the Android emulators that have existed for a long time, NoxPlayer is the one that, on average, has the best user reviews, and the share of negative ones is very low.
What is BlueStacks
Bluestacks is probably the most famous and popular Android emulator: free, regularly updated, and has been around longer than other similar programs.
Among the advantages of the latest version of the Bluestacks emulator are:
- Flexible performance settings, allowing you to set the parameters suitable for your, including not very productive PC.
- Customizable mouse and keyboard controls in games and availability of preset settings for most popular games.
- Excellent compatibility: games that fail in other emulators often work successfully in Bluestacks.
- Built-in Play Market, ADB (Android Debug Bridge) support.
At the same time, some users report that specifically on their devices Bluestacks shows less performance than other emulators.
What is Remix OS Player
Remix OS Player emulator differs from the others in that it’s based on Remix OS – a modification of Android x86, “sharpened” specifically to run on PCs and laptops. Otherwise, it’s the same Android, at the moment – Android 6.0.1. The main drawback – it works only on Intel processors.
What is Koplayer
Koplayer is another free emulator that allows you to easily run Android games and apps on your Windows PC or laptop. As well as the previous variants, Koplayer works fast enough on relatively weak systems and has similar settings, including the assignment of the amount of RAM for the emulator.
Well, the most interesting thing about this program is a very convenient keyboard setup for each game separately, and for the keys, you can assign gestures on the Android screen, accelerometer actions, and pressing on individual areas of the screen.
What is Genymotion
Genymotion Android emulators have as their target audience developers who need to test their apps on a large set of different devices and are available in two variants:
- In the cloud with access directly in your browser, with USB debugging and other functionality as if it were a regular emulator, as well as the ability to run multiple instances of devices with different characteristics simultaneously in the cloud. This option, after a short pay period, is only available with payment for running instances of virtual devices. Setting parameters and running the emulator in the browser are available after registration on the official website. There’s also documentation on how to work with it.
- As offline emulators, Genymotion Desktop is based on VirtualBox, available for Windows, Linux, and Mac OS. This version is free to use for non-commercial purposes, ADB support from Android SDK Tools is also present. The offline version is available for download on the official website after creating an account. When downloading it’s required to specify that the emulator will be used “For Personal Use” and download it with or without VirtualBox
The PC version of the Genymotion emulator is easy to install and allows you to emulate a wide range of real devices with different Android OS versions, including new ones. And, perhaps importantly, it runs fast and supports hardware-accelerated graphics. There’s integration with popular IDEs, simulation of incoming calls, SMS, camera operation, battery drain, screen recording, and many other features that programmers should find useful.


