

Microsoft Word is still among the most popular word processors, especially in corporate circles. This is because Microsoft is constantly developing the functionality of its service. Including, of course, Word can collaborate on documents. In this case, the function to track changes will be helpful.
However, from time to time, users complain that it is more of a hindrance. Since this feature implies that after the author has written the text, the administrator of the document must accept this text. This drags out the work on the document, and you will have unnecessary items in the editor. Of course, you can easily disable this feature in Word by using the button in the Review tab.
What is the Track Changes feature in Microsoft Word?
Let’s start by understanding what it means to keep track of changes in Microsoft Word. The point is that, as I mentioned earlier, Word allows you to work simultaneously with other writers on documents in real-time. This is done through the OneDisk service and your Microsoft account.
However, unlike Google Docs, for example, there is no history of changes, and if you haven’t made a save, it will be pretty challenging to go back to a specific “build” of your document. Instead, Microsoft has offered an alternative feature called change tracking.
If this feature is enabled on your document, any changes made to the document will be in a “suspended” state. You must review the changes beforehand and decide which ones to accept and discard. The creator of the document can do this. And you can configure this function, for example, to track only your changes or the changes of all participants in the document.
How to turn off track changes in Microsoft Word
If the Change Tracking feature bothers you and only interferes with your work, you can quickly turn it off. And note that it can be turned on only for you, and if you are distracted by any of its elements or interface, you can customize it. To do this, you need to:
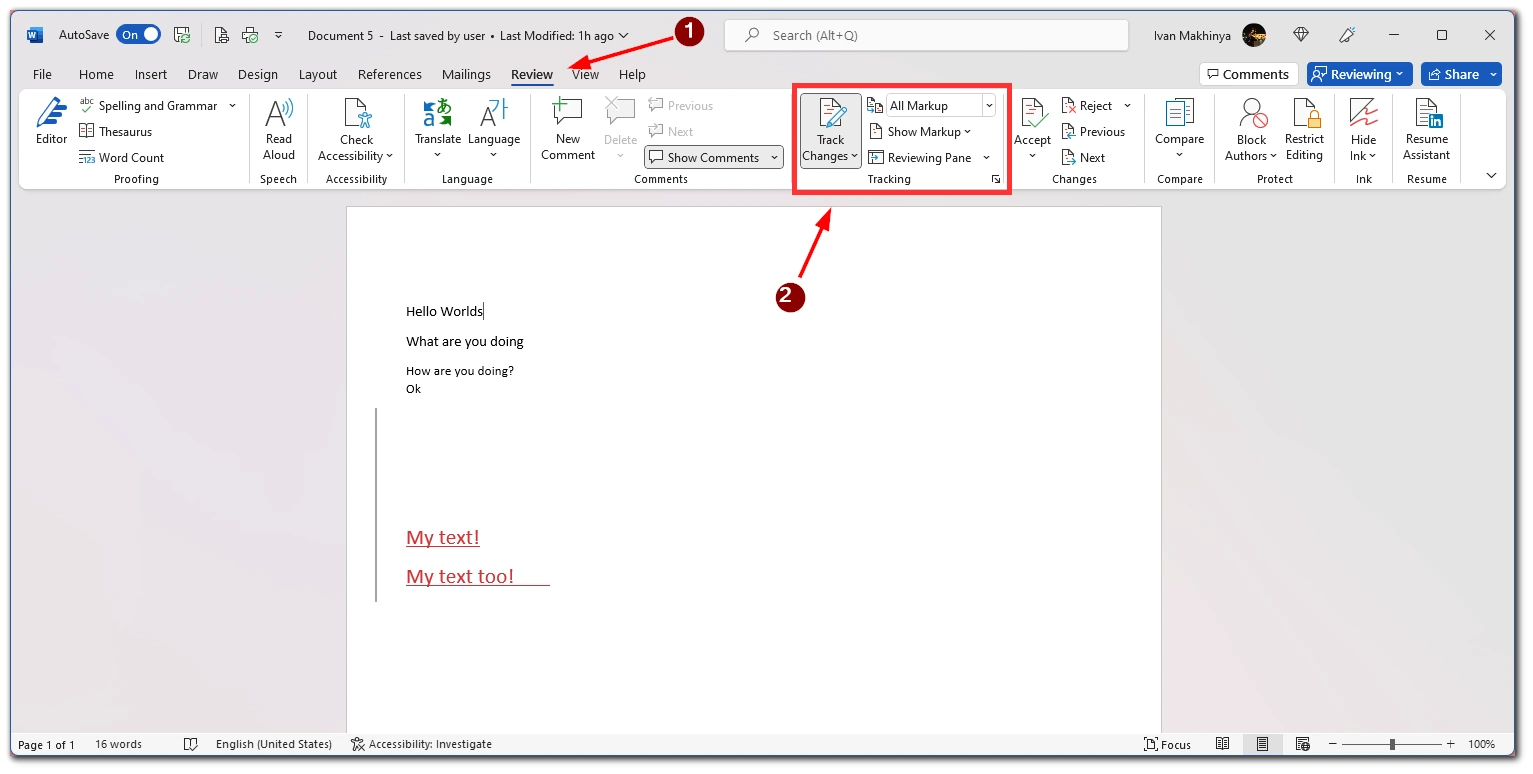
- In your document, click on Review above the toolbar.
- Next, in the taskbar, find the Tracking tab. You can use the Track Changes button to turn this feature off immediately.
- After you disable it, you may be asked for the password that the document administrator gave you.
Note that the snoop tab also has other options that allow you to customize the Track Changes feature. You can enable it for individual users or customize the interface of this feature. I suggest you look at all the related options and decide whether you want to disable this feature or customize it.
What is Lock Tracking, and how to enable it in Microsoft Word?
As I described above, you may be asked for a password to disable Track Changes. This is useful if you do not want other authors to disable this feature on your document. To connect a password to it, you need to:
- Go to the Review section above the toolbar of your document.
- Then click the down arrow on the Track Changes button.
- In the dropdown menu, click on Lock Tracking.
You will then need to create a strong password and set it. It is important to remember this because you will now need to confirm your action with this password to disable this feature. To disable the password, you can follow the exact instructions.
How to accept or reject changes with track changes in Microsoft Word
The Follow Changes feature, as I described, allows you to get or discard different text options. Let’s take a closer look at how you can accept or reject changes to your document. To do this, you will need the following:
- Highlight the part of the text you want to accept or reject.
- Go to the Review section.
- This is where you can use the Accept or Reject button in the toolbar.
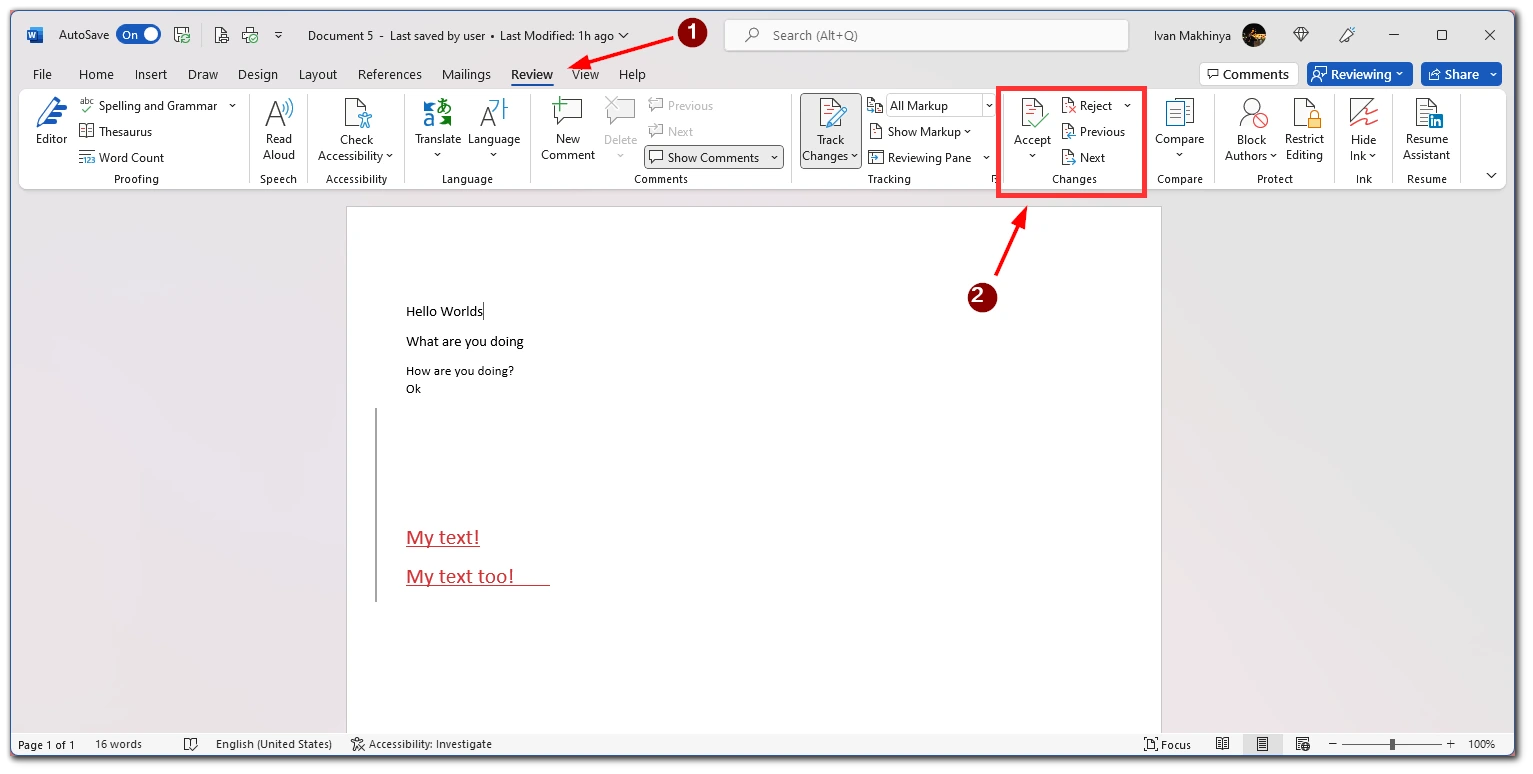
There are also buttons next or previous to toggle between changes. Note that changes are only recorded when you enable the Track Changes feature. So you can’t change the text that was written before Track Changes.
How to share your documents with other authors
Tracking changes make the most sense if several authors work on your documents simultaneously. Of course, you first need to invite them to work together on your Word document. Let’s take a closer look at what this looks like in Microsoft Word:
- To add contributors, click the Share button.
- You have two options in the dropdown: Copy Link and Share.
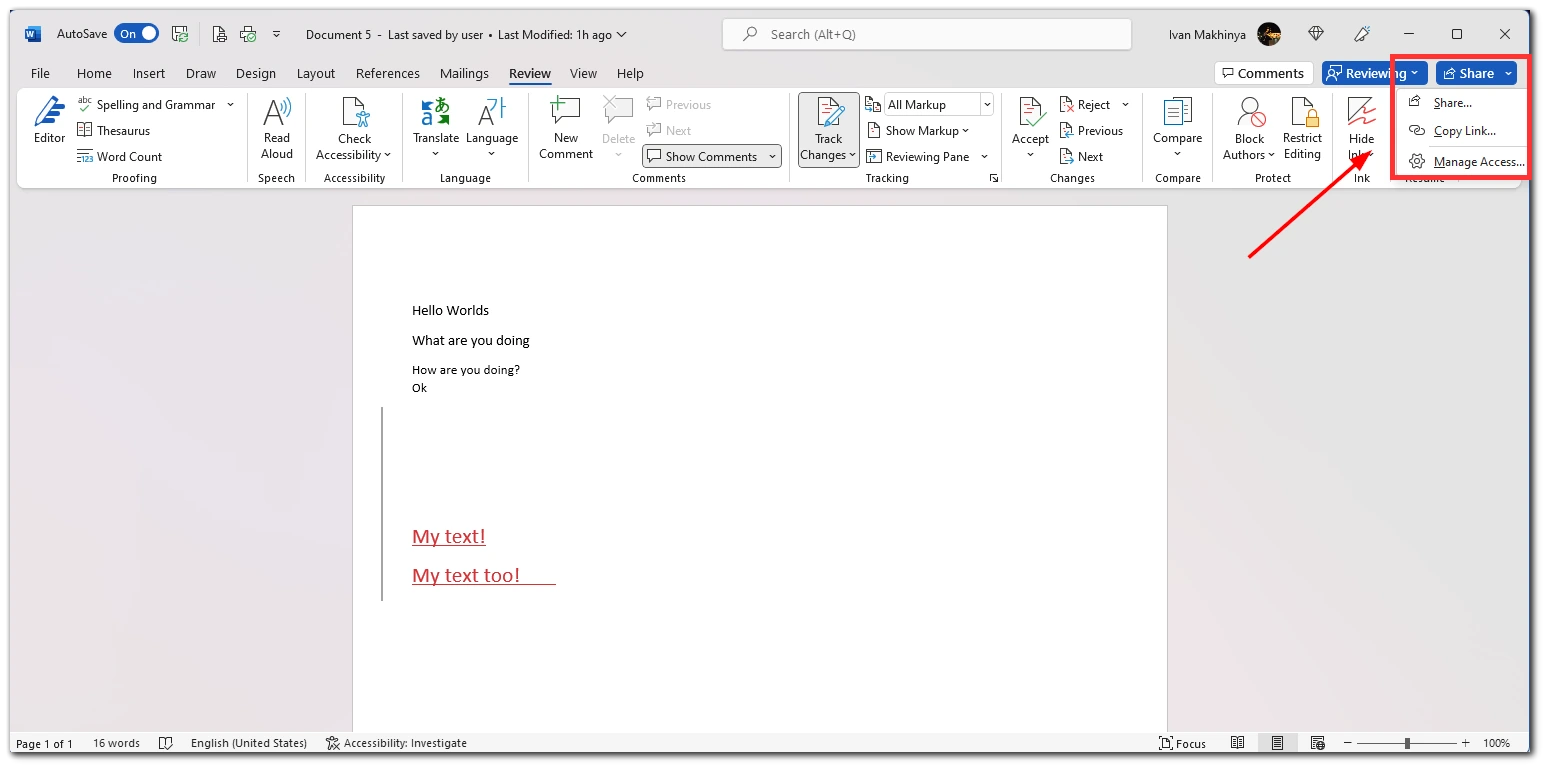
- If you click on Share, you can either copy the link or send an email using the textbox and the Send button.
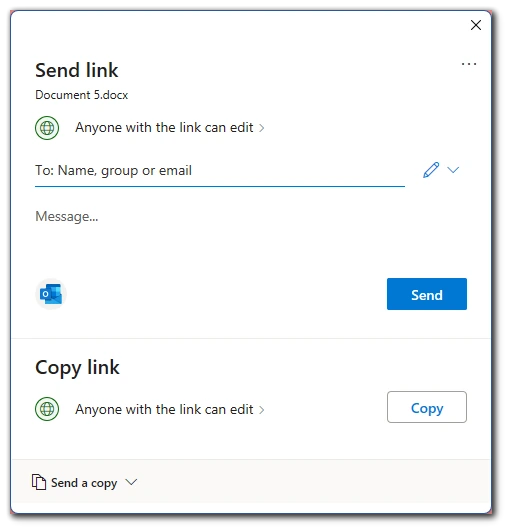
Don’t forget that you have to choose what rights the user you invite will have. You can choose between allowing the user to edit or view the content. You can also limit the time the user can work on the document.


