Windows 11 is the most modern operating system at the moment. It has many different tools and programs that make it stable, support most applications and formats, and provide suitable security. Modern operating systems are designed, so you do not have to install additional software to protect them. Special Antimalware Services should help with this.
However, users often find that programs that protect you from malware only get in the way. They can slow down your computer and clash with third-party applications they deem “insecure.” In that case, you have many options on how you can disable them. Usually, you have to use your PC settings or registry to do this. Let’s take a closer look at why this happens and what you can do about it.
What is Antimalware Service Executable in Windows 11, and why it takes a lot of resources?
The software responsible for the security of your Windows 11 system and its protection from external software threats is the built-in antivirus Windows Defender or just Defender. In this program, one service is constantly running in the background and can load your system. This service is called Antimalware Service Executable.
As I mentioned before, this service can be quite a burden on your system. This is because the service is constantly running in the background and scanning your system. The service also downloads various security updates and scans for new files you want to open. In this case, your processor and disk can be very busy, and the load extends to your RAM.
Therefore, you might want to use a third-party antivirus which will give you the same protection but will not burden your system as much. You have several options to simplify Antimalware Service Executable systems. This means that you do not have to turn off the Windows Protector completely, but you can disable only some of its features, so they do not run in the background and interfere with other processes on your computer.
How to turn off Antimalware Service Executable on Windows 11
I want to tell you about four ways you can use to reduce the load on your system. We’ll start by setting up the computer to scan at the right time (for example, when you’re not busy and your computer is not being used to its total capacity). I will also show you how to add the necessary applications or folders to the exclusion list so that Windows Protector would not scan it and would not affect the performance while working on these files.
In addition, I want to tell you about two ways to disable the Windows Protector at once. The fact is that the usual disabling through Settings does not always work correctly. So you may need a more radical method to disable the Windows Defender service. Let’s take it one step at a time.
How to reschedule the Windows Defender scan
Let’s start with the easiest way, which will not affect your level of protection. It will allow you to reschedule the scanning of your computer’s files. This way, you can set the scanning to take place when you are not working on your computer and do not need its maximum performance. To do this, you need to:
- Use the start menu to find the Task Scheduler application.
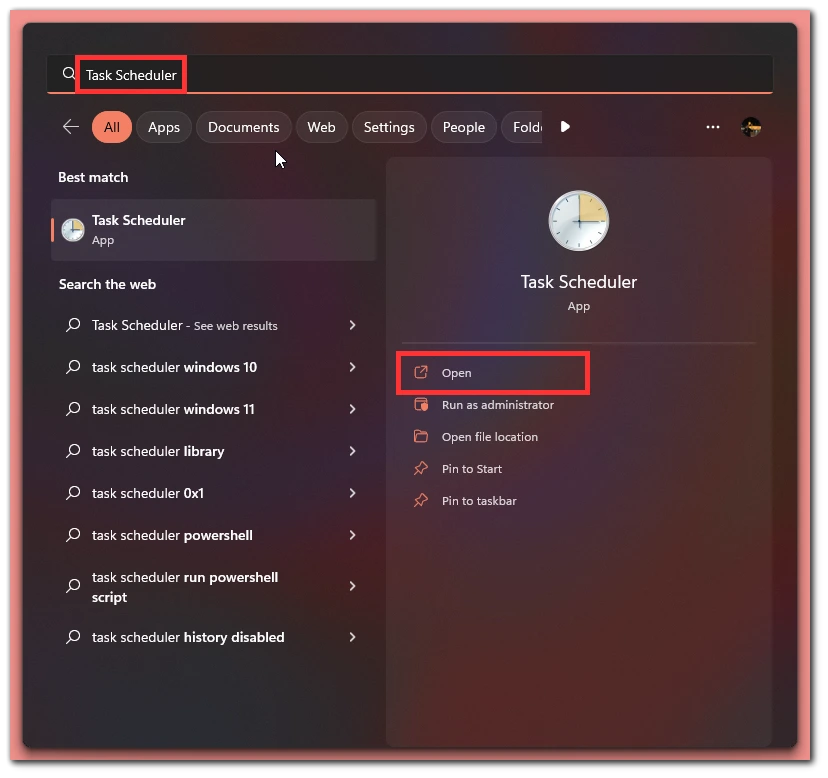
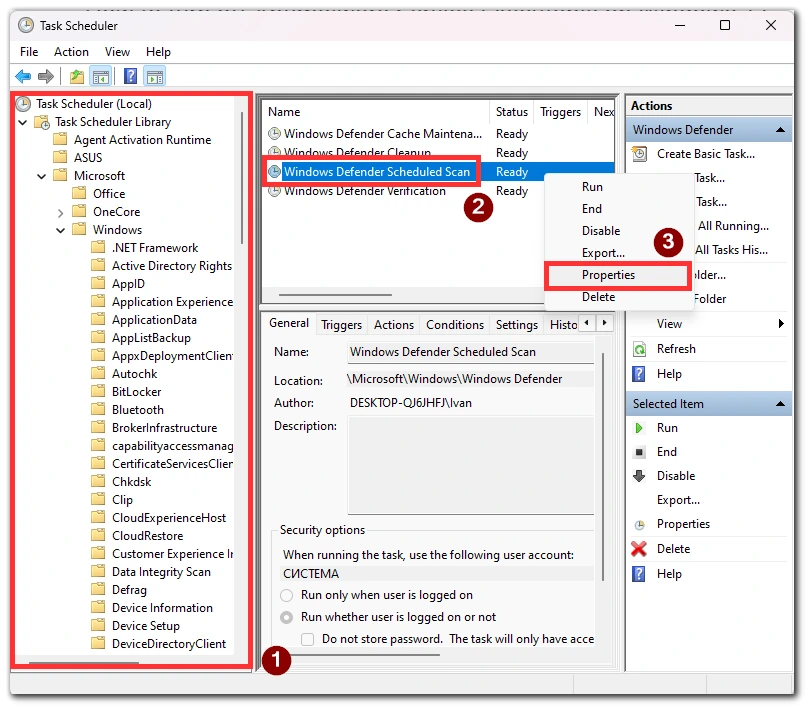
- Then in the left navigation menu, you need to go to Task Scheduler Library>Microsoft>Windows>Windows Defender.
- Now in the middle menu, select Windows Defender Scheduled Scans and right-click on it, then click Properties in the drop-down menu.
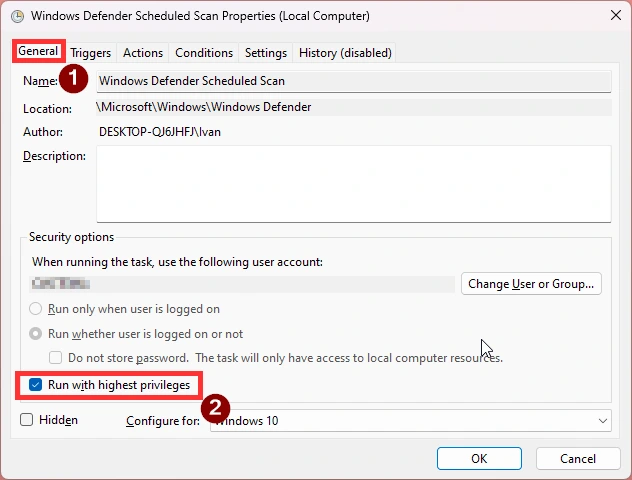
- Then in the top pane of the window that opens, go to the General tab, uncheck Run with the highest privileges, then click OK.
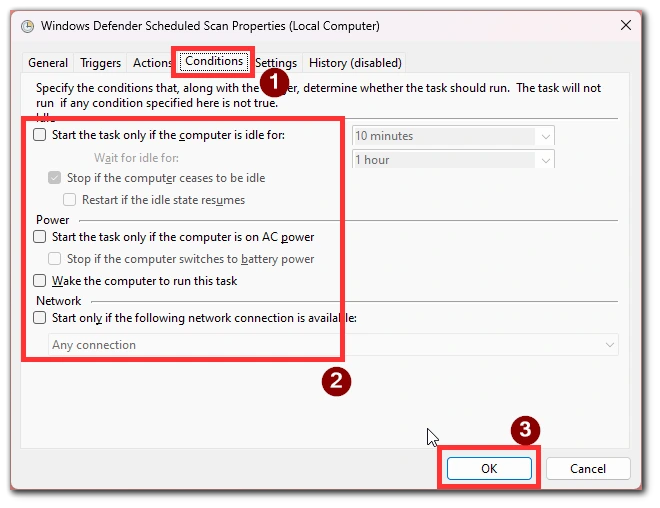
- After that, go to the tab Conditions and, uncheck all the checkboxes, confirm your action by clicking OK.
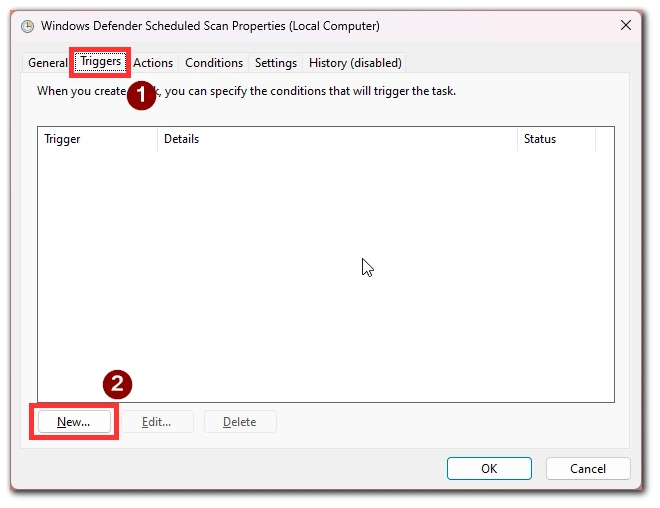
- Then you need to go to Triggers and click New.
- Here you can configure the schedule using the available tools and click OK.
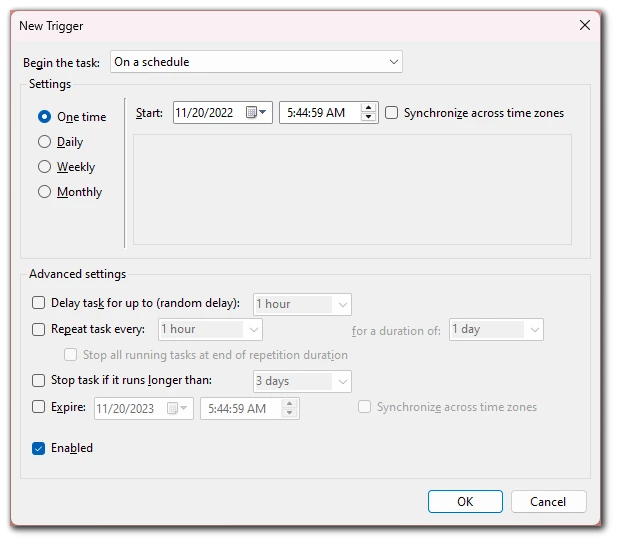
After this, Windows Defender scans will be ordered and run only at times you set. Your system will still be protected because Windows Protector is enabled and will check for files that could potentially harm your system when launched.
How to add exceptions to Windows Defender
Another way to ensure that you do not lose protection for your system and that it does not interfere with your work is by adding a special list of exceptions. Some applications get there by default, but you must add most of them manually. To do this, you need to:
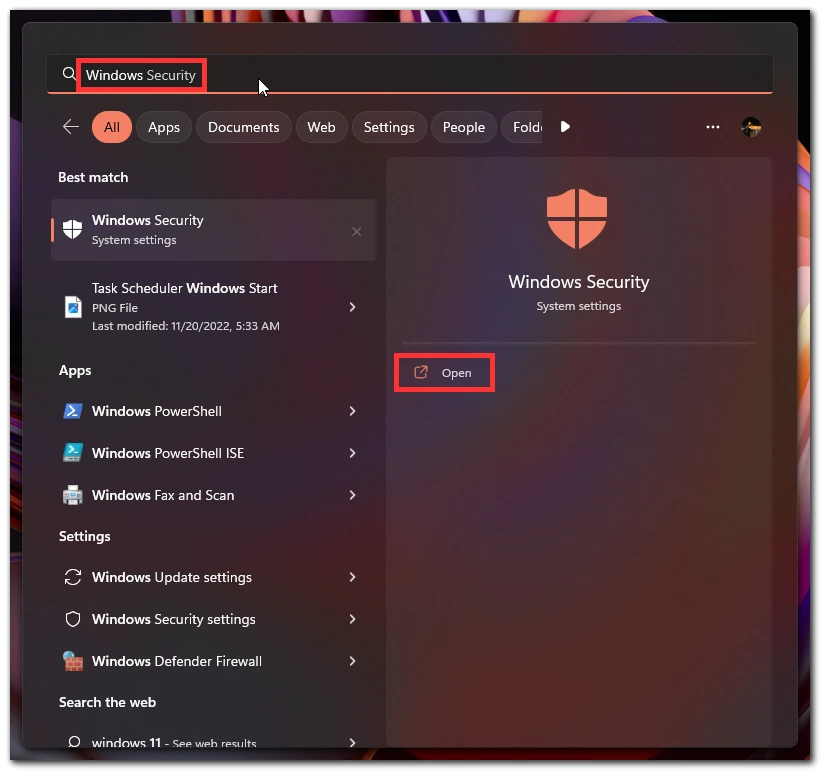
- From the Start menu, find the Windows Security app.
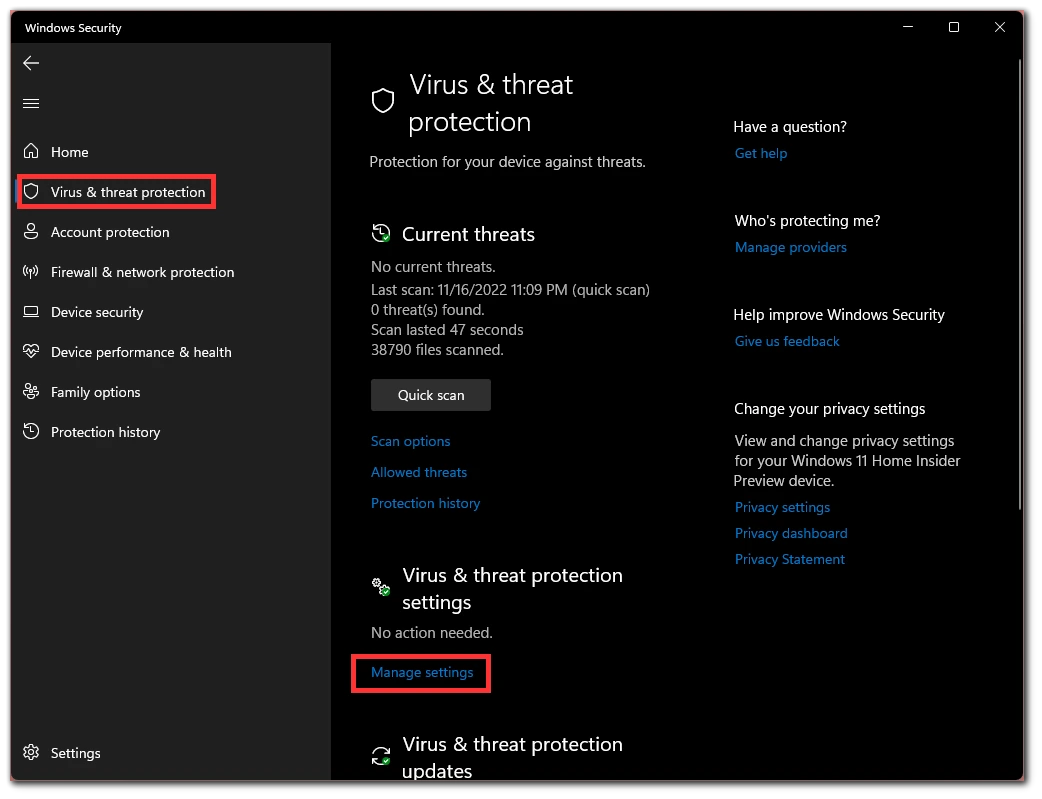
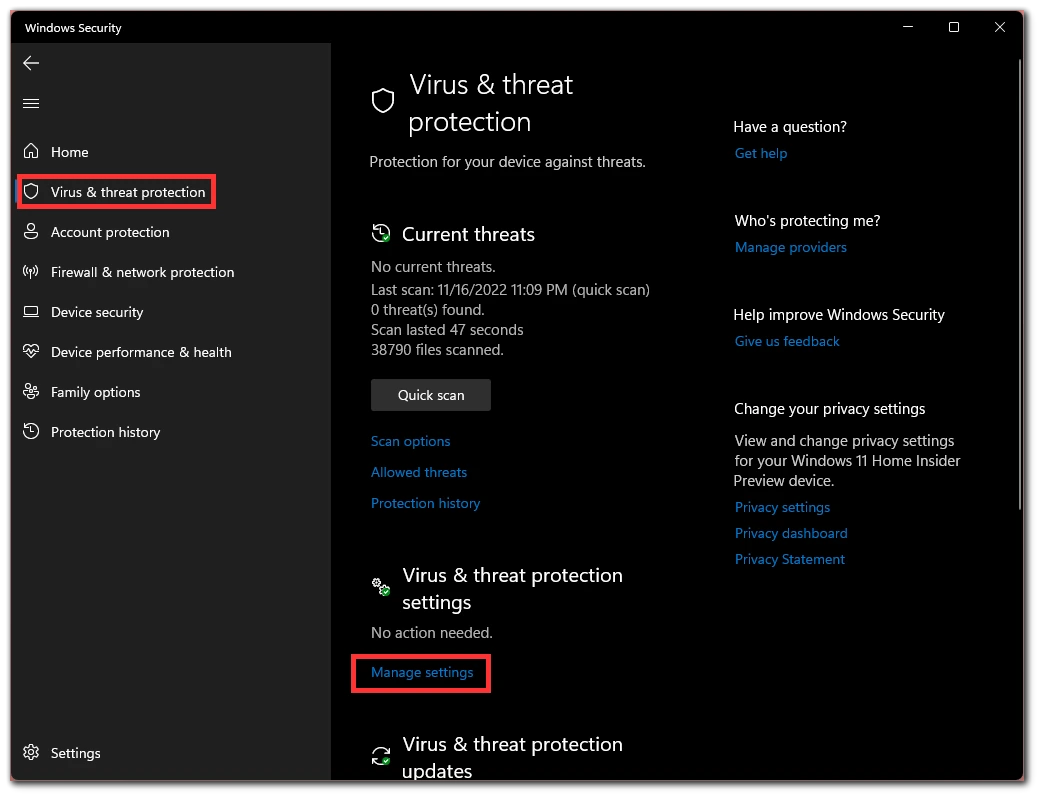
- In the Virus & Threat Protection section, you need to click on Manage Settings.
- Scroll down to the bottom and select Add or Remove Exclusions.
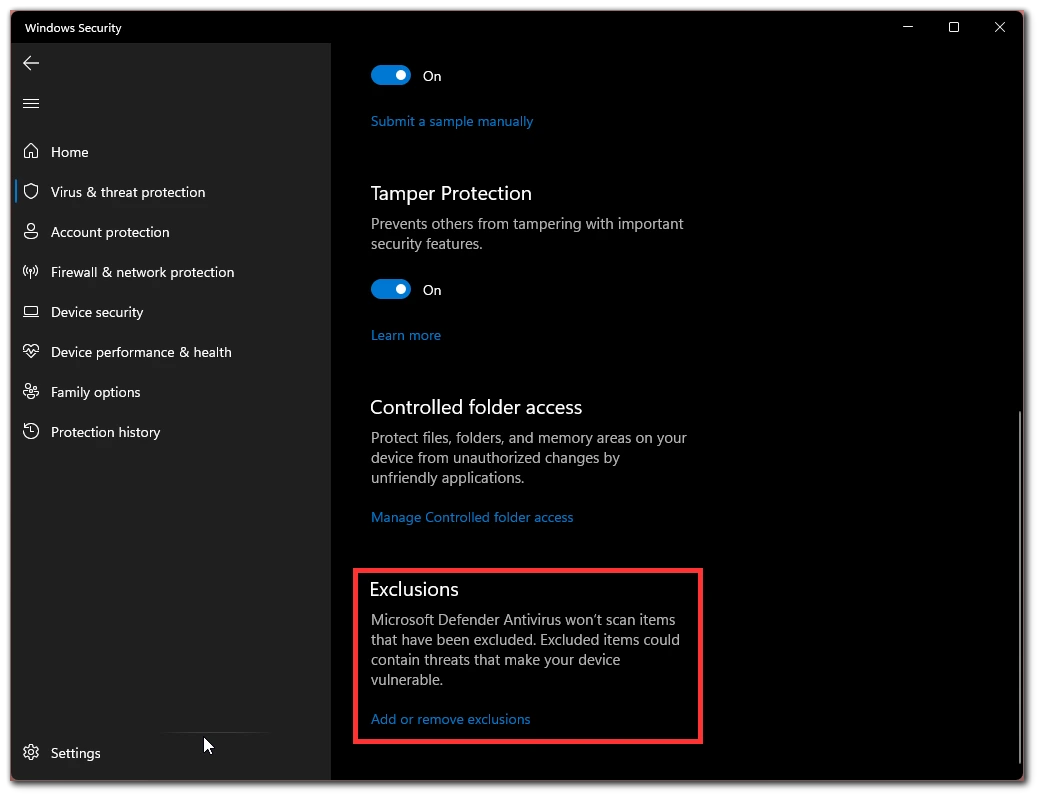
- Here you need to click the Add Exclusion button and enter the name of your process or the path to the folder you want to add to the exclusions for Windows Protector.
It is essential to understand that only approved applications and files should be added, as they will bypass your system’s protection and potentially harm your computer. So if you are unsure about the security of the application you are using, it is better not to do it.
How to disable Windows Defender
If the above methods do not help you to improve performance or Windows Defender still bothers you, you can turn it off. Note that, in this case, your system will be at risk. To do this, you will need to:
- In the start menu, find the Windows Security application.
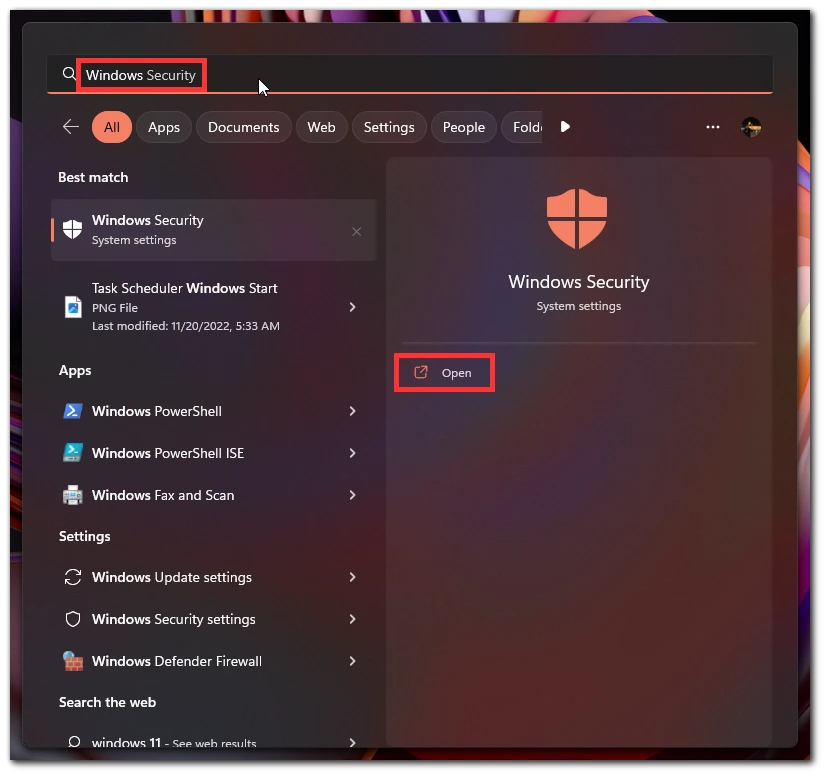
- Then you need to click on the Virus & threat protection tab.
- Click on Manage Settings.
- Here you need to disable the Real-time protection item.
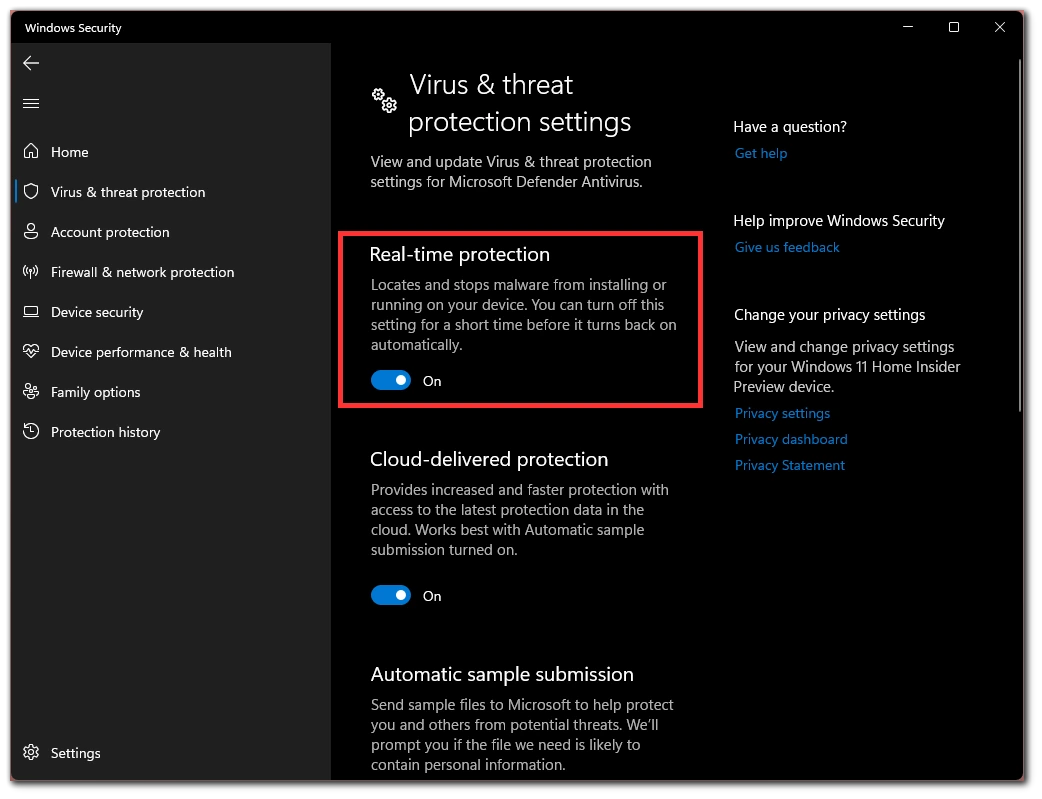
Please note that the Windows Protector will turn on after you reboot your device. So you will need to go in and turn it off manually before work. I advise you to check if this helps improve performance and if it does, find a third-party antivirus that will not load the system as much and keep you safe on your computer.
How to stop the Windows Defender Antivirus Service process
If you notice that disabling Windows Defender improves performance, you may want to disable it permanently. To do this, you need to stop the Windows Defender Antivirus process. To do this, you need to:
- In the Start menu, find Services.
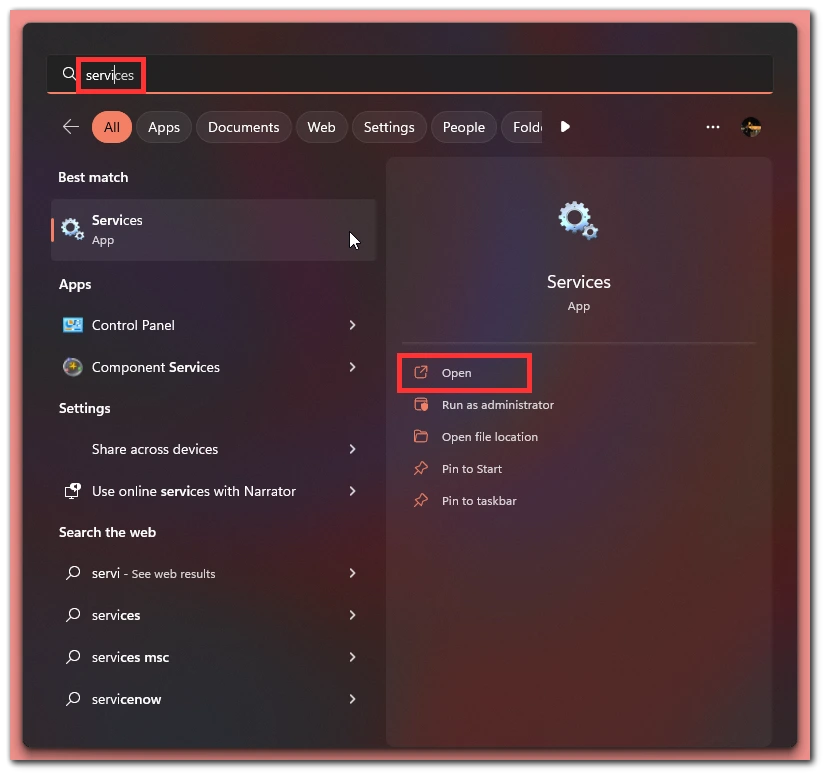
- Now in the List, you need to find the Windows (Microsoft) Defender Antivirus Service process and right-click on it.
- In the drop-down menu, click on Stop.
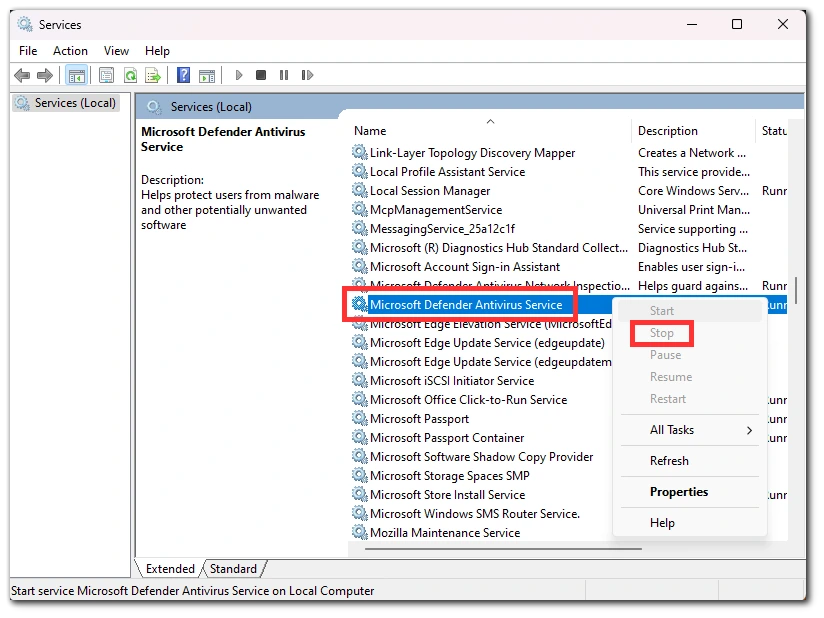
After that, the antivirus of your Windows computer will stop working. So it would be best if you took care of additional protection beforehand. To restart the process, you need to repeat the process and click on Start.

