It will take you a couple of minutes to remove eSIM from your iPhone. You can do it directly from the settings. Go to Mobile Data, and there you will find a list of eSIM cards. Select the desired one, and there you will see the Delete eSIM option.
Let’s take a closer look at the process of deleting an eSIM, along with more information below.
How to remove eSIM on your iPhone
Deleting a number from the eSIM on your iPhone is a straightforward process. Follow these steps to remove a number from your eSIM:
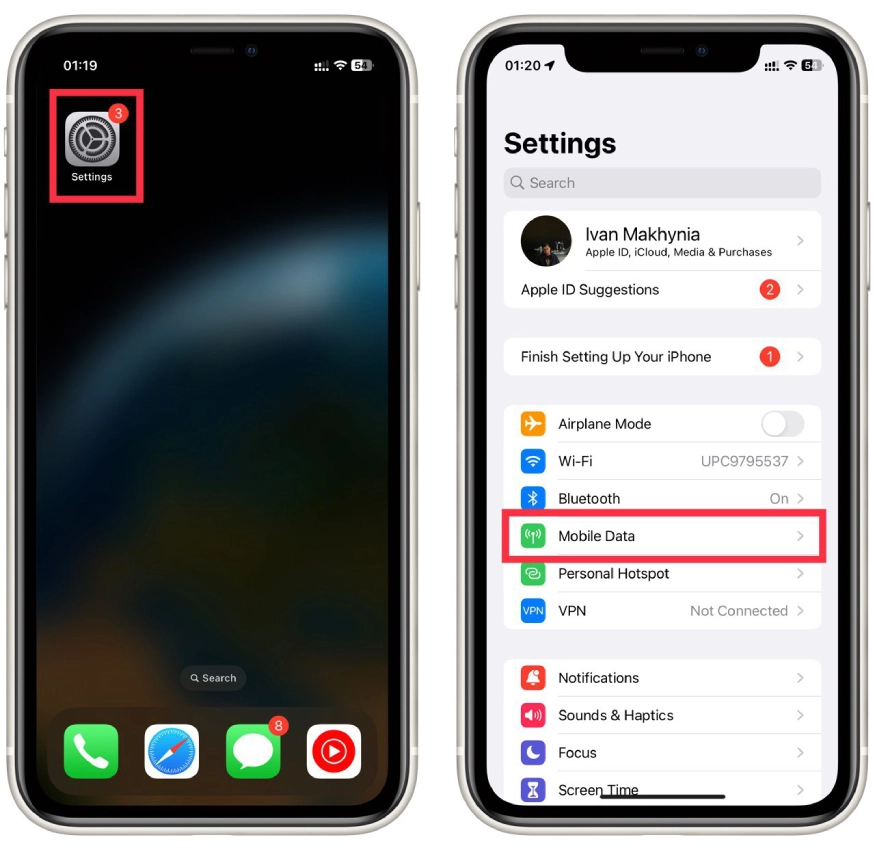
- Unlock your iPhone and navigate to the “Settings” app, which is represented by a gear icon.
- Scroll down in the Settings menu and tap on “Mobile Data.”
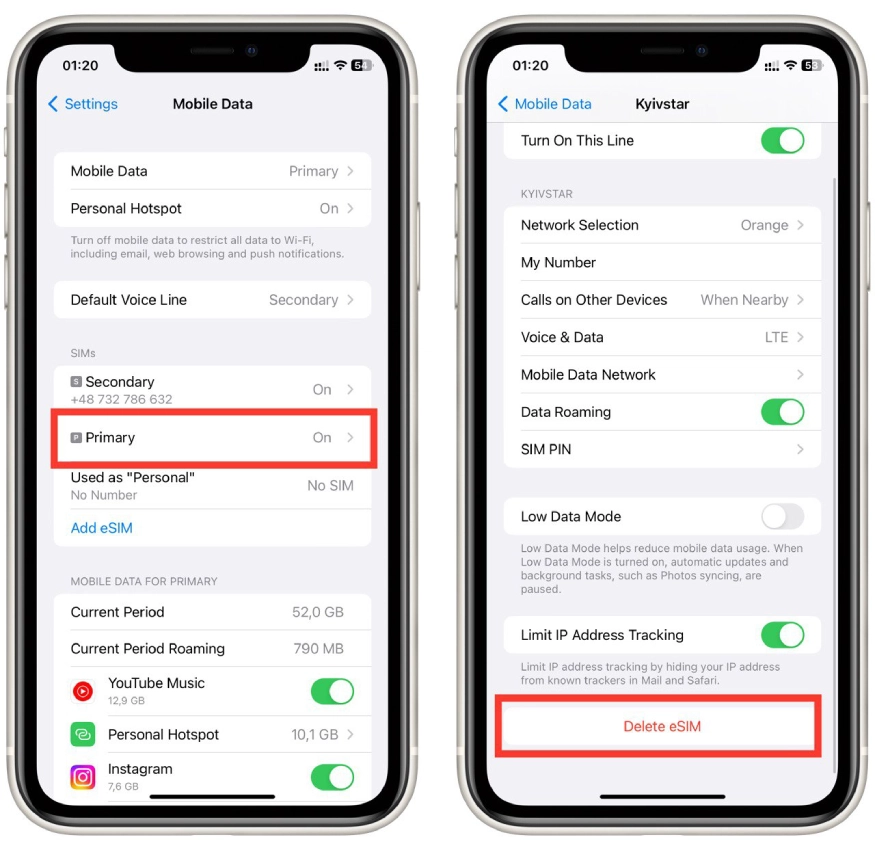
- You’ll find the “SIMs” section within the Mobile Data settings. Here you’ll see a list of the numbers associated with your eSIM and SIM cards. Select the number you want to remove.
- On the number’s details page, you’ll find an option to “Delete eSIM.” Tap on this to initiate the removal process.
- A confirmation message will pop up, asking if you’re sure you want to remove the plan. Confirm your choice.
After confirming, the selected number will be removed from your eSIM. Your iPhone will no longer use this number for calls, messages, or data.
Can you restore deleted eSIM on iPhone?
There is generally no direct way to restore a deleted eSIM profile on an iPhone once it has been removed. When you remove an eSIM profile from your device, you are essentially detaching the associated mobile plan or number from that specific eSIM.
The eSIM itself remains functional and can be used to activate another plan or number in the future, but the specific profile you removed is typically not recoverable. To restore eSIM on your iPhone, you need to contact your cellular carrier and reconnect eSIM to your iPhone.
How to add eSIM to iPhone
After deleting, you may need to add a new eSIM. To do this, you need to:
- Reach out to your carrier to check if they support eSIM activation and if your plan is eligible for it. They will provide you with a QR code or activation details that you’ll need during the setup process.
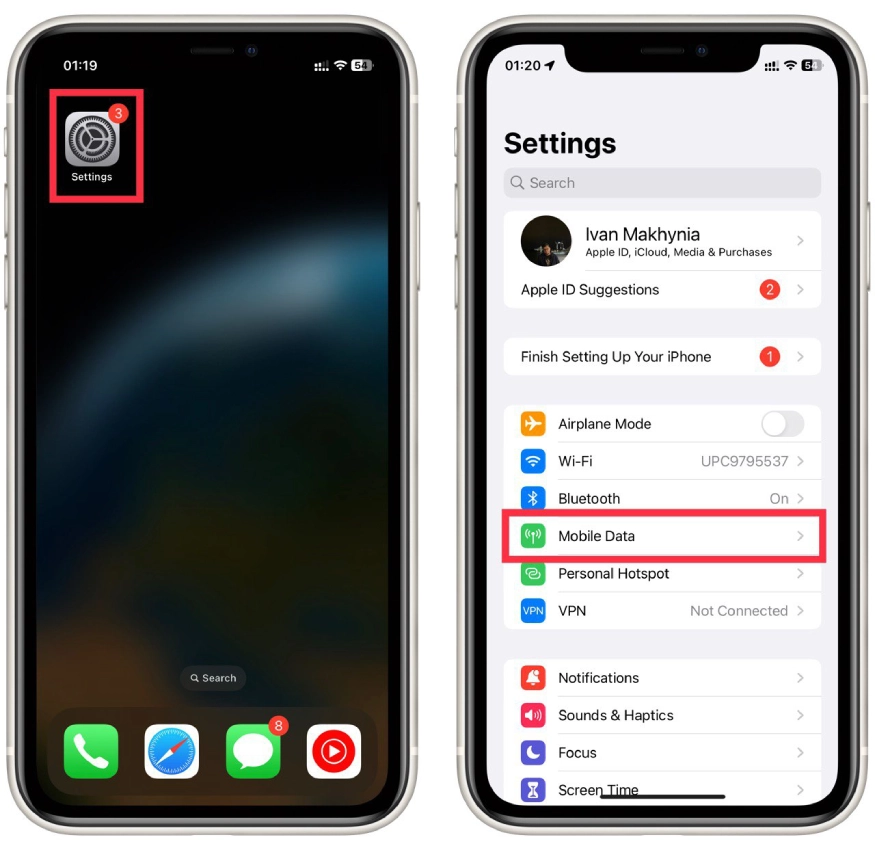
- Unlock your iPhone and locate the “Settings” app – the gear icon – on your home screen.
- Scroll down in the Settings app and tap on “Mobile Data.” This is where you’ll configure your cellular settings, including adding an eSIM.
- Within the Mobile Data settings, you’ll see an option to “Add eSIM.” Tap on it to initiate the eSIM setup.
- If your carrier provided you with a QR code, use your iPhone’s camera to scan the code. The QR code contains the necessary information to activate your eSIM.If your carrier doesn’t use QR codes, they might provide you with activation details, such as a confirmation number or activation code. Enter the provided details manually.
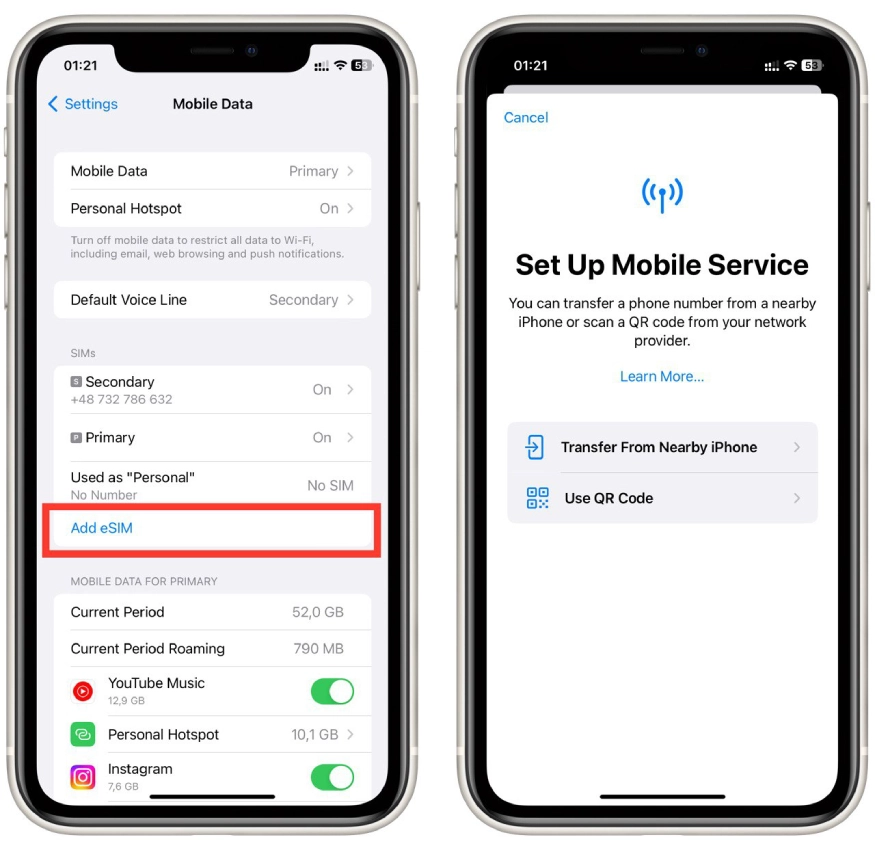
Once the activation process is complete, your eSIM will be ready to use. Your iPhone will display the carrier’s name and signal strength in the status bar, indicating that the eSIM is active.
Note that some operators can activate eSIM through their mobile app. This usually works if you insert a physical SIM card in your iPhone, which will be overwritten as an eSIM. So it’s a good idea to call your cell phone carrier to find out what the procedure is for activating eSIM.
How many eSIM can be used in iPhones at once?
You can program up to 10 eSIMs on your iPhone at a time. The number of available eSIMs may decrease if you do not have enough free space. Please note that only up to 2 eSIMs can be used at a time.
This means that the other eSIMs you program into your iPhone will be inactive, and you will need to switch to them to use them manually. You can find the list of all eSIMs available on your iPhone in Settings in the Mobile Data section.
Can you use 2 eSIM numbers at the same time on iPhone?
Most iPhones support the simultaneous use of one physical SIM card and one eSIM. This means you can simultaneously have two active phone numbers on your iPhone: one associated with the physical SIM card slot and one associated with the eSIM.
However, simultaneous use of two eSIM numbers is available on iPhone 13 and later. In these, you can choose to either use two eSIM numbers or one eSIM and one physical SIM. Apple also stated that if there will be iPhones without physical SIM card slots in the future, they will also support dual eSIM.
What iPhones support eSIM
At the time of writing (August 2023) following iPhone models support eSIM technology:
- iPhone XR
- iPhone XS
- iPhone XS Max
- iPhone 11
- iPhone 11 Pro
- iPhone 11 Pro Max
- iPhone SE (2nd generation)
- iPhone 12
- iPhone 12 mini
- iPhone 12 Pro
- iPhone 12 Pro Max
- iPhone 13
- iPhone 13 Mini
- iPhone 13 Pro
- iPhone 13 Pro Max
- iPhone SE 3 (2022)
- iPhone 14
- iPhone 14 Plus
- iPhone 14 Pro
- iPhone 14 Pro Max
Note that iPhones that are released for the Chinese region may not have eSIM but instead have two slots for physical SIM. It also appears that all future iPhone models will also have eSIM.
Can you change eSIM to a physical SIM card?
The answer to this question depends on your cellular carrier. Some carriers allow their users to switch from eSIM back to a physical SIM card and will provide you with a new SIM card with your number.
However, it should be noted that not all cellular carriers can provide this service. It especially concerns online cellular carriers that have only eSIM and do not physically issue SIM cards. Also, some cellular carriers may offer you to simply create a new number on a new physical SIM card. You should contact your cellular carrier and ask them about this issue.
How to remove physical SIM from the iPhone
Removing a physical SIM card from your iPhone is a straightforward process. Here’s how you can do it:
- Before removing the SIM card, turning off your iPhone’s a good idea. This helps prevent any potential issues when handling the SIM card.
- Different iPhone models have SIM card trays located in different places. Generally, you’ll find it along the sides of your iPhone. It’s usually on the right side of the device, but on some models, like the iPhone SE (1st generation), it’s on the top edge. You’ll need a SIM card eject tool (usually included with your iPhone) or a small paperclip.
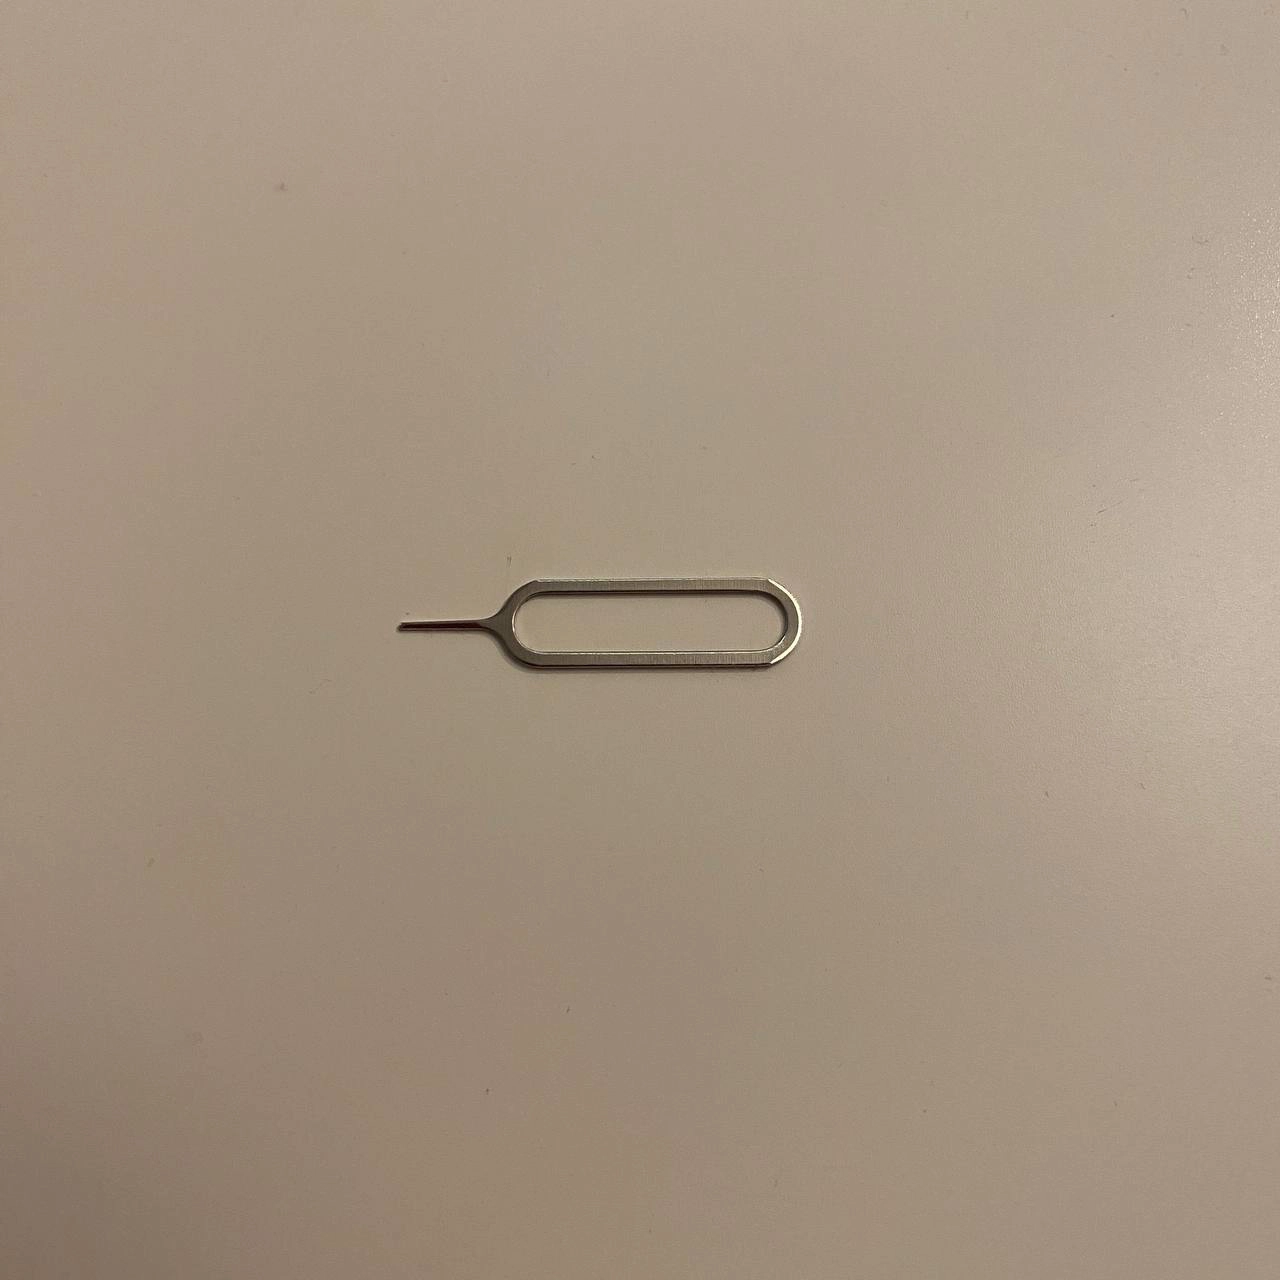
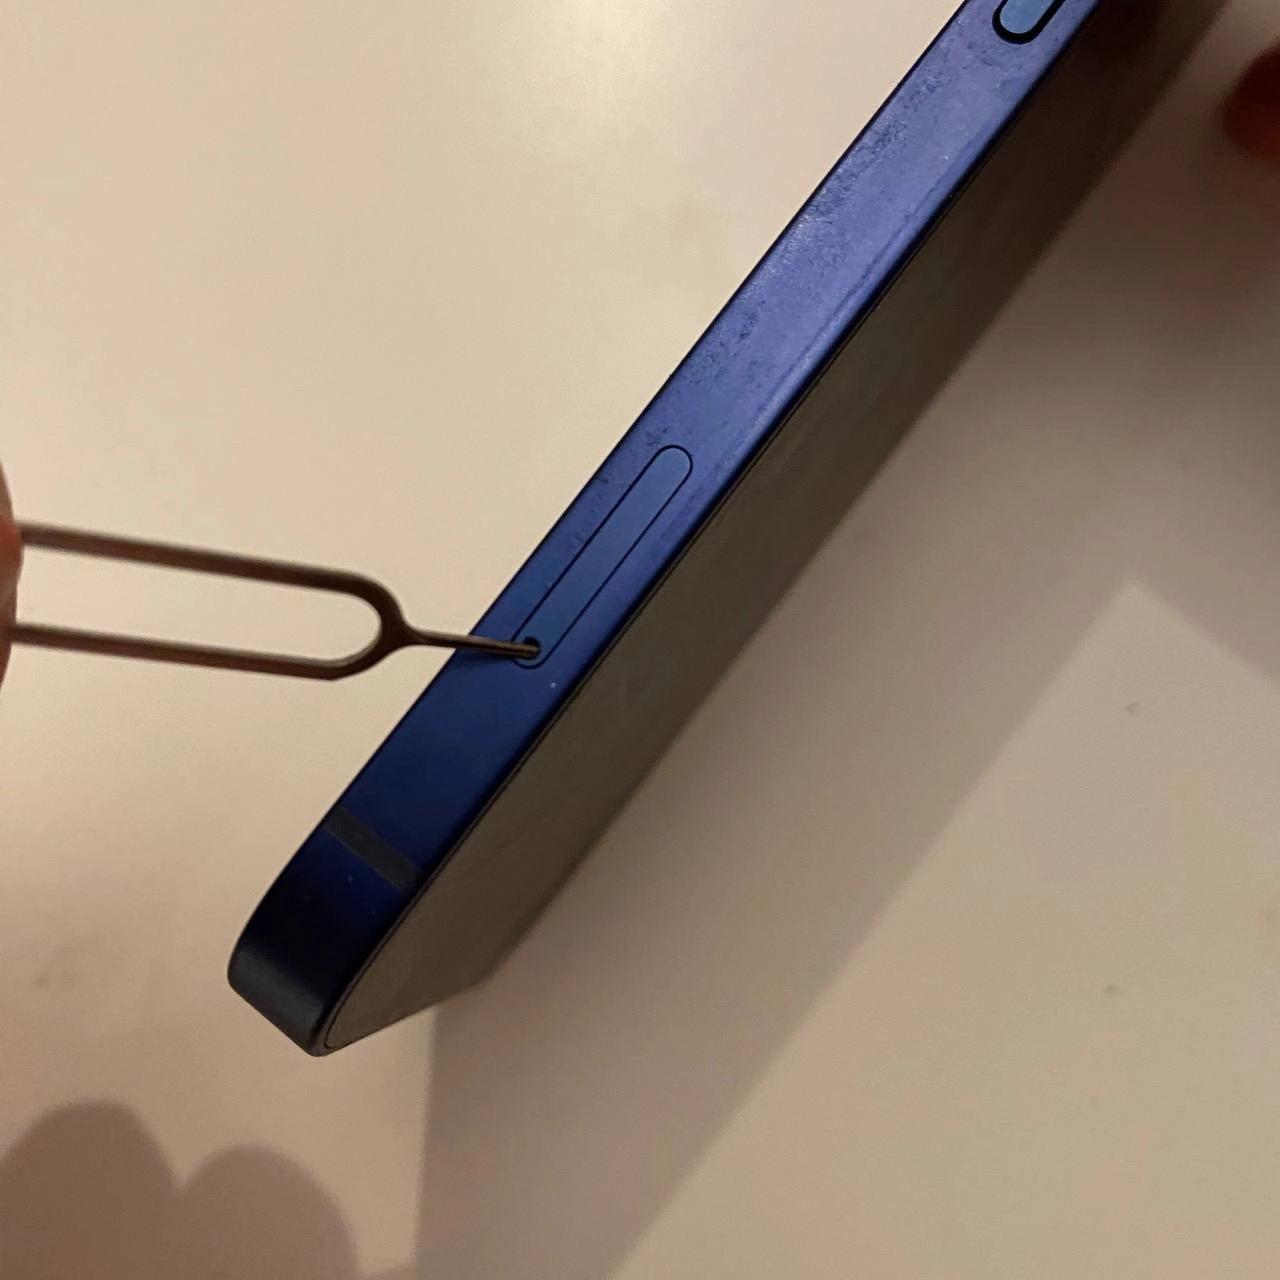
- Insert the SIM card eject tool or a straightened paperclip into the small hole on the SIM card tray. Gently push into the hole until the tray pops out slightly.
- Pull the SIM card tray out of the iPhone. The SIM card will be in the tray. Carefully remove the SIM card from the tray, making sure not to touch the gold contacts on the card.
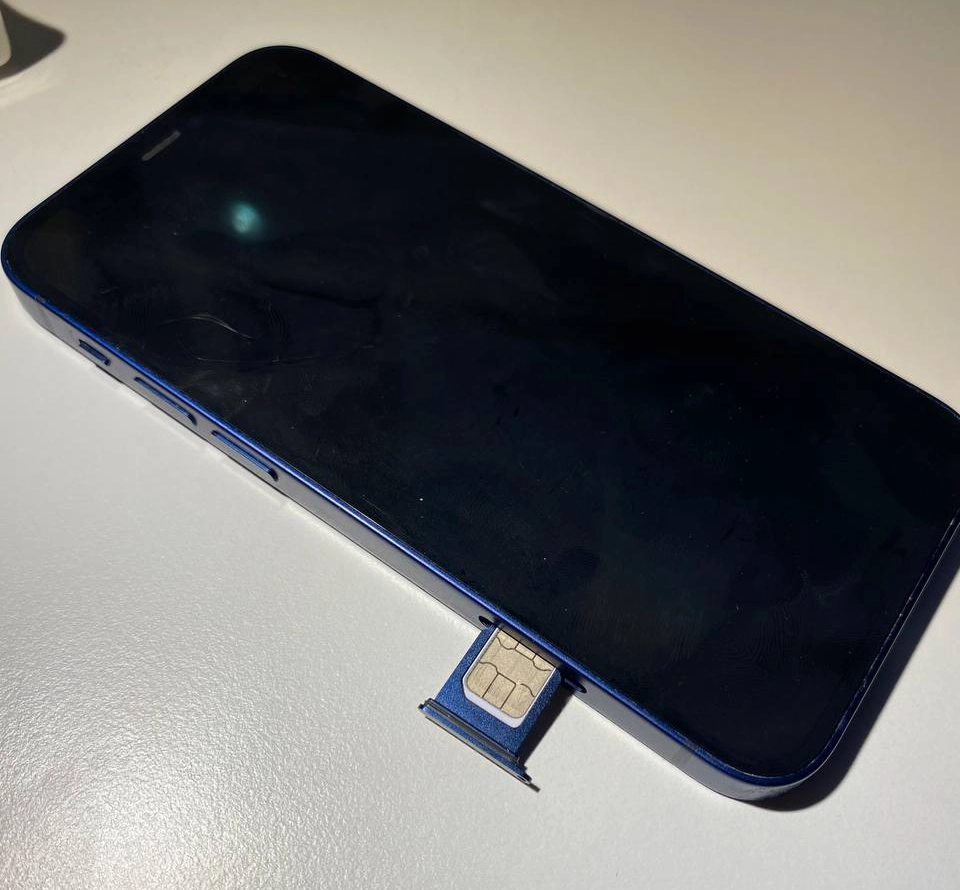
If you’re not replacing the SIM card with another one, insert the empty SIM card tray back into the iPhone. You can turn on your iPhone after reinserting the tray or replacing the SIM card. The device should recognize the absence of the SIM card or the presence of a new one and adjust accordingly.
Please note that you should be careful and gentle to avoid damaging the SIM card, the tray, or your iPhone. If you encounter any difficulties or resistance while inserting or removing the tray, do not force it. Double-check that you’re using the correct hole and the proper technique.

