Twitch Clips are a great way to share your favorite moments from a stream with friends or promote your stream to new viewers. Creating them can be intuitive for many users. However, there are a few nuances to be aware of.
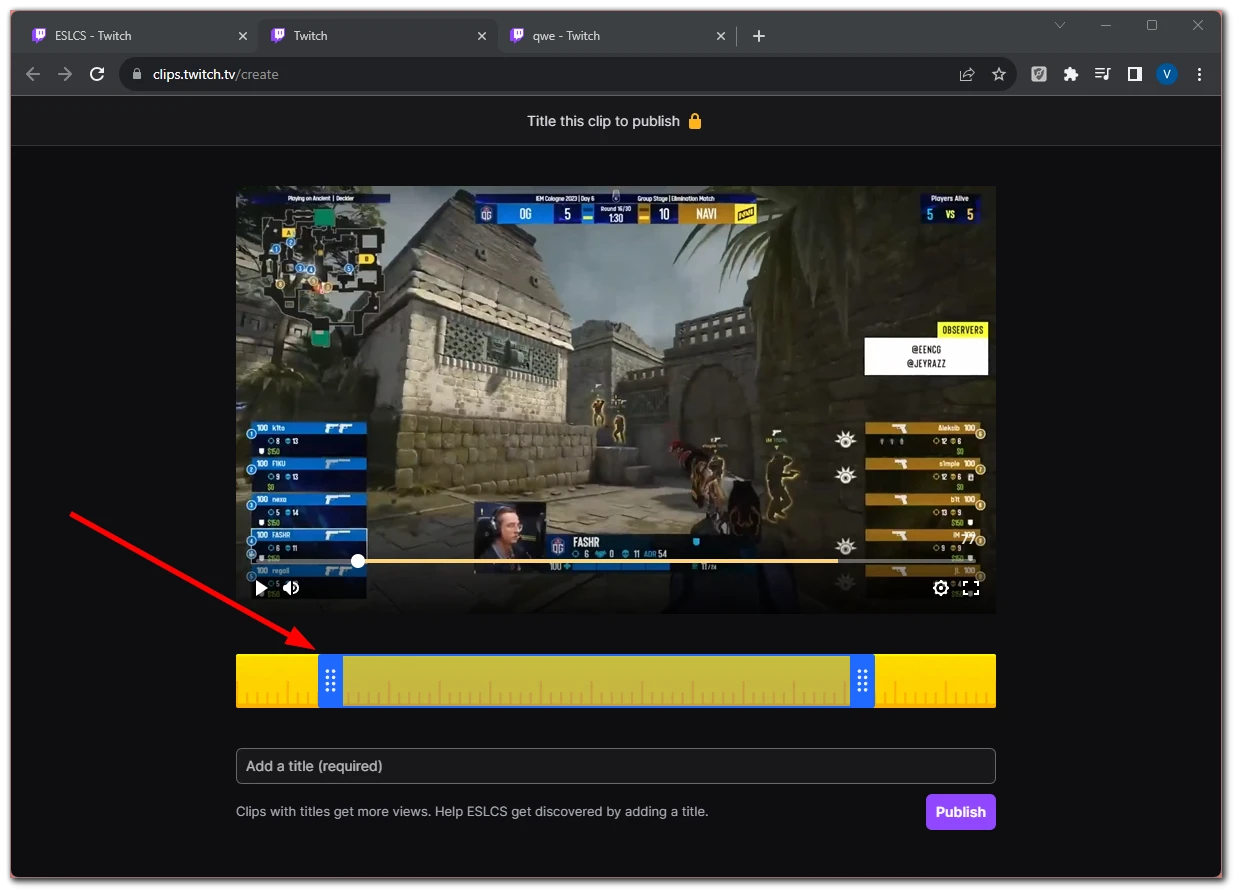
Once you click on the Clip icon, you are taken to a new tab with the editor. You will get a one-and-a-half-minute video from which you can make a maximum of 60 seconds or a minimum of 5 seconds clip. You can select the needed piece and adjust its length using a slider.
Finally, you only need to add a title and publish your Twitch clip. It may take a while, so you’ll have to wait.
For a more detailed guide with screenshots, check it out below.
How to create a clip on Twitch
You can create clips either on the Twitch website or in the app. Let’s take a look at how both methods work.
On Twitch website
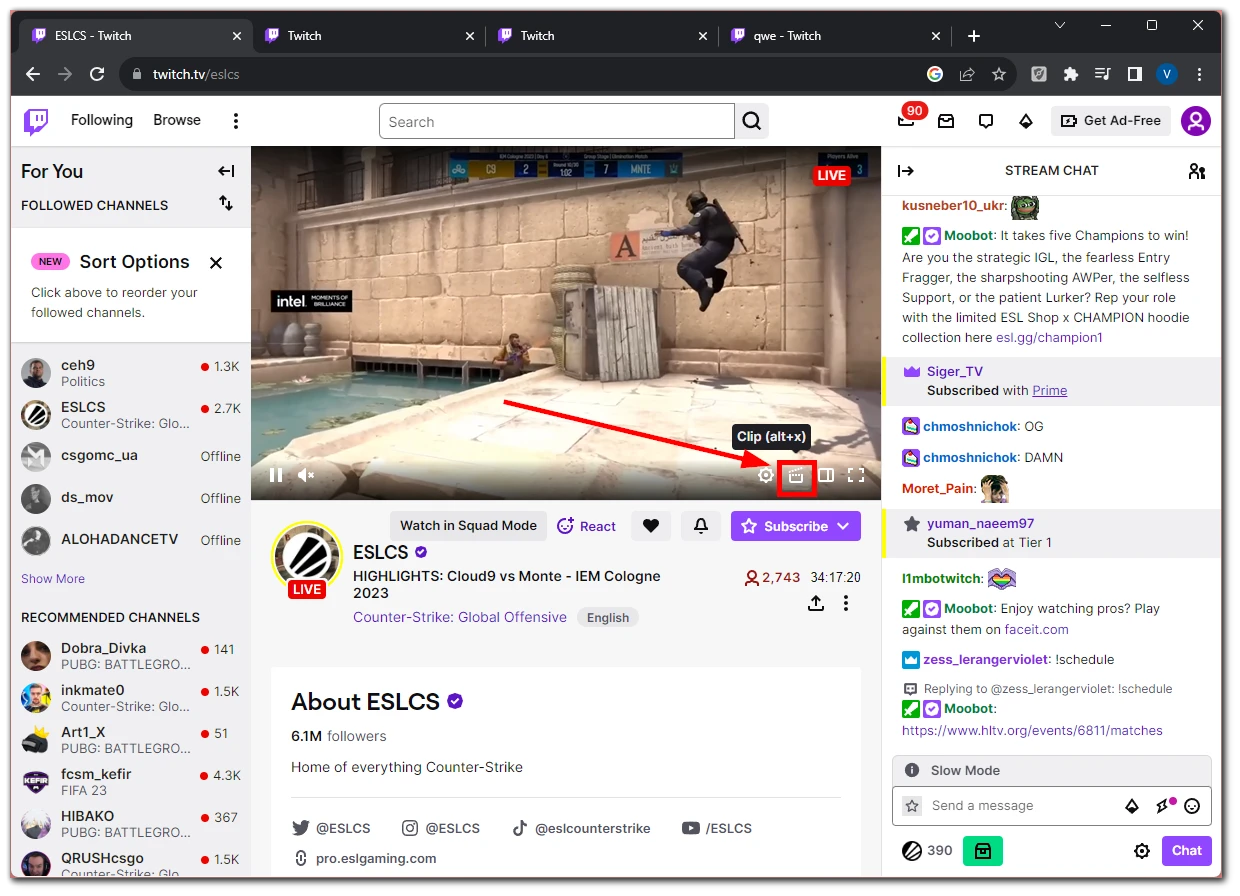
- Once on the stream, wait for the moment you want to clip and click on the Clip icon. It looks like a clapperboard and is located at the bottom right corner of the video player. Alternatively, you can press Alt + X on your keyboard.
- After that, a new window with the editor will show you the clip you’re about to create.
- Use a slider to select the needed piece. You can move the slider along the ruler by clicking on the middle of it. By clicking on the edges with dots, you can increase or decrease the length of the clip.
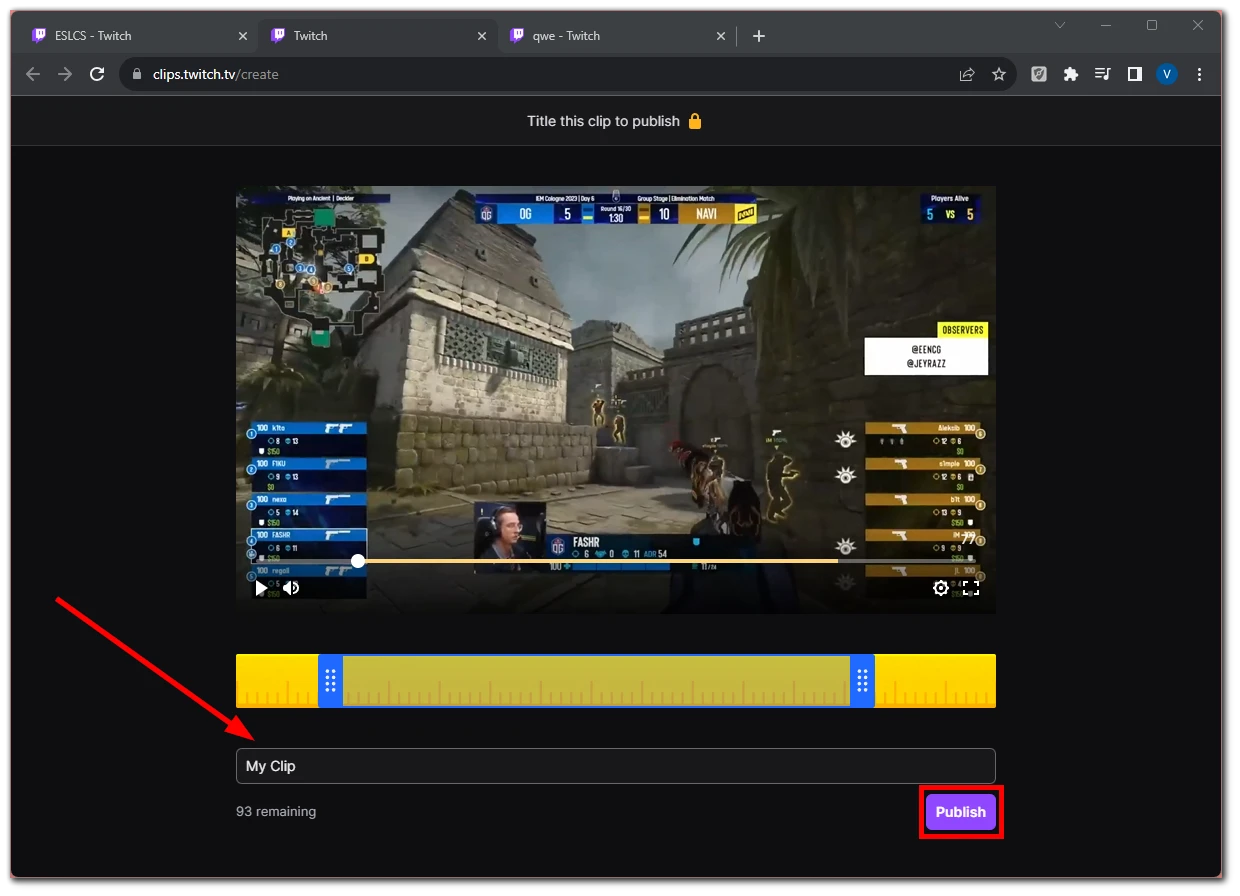
- Next, add a title to your clip and click Publish. The title can be up to 100 characters long.
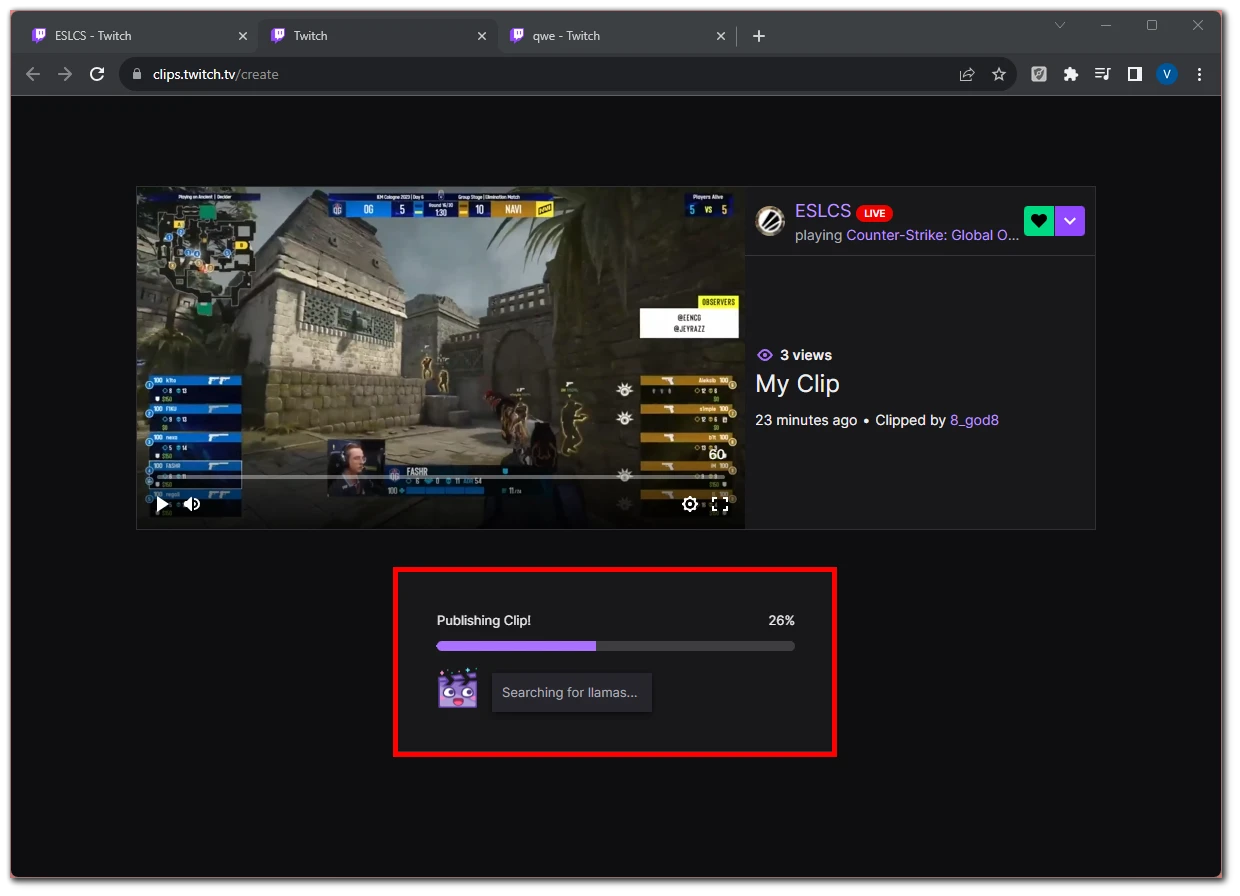
- The publishing process will begin. Wait until it is complete.
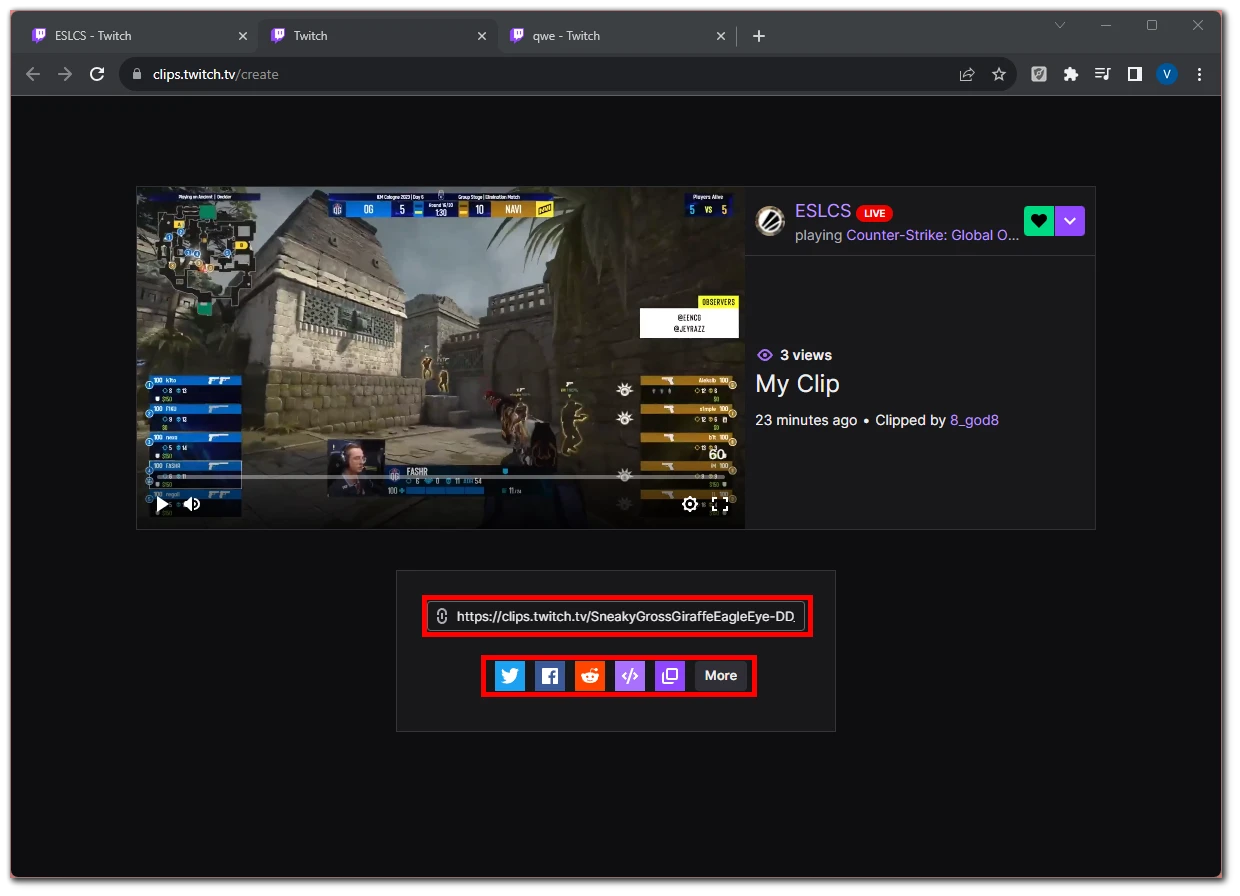
- Finally, you will get a URL you can copy by clicking on it. You can also use social media icons to share the clip with your followers.
On Twitch app
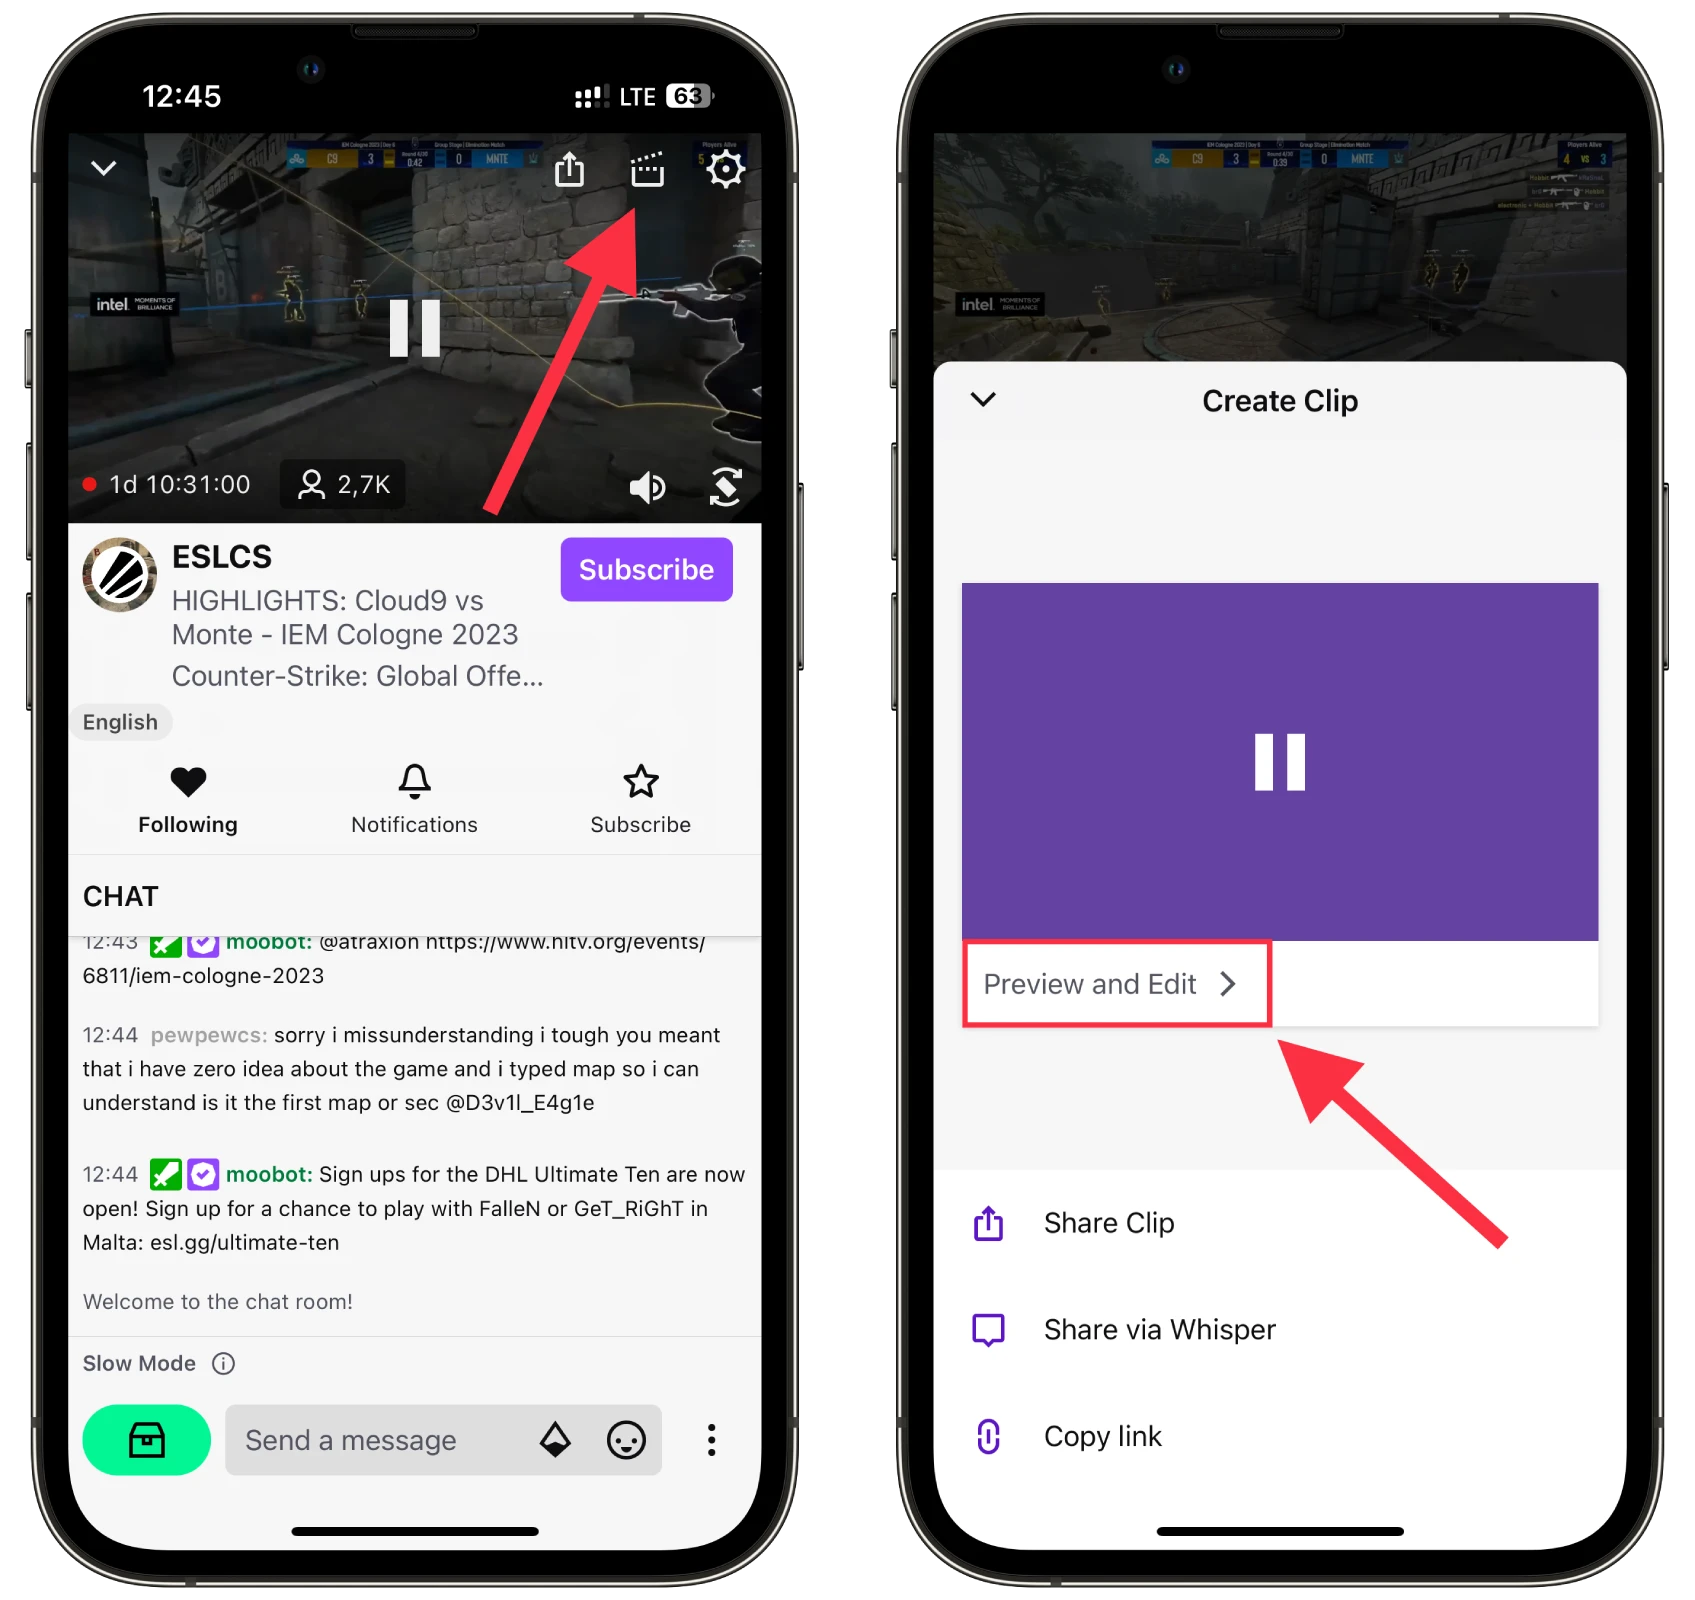
- Once on the stream, wait for the moment you want to clip and tap on the Clip icon in the playback menu.
- Then tap Preview and Edit if you want to change the length and title of your clip.
- Select Trim Clip and use the slider to select a needed piece and adjust the length. Tap Done.
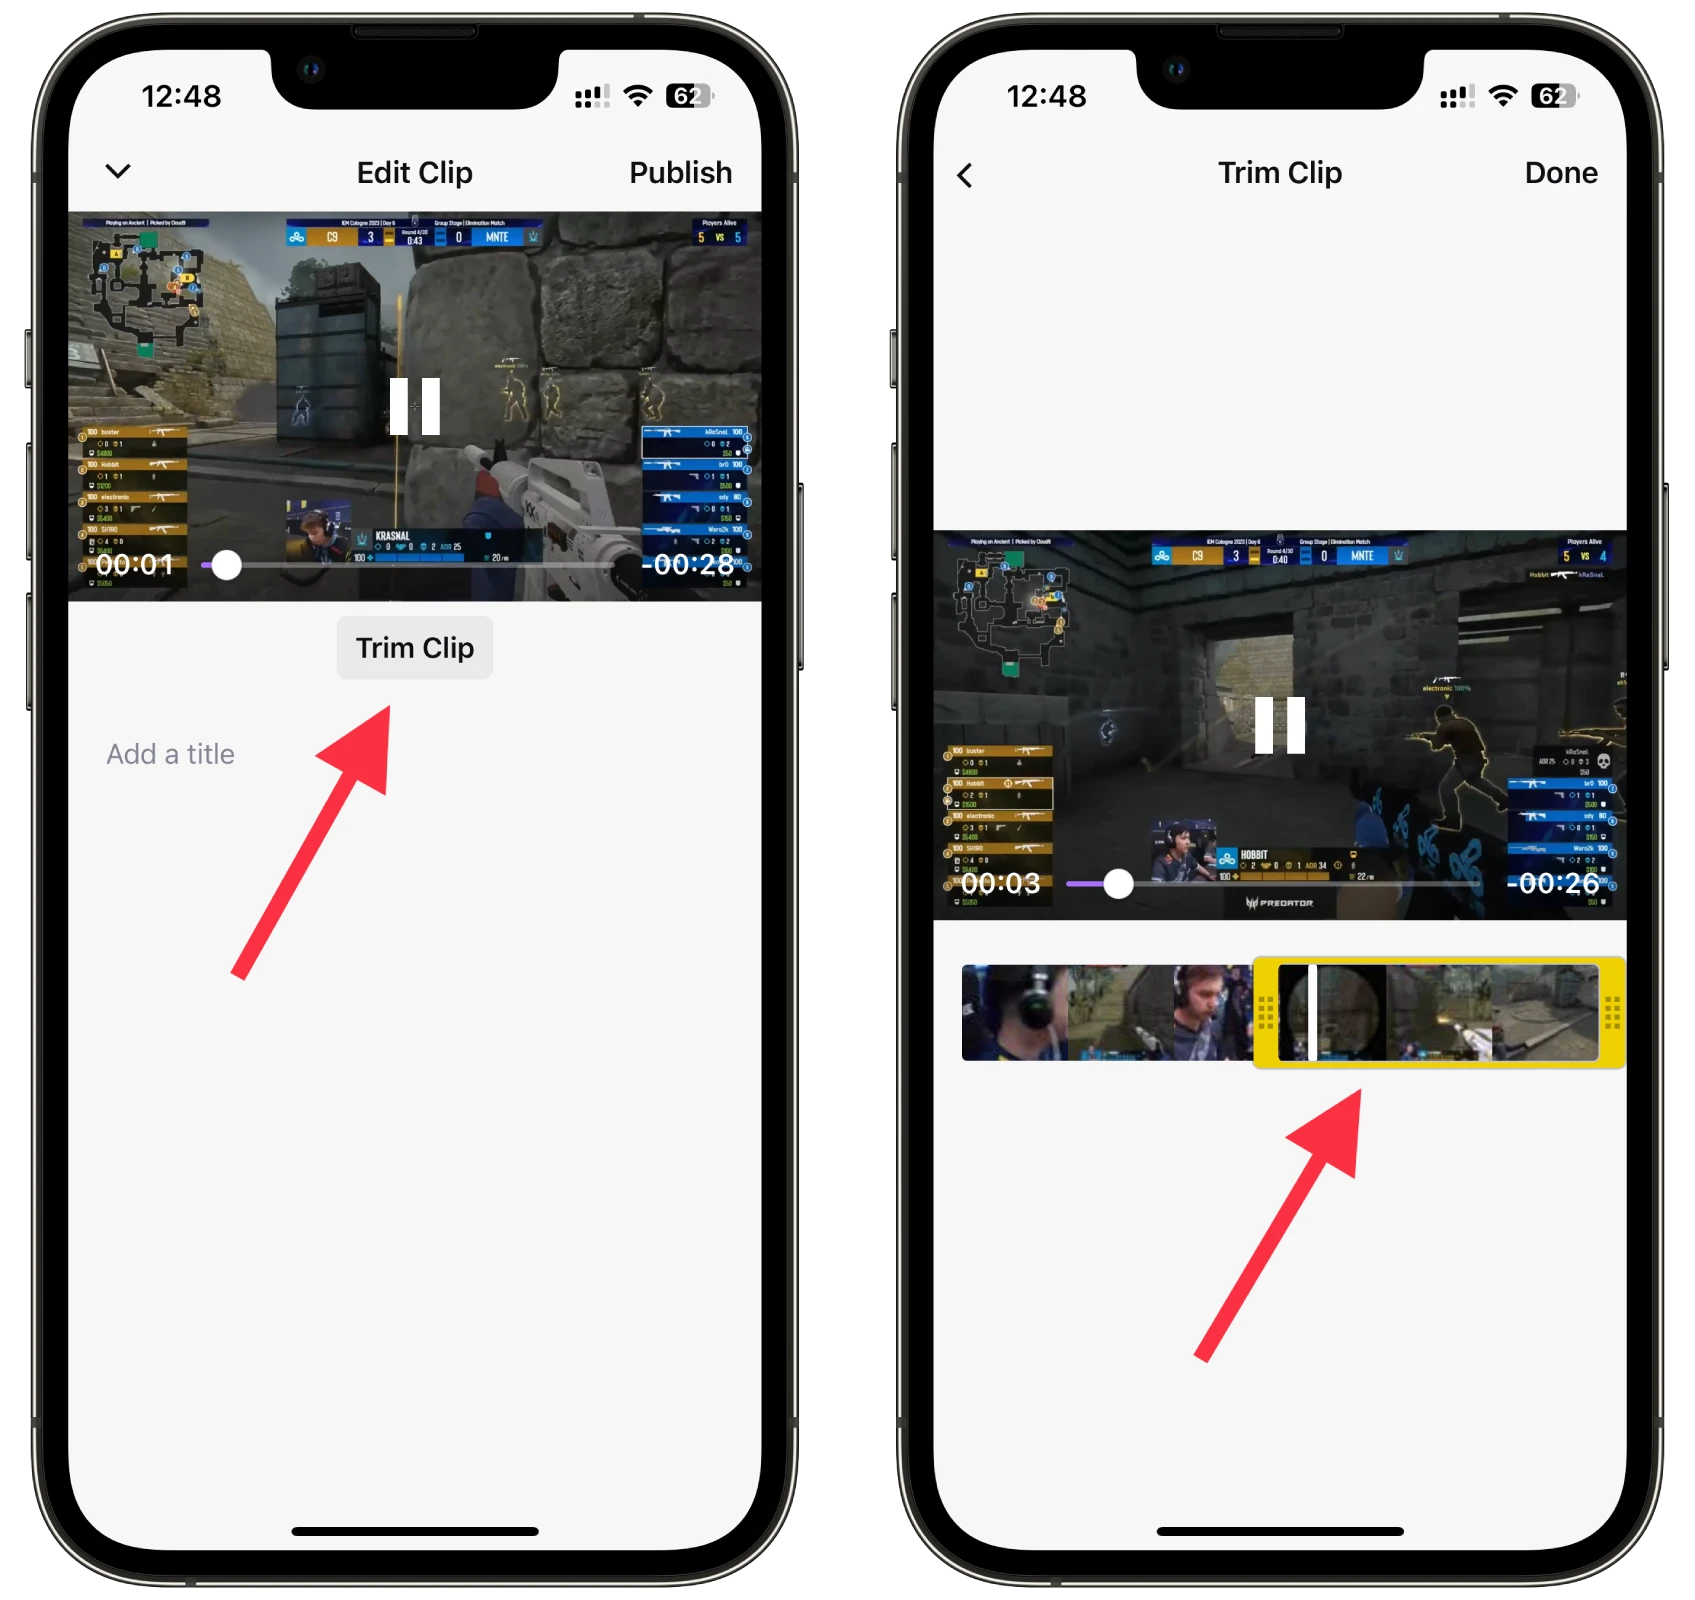
- Add a title and tap Publish.
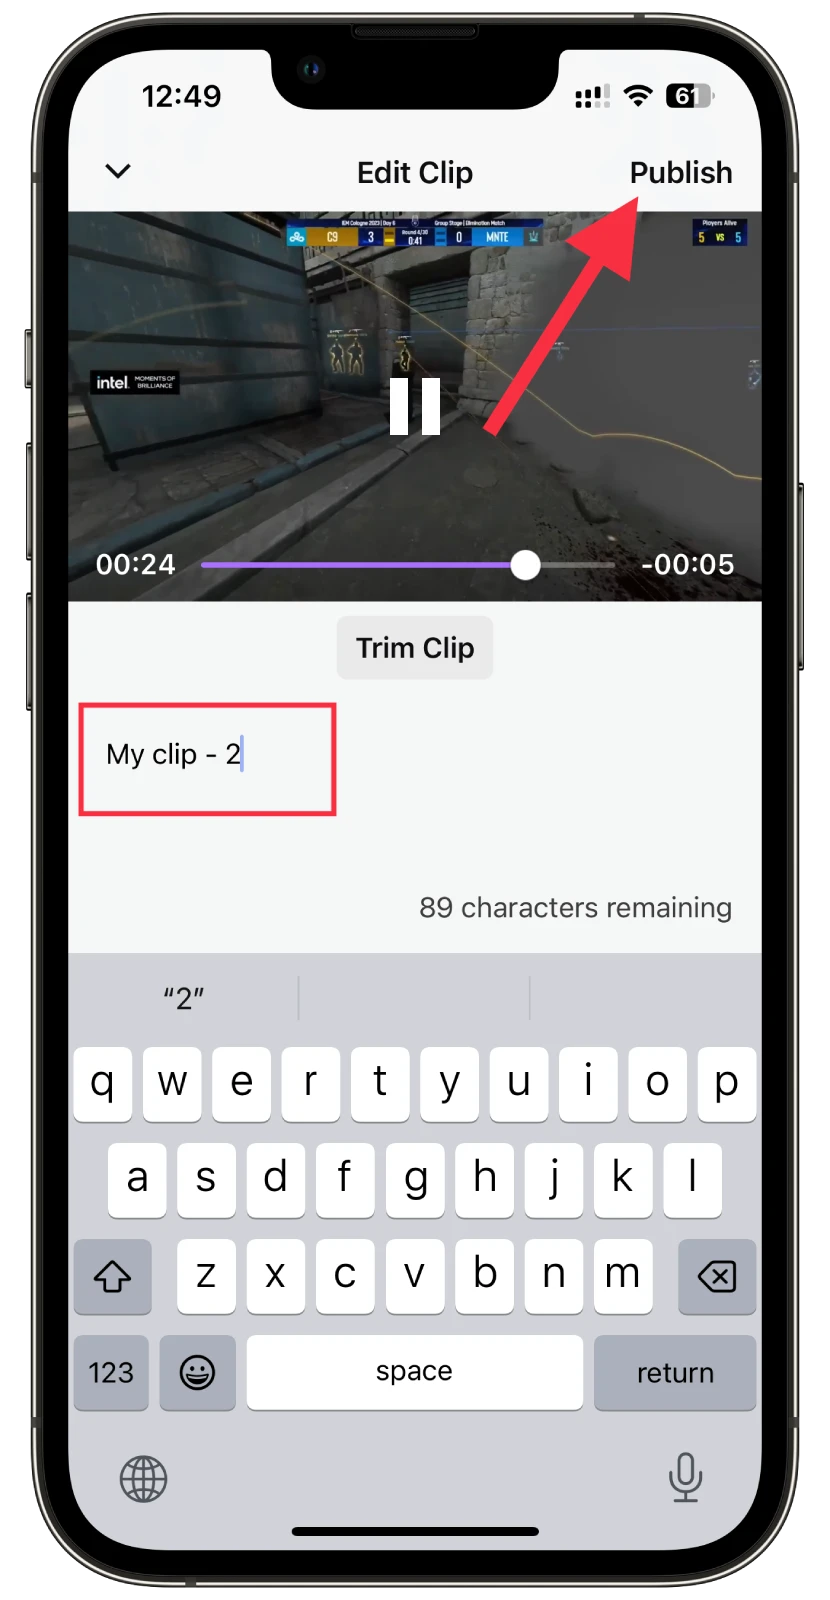
- If you want to share your clip, just return to the previous menu by tapping the arrow icon at the top left corner.
If you have created a clip from your personal stream, it will be published on your profile. If you clip someone else’s stream, you can find it in the Videos category of the streamer’s profile.
You can also manage the clips you have created by visiting the Clips tab in the Creator Dashboard. But this is only available via the website. Let’s go over everything in detail in the next paragraph.
Where are my Twitch clips?
You can find your clips directly on the channel page. However, there’s a slight difference in how it’s done through the website and the app.
If you want to find your clip using the Twitch website, follow these steps:
- Go to the channel of the streamer you clipped.
- Open the Videos tab and use filters.
- Select Clips and Top 24H.
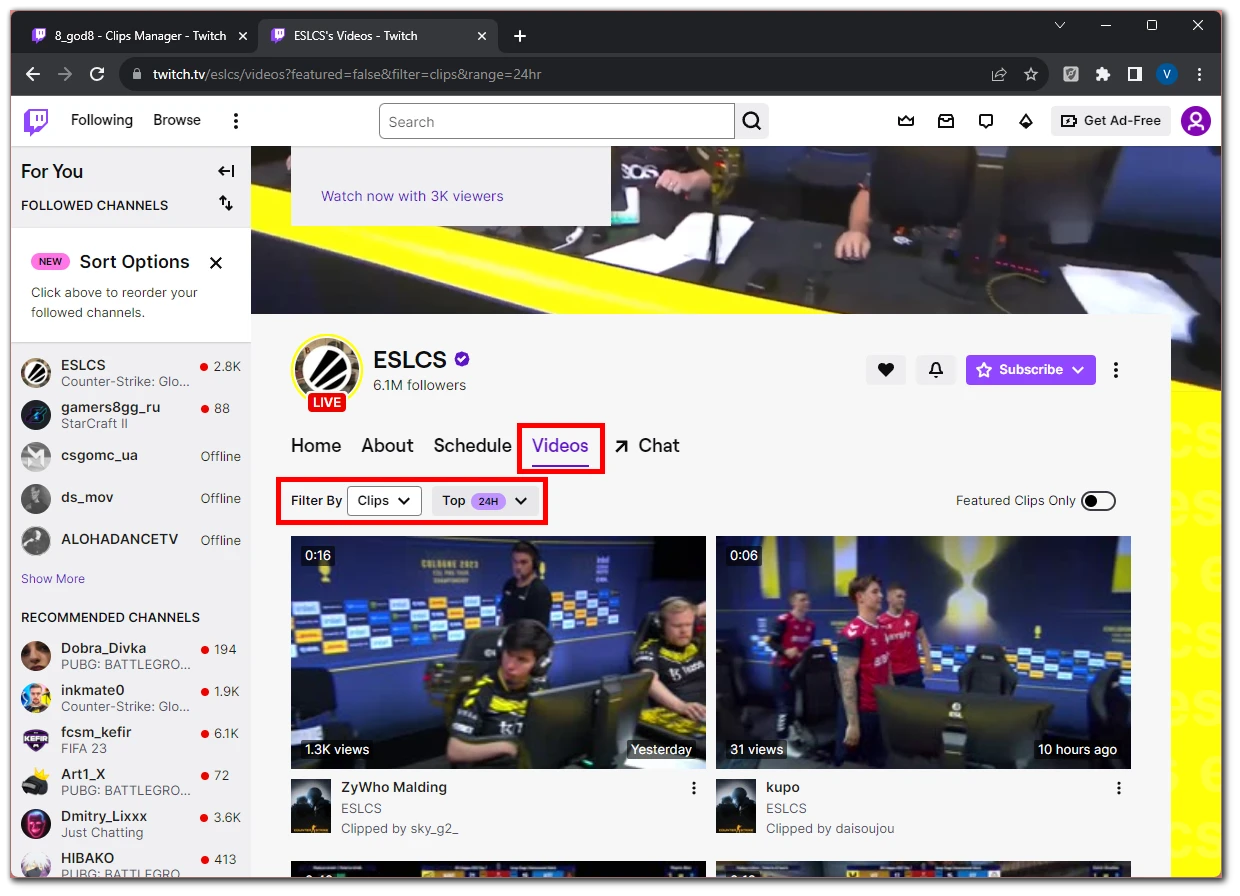
- After that, toggle off Featured Clips Only.
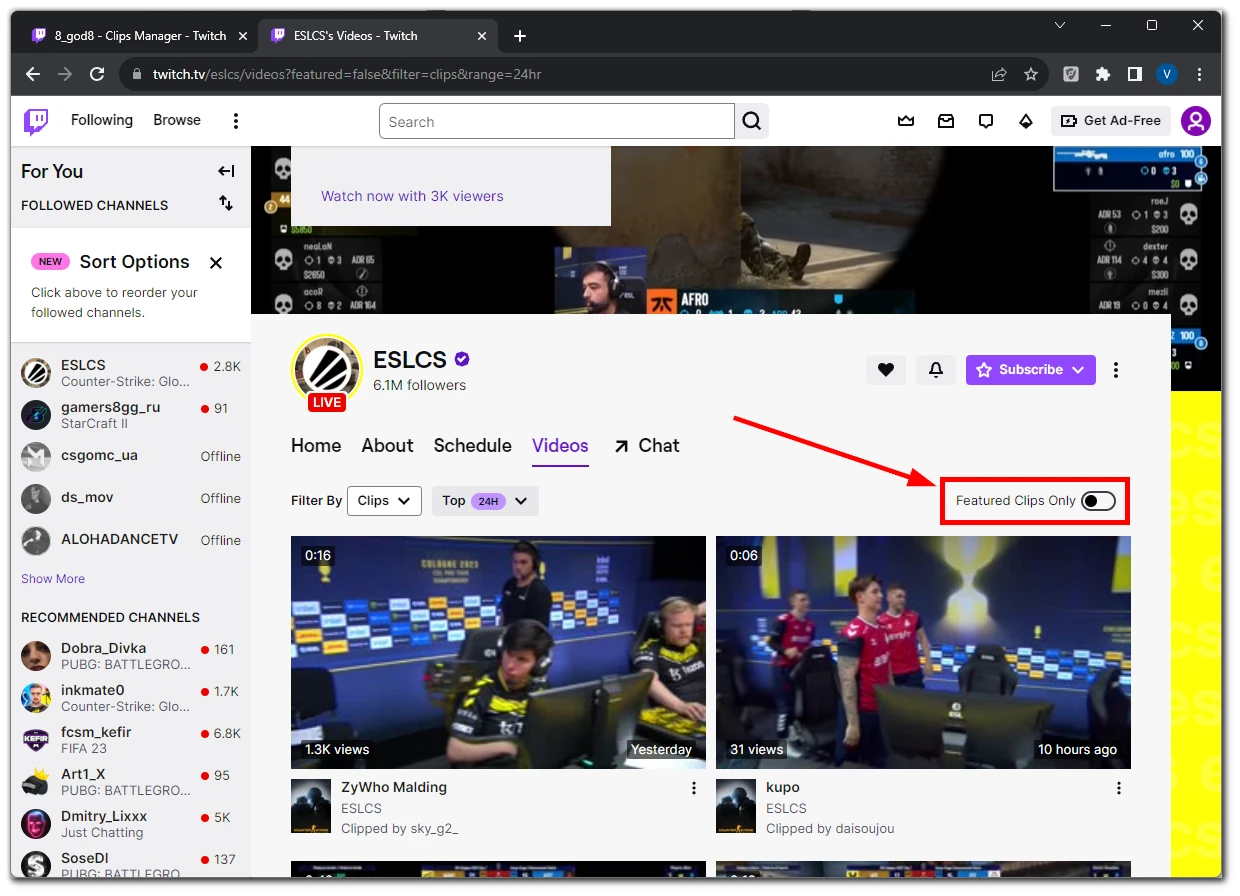
You should now see all posted clips from the last 24 hours. You need to scroll through and find yours among them.
To find your clip on the Twitch app, do the following:
- Go to the channel of the streamer you clipped and open the Clips tab.
- Tap Filter By and turn off the Featured Clips Only option.
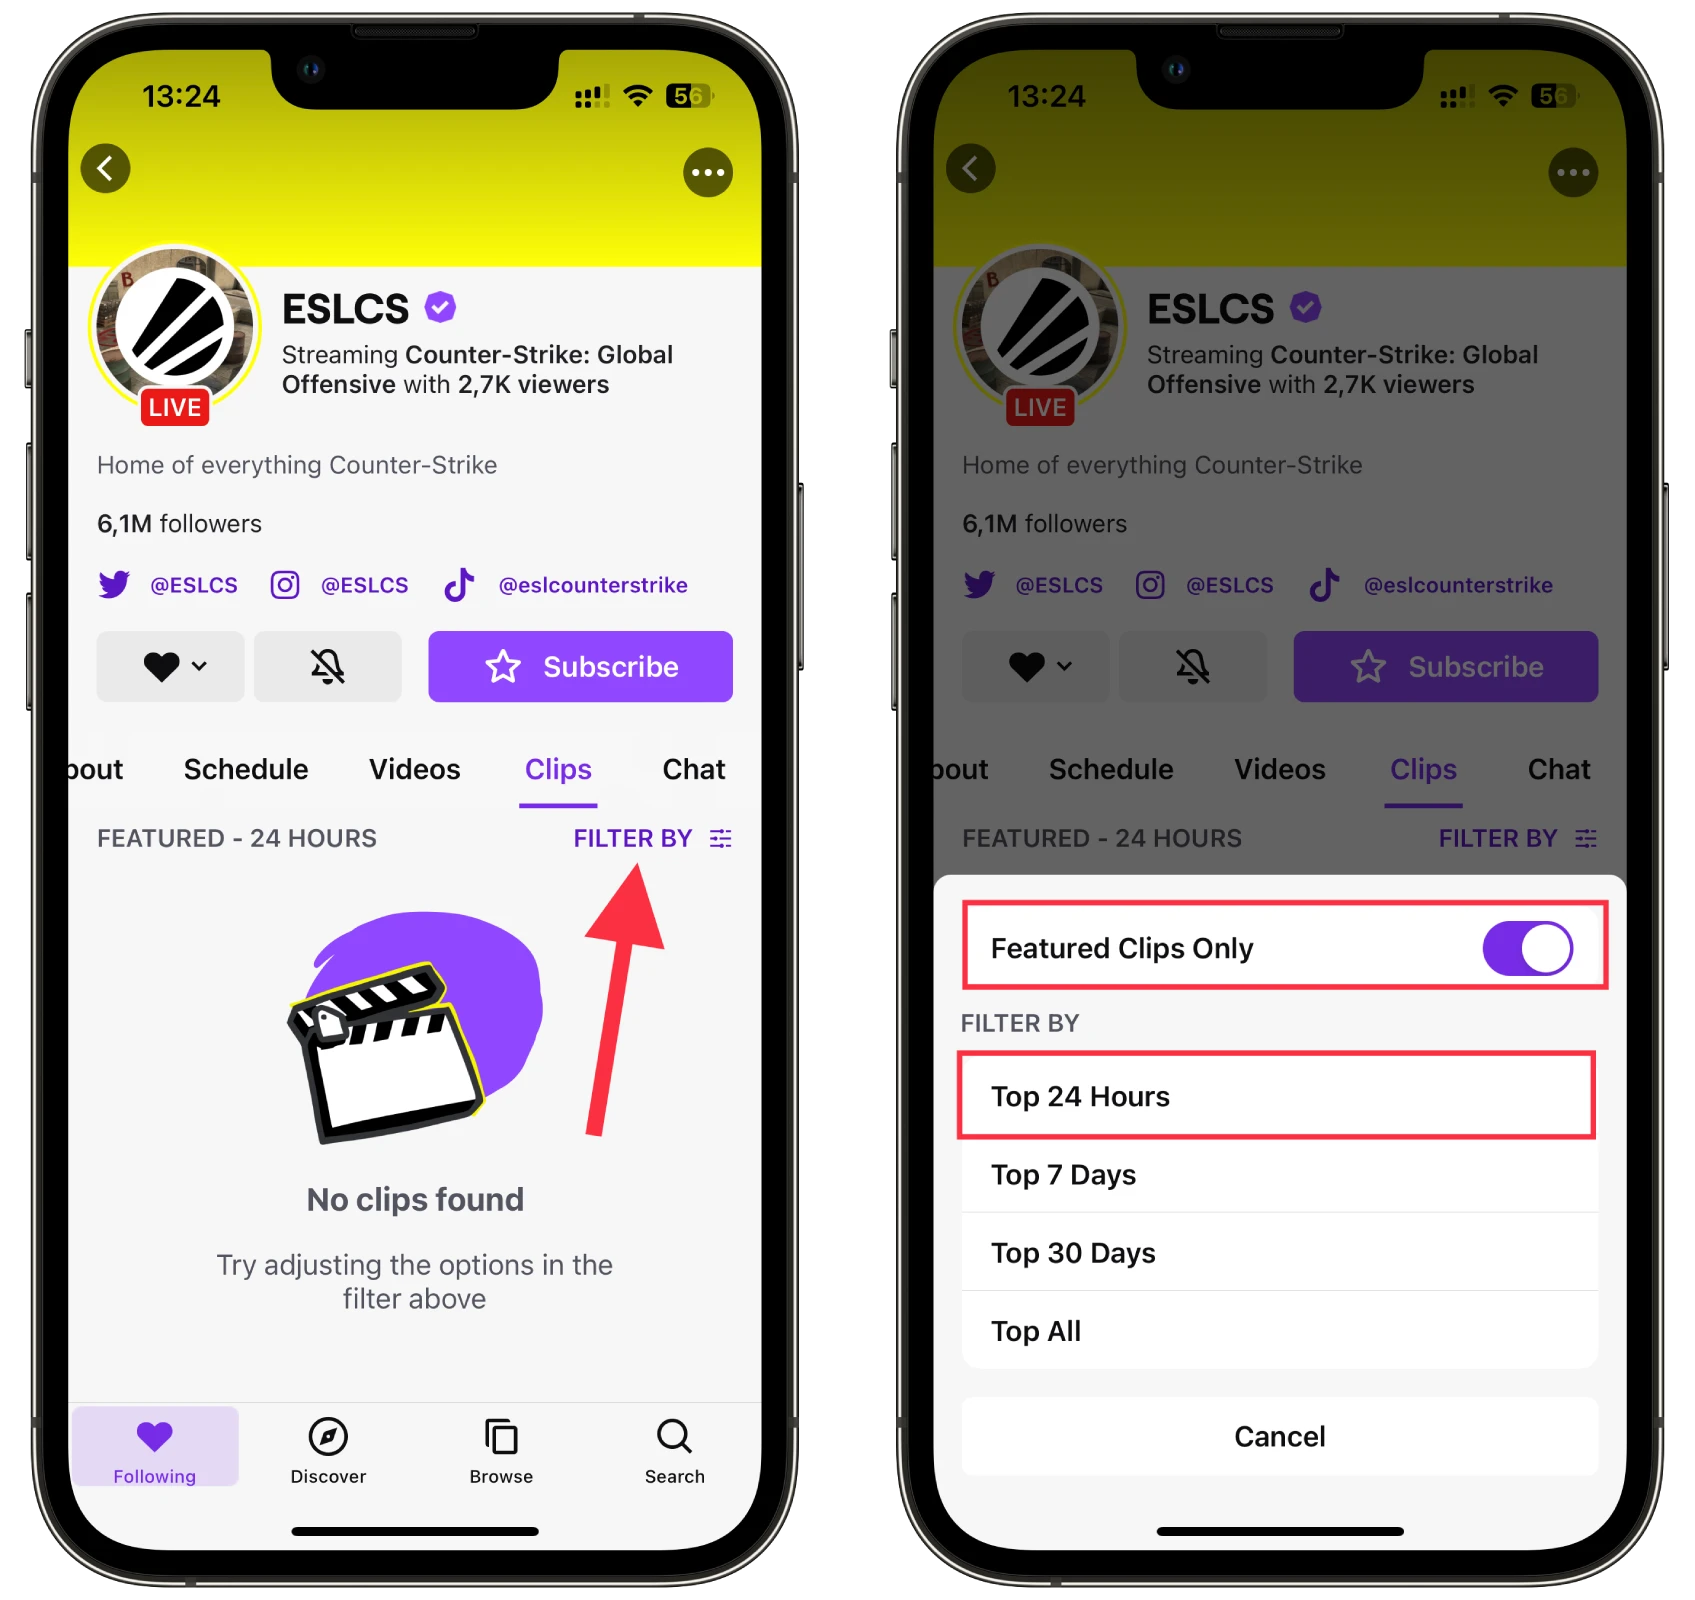
Likewise, scroll through the feed and find your clip.
How to manage clips on Twitch
Twitch provides streamers with a platform to analyze and manage content, including clips. It is called Creator Dashboard. Here you will find a list of all your clips.
So here’s how you can access this list:
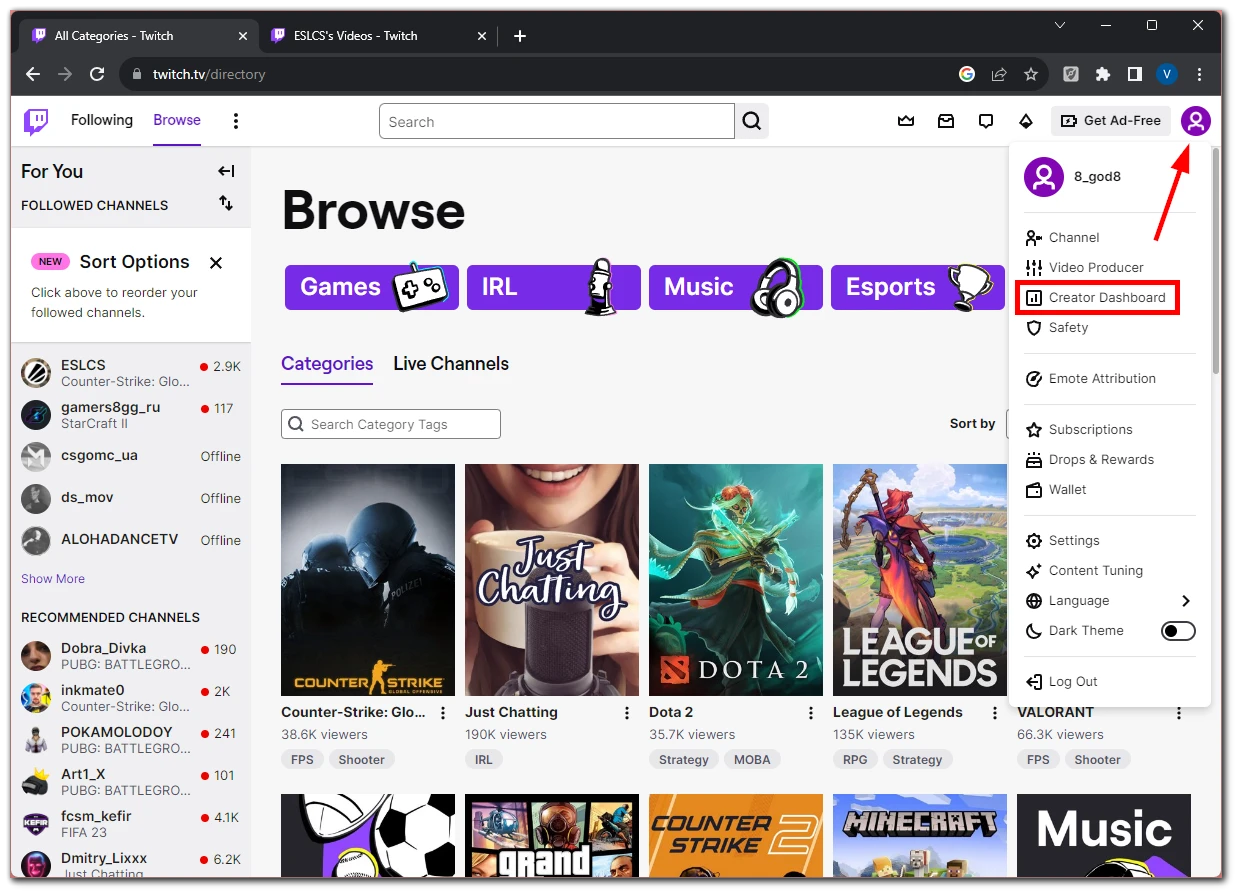
- Click on your profile icon and select Creator Dashboard.
- Next, navigate to Content and open the Clips tab.
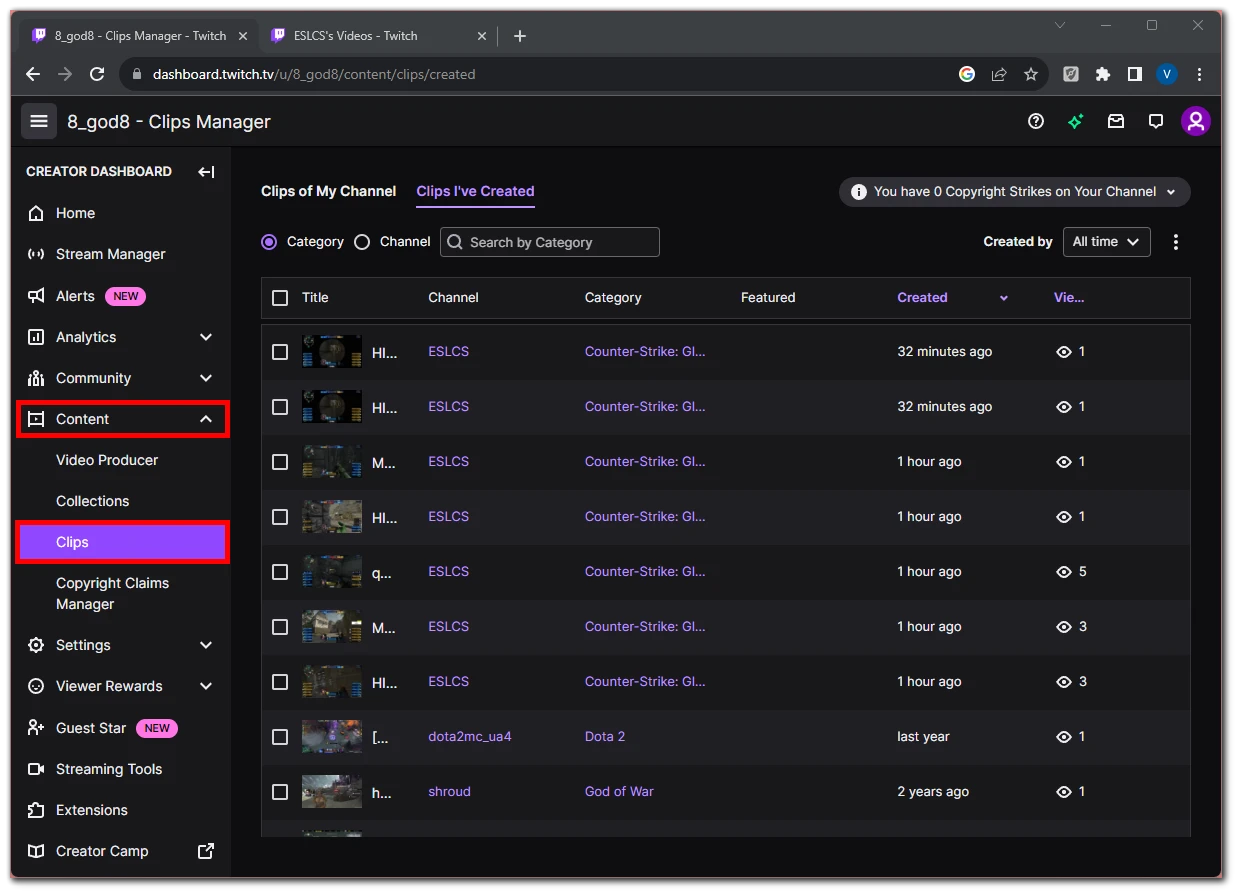
- Here you can also see 2 tabs: Clips of My Channel and Clips I’ve Created. Pick what you need.
- Next, click on the clip. You will see the preview and other options, such as Share, Update Clip Title, and Delete.
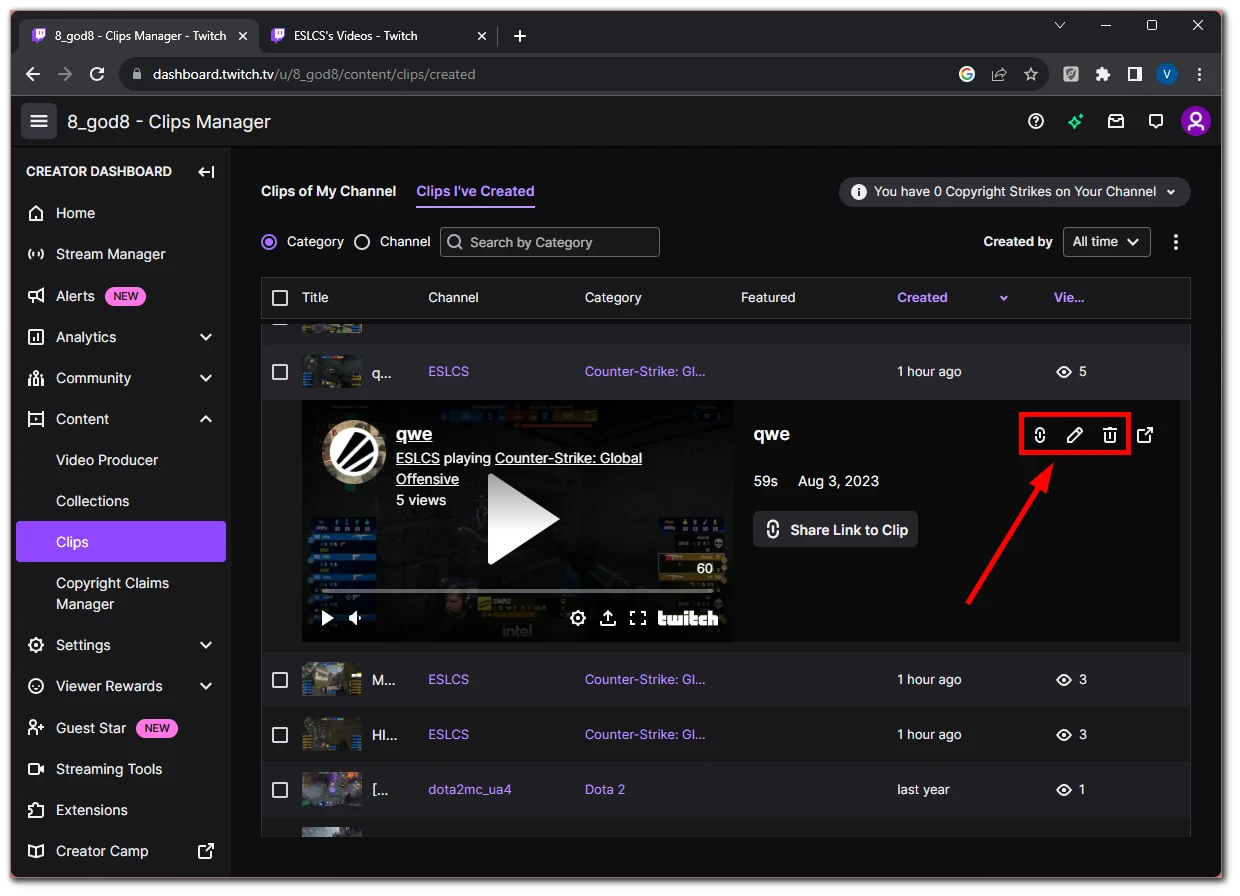
There you can also see other relevant information such as the title, creator of the original movie, broadcast game, creation date, and the number of views of the clip.

