If you order many different items on Amazon, your shopping list will be quite long. It may be helpful to clear your Purchase History from time to time. This will help you eliminate unnecessary information and hide your purchases from prying eyes.
You can’t just delete your Amazon purchase history, but there is a trick to hide your purchases so they won’t be visible. This is especially useful if others have access to your computer and you wouldn’t want anyone to see what you’ve bought. For example, if you purchased a Christmas present in advance or didn’t want anyone to see the List of your recent purchases.
Is it possible to delete your Amazon History?
At this time, Amazon has not given users or sellers the option to delete order history on their service. This is to ensure that your order is permanently linked to your Amazon Account so it can be tracked in the Amazon system.
On the other hand, you can hide your order. Of course, this is not ideal, as those who know about the order archive and have access to your account can quickly gain access to it. This will remove the order from your order list, but it will remain on your account. Amazon has a similar policy with feedback.
To get rid of your order history, you can only create your new account and deactivate your old account. I would recommend not buying sensitive items through your main Amazon account. You can make another account that only you have access to.
How to archive your Amazon order
You must use the service’s desktop version to archive an order on Amazon. The thing is that this function is not available in the apps for iPhone, Android, or iPad. So it would be best if you opened Amazon with a browser on your computer.
- At the top right of the screen, click on Returns & Orders.
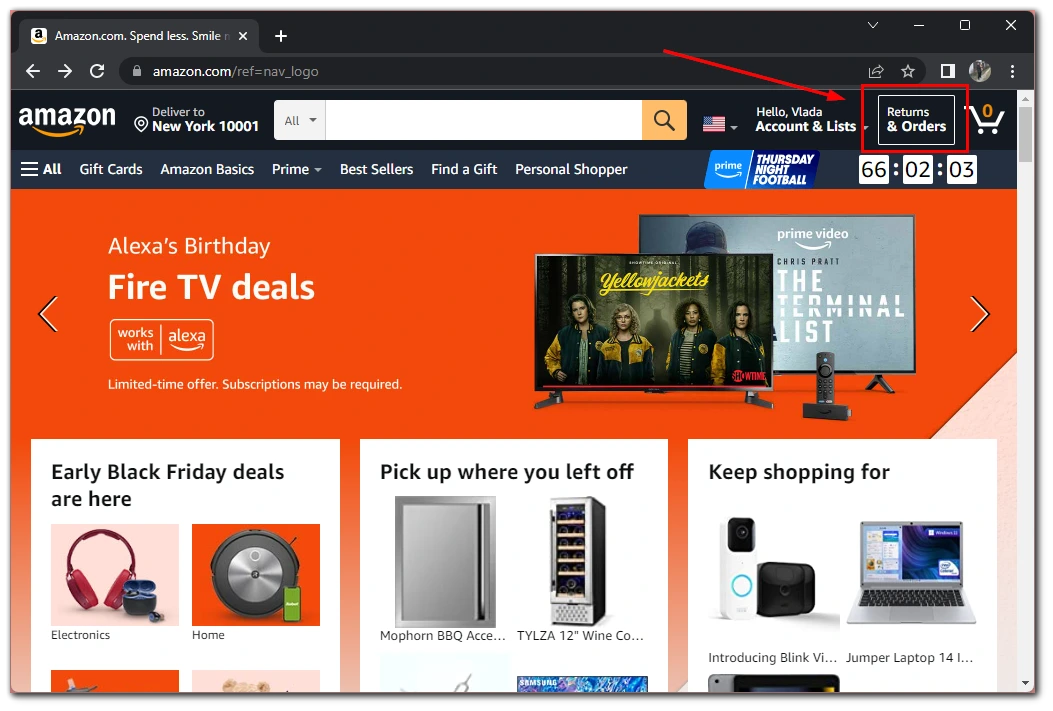
- A list of your orders will appear in front of you. Under the order you want to archive, click on Archive Order.
- In the end, you must confirm your decision in the pop-up window. Click on Archive Order.
Your order will be immediately archived. Remember that Amazon only allows you to archive up to 500 charges. If you exceed this limit, you will have to remove some orders. You can place any order in the archive without any restrictions.
How to see archived Amazon orders
You will also have to use your computer’s desktop version of Amazon to view your archive orders. You can do this at any time. Once you place an order in the archive, it will be displayed immediately without any delays. To do this:
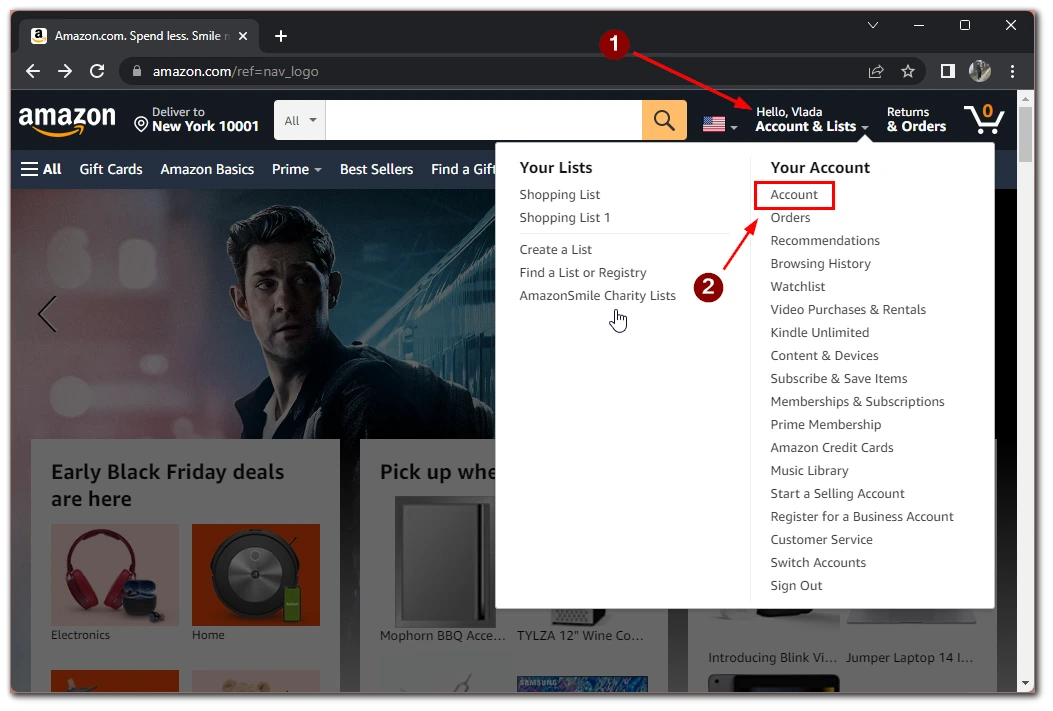
- Click on the Account & Lists button at the top of the screen.
- In the pop-up menu, click on Accounts.
- Next, in the pop-up menu, select Archive Orders.
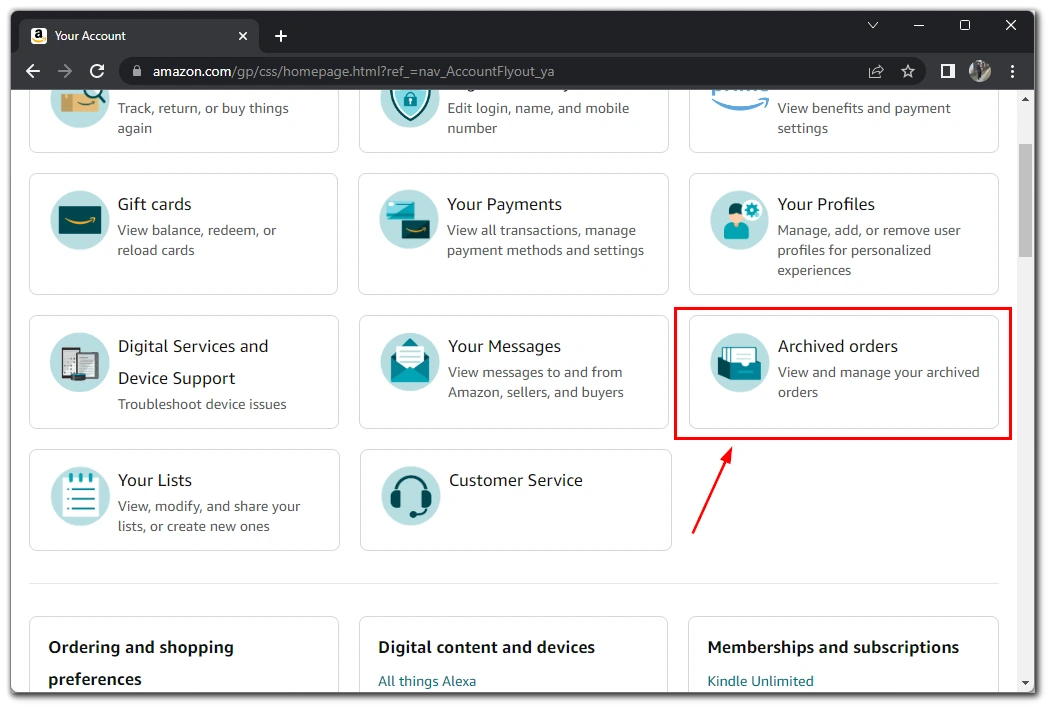
A list of all archived orders in your account will appear in front of you. To return your order to the List of regular orders, you need to click on the Unarchive Order button under your order. There are no restrictions on pulling orders from the archive either.
How to show Product Viewing History on Amazon
When you buy many items on amazon, you probably look at many different offers. In order not to lose various exciting products that you are interested in but didn’t have time to buy them immediately, you can view Product Viewing History:
- Click on Accounts & Lists at the top of the screen to get started.
- In the pop-up menu, you need to select Browsing History.
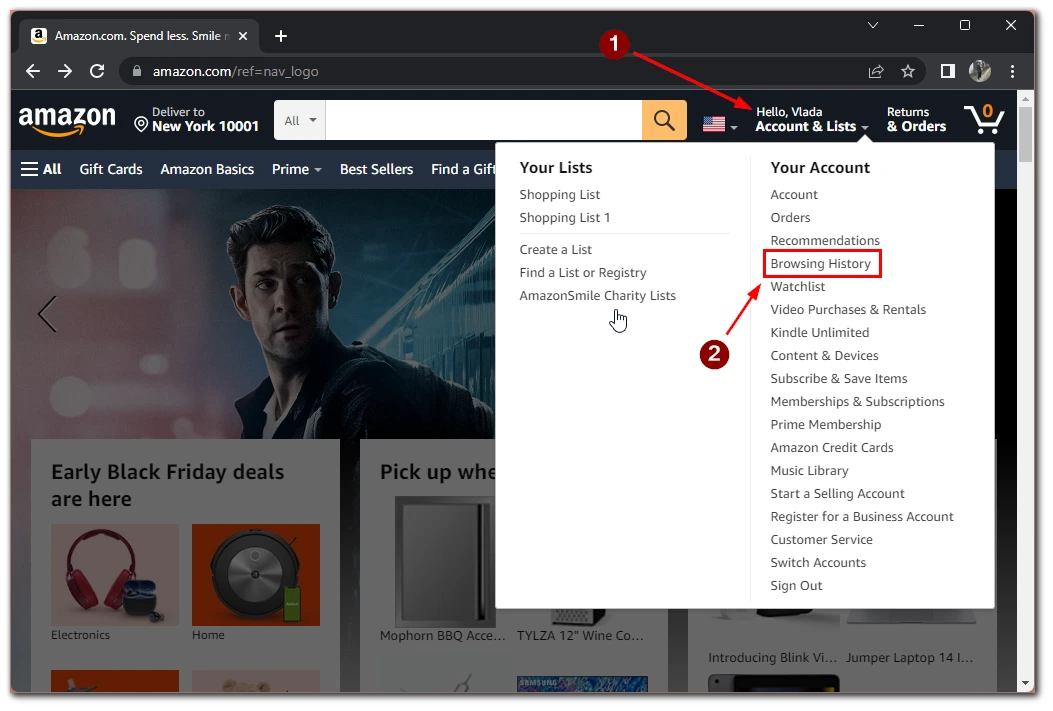
This will include a list of all the products you’ve viewed on Amazon. You can easily remove an item from this List by clicking the Remove from Browsing button. This List is also available from the mobile app. To do this, click on the silhouette icon and the Your Browsing History button.
How to create your List on Amazon
If you’ve already cleared your List of past orders, it’s time to think about preparing a new shopping list. At Amazon, you can assemble a shopping list in your account to add everything you need and purchase it later when you have the finances. To create Your List on Amazon, you need to:
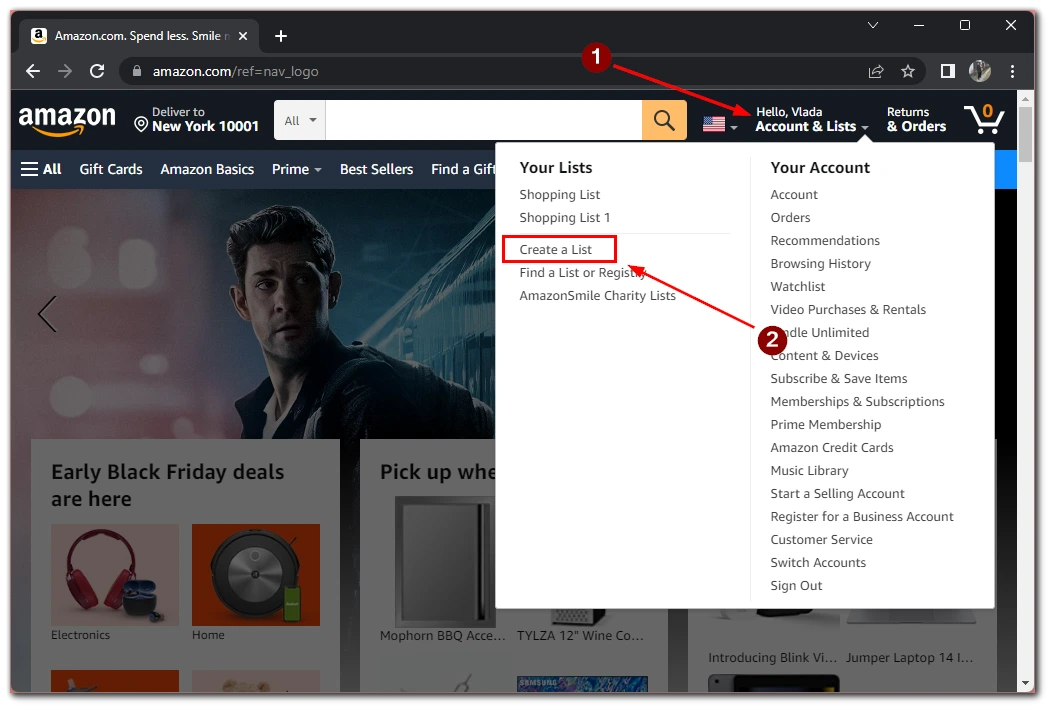
- Hover your mouse over Accounts & Lists.
- In the drop-down menu, you need to click on Create Your List.
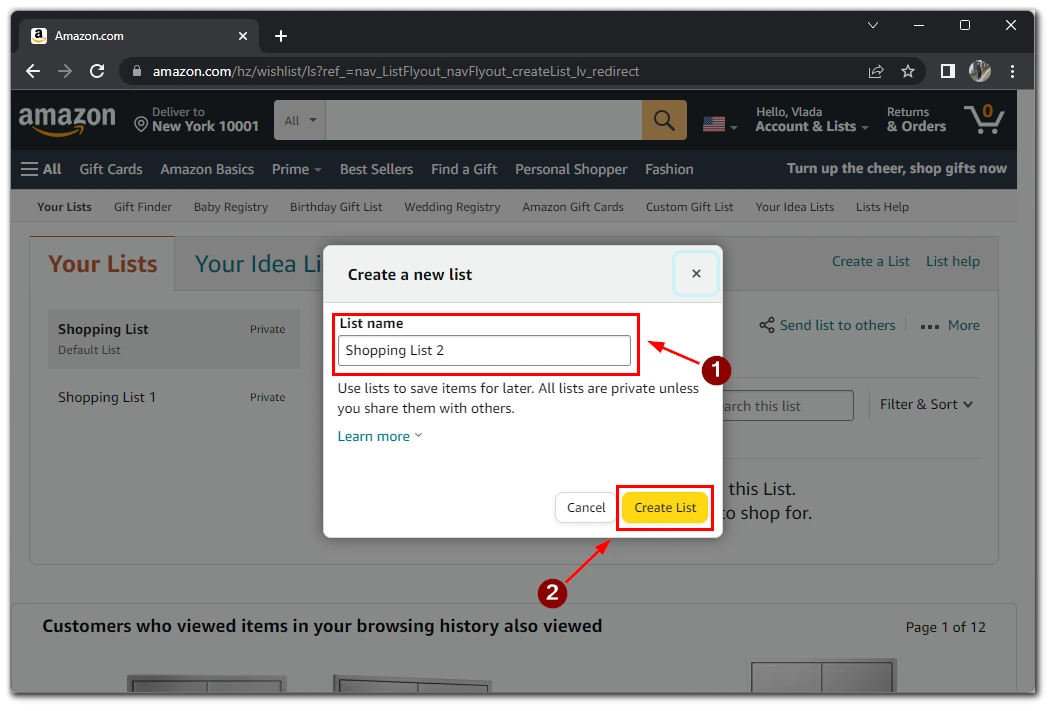
- Next, you’ll need to create a name for your List and click Create List.
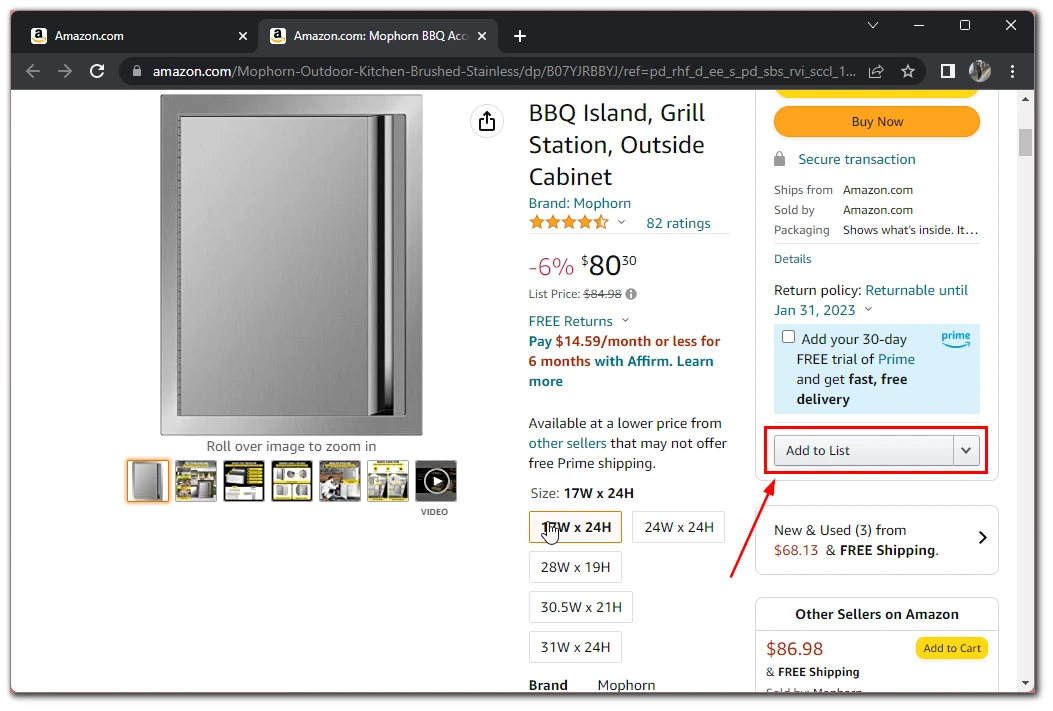
- To add items to your List, you’ll need to open the object of interest and click on Add to List under its price.
Done. You have created your first List. Remember that on your list page, you can add people with the Invite button. So you can add your family and do your shopping together or show your friends what you want for your birthday, for example.


