A year ago, I purchased my first iPad. I will say immediately that I am thrilled with the purchase and use it constantly. During this period, I have found some incredibly convenient features that often help me and make the iPad an even more attractive device.
You may disagree with my choice and think some other features deserve more attention. However, below I want to tell you about a bunch of features that I use on the iPad.
Using a screenshot of the whole page
The function to screenshot an entire web page is also available on the iPhone. However, I have never used it on my iPhone, but it is very convenient in the case of an iPad. Since my work is related to websites and information retrieval, I often have to save something. And taking multiple screenshots on the same page is very uncomfortable. Using the “Full page” button, I can create a file with a full web page, which can then scroll as when viewing in a web browser.
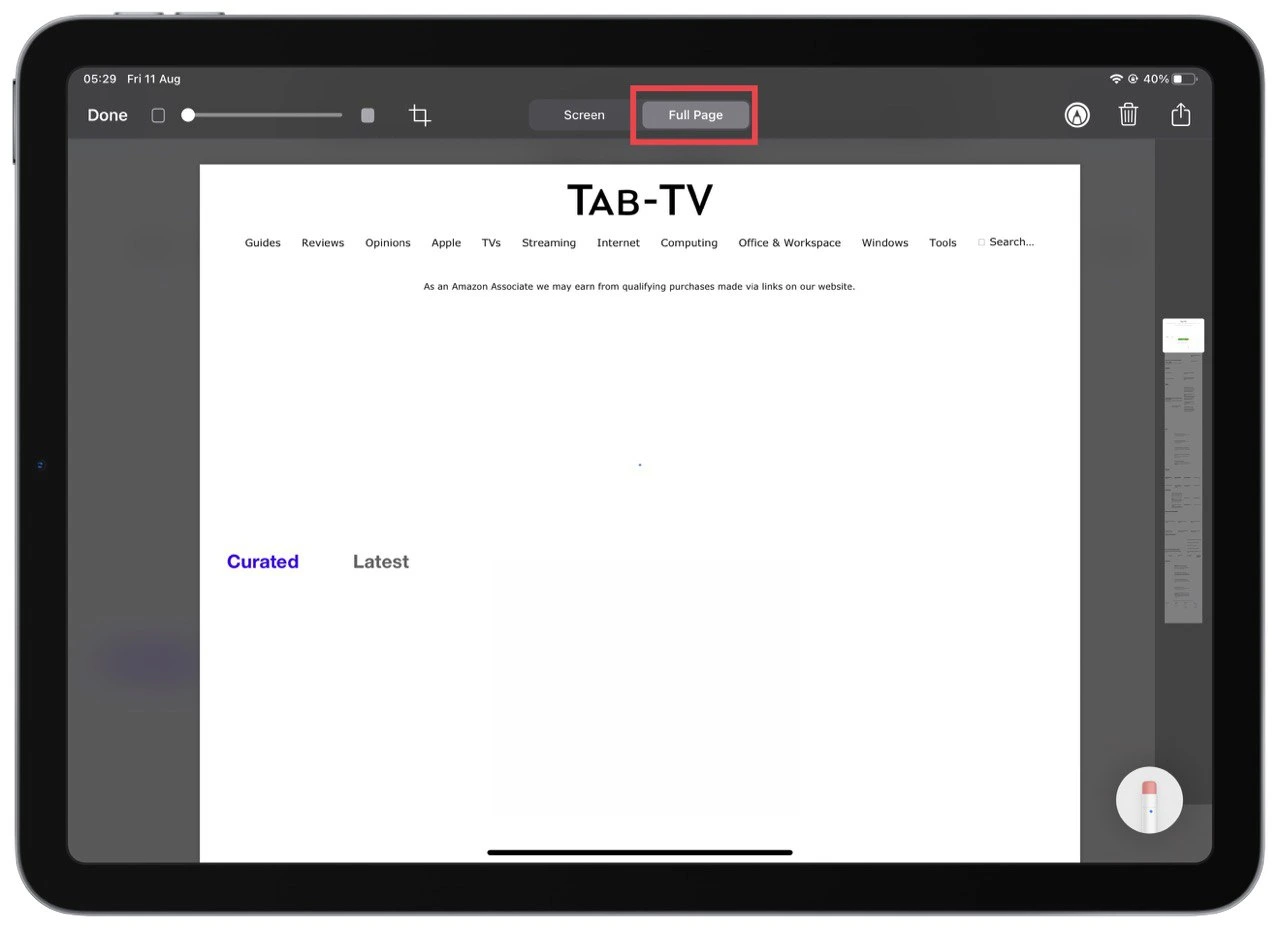
This is very easy to do. Just take a screenshot, and press the Full Page button at the top of the screen when editing it. Note that such a screenshot is saved as a PDF file on the iPad, not a screenshot in the photo library.
Use your iPad as a Second screen for Mac
Another exciting use of the iPad is the ability to connect it to your Mac as an additional display. This is possible with Hand Off feature enabled. Also, both devices must be connected to the same Apple ID.
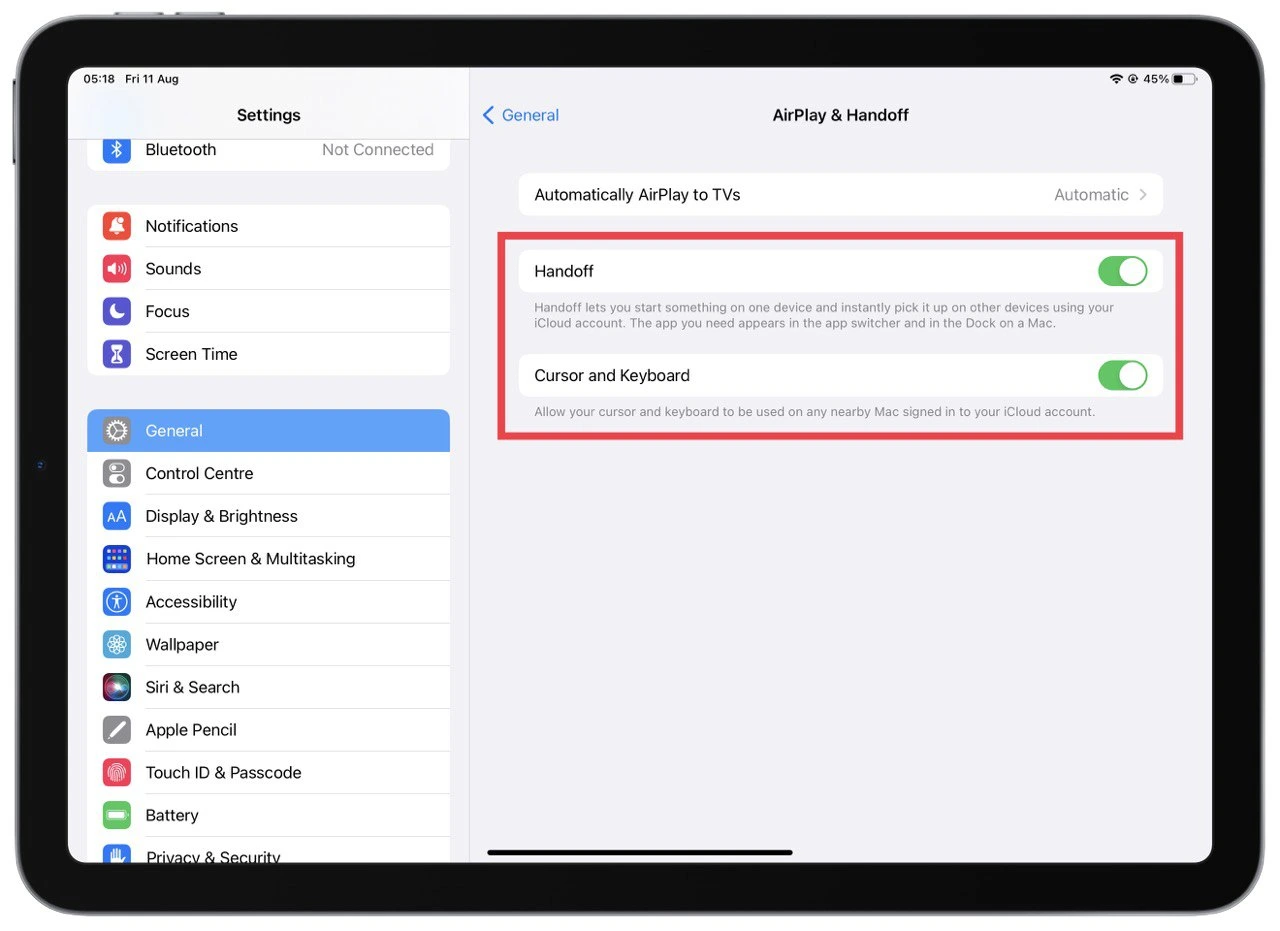
Of course, the iPad can’t be a full-fledged replacement for a second monitor. But starting some activities on a Mac and continuing them on an iPad is convenient. For example, drawing and editing images. I would argue that the iPad can be turned into an expensive graphics tablet for the Mac.
Use iPad keyboards shortcuts
If you use your iPad for word processing, you probably already have an external Bluetooth keyboard or a case with a built-in keyboard. However, not everyone knows that iPad supports keyboard shortcuts just like Macs.
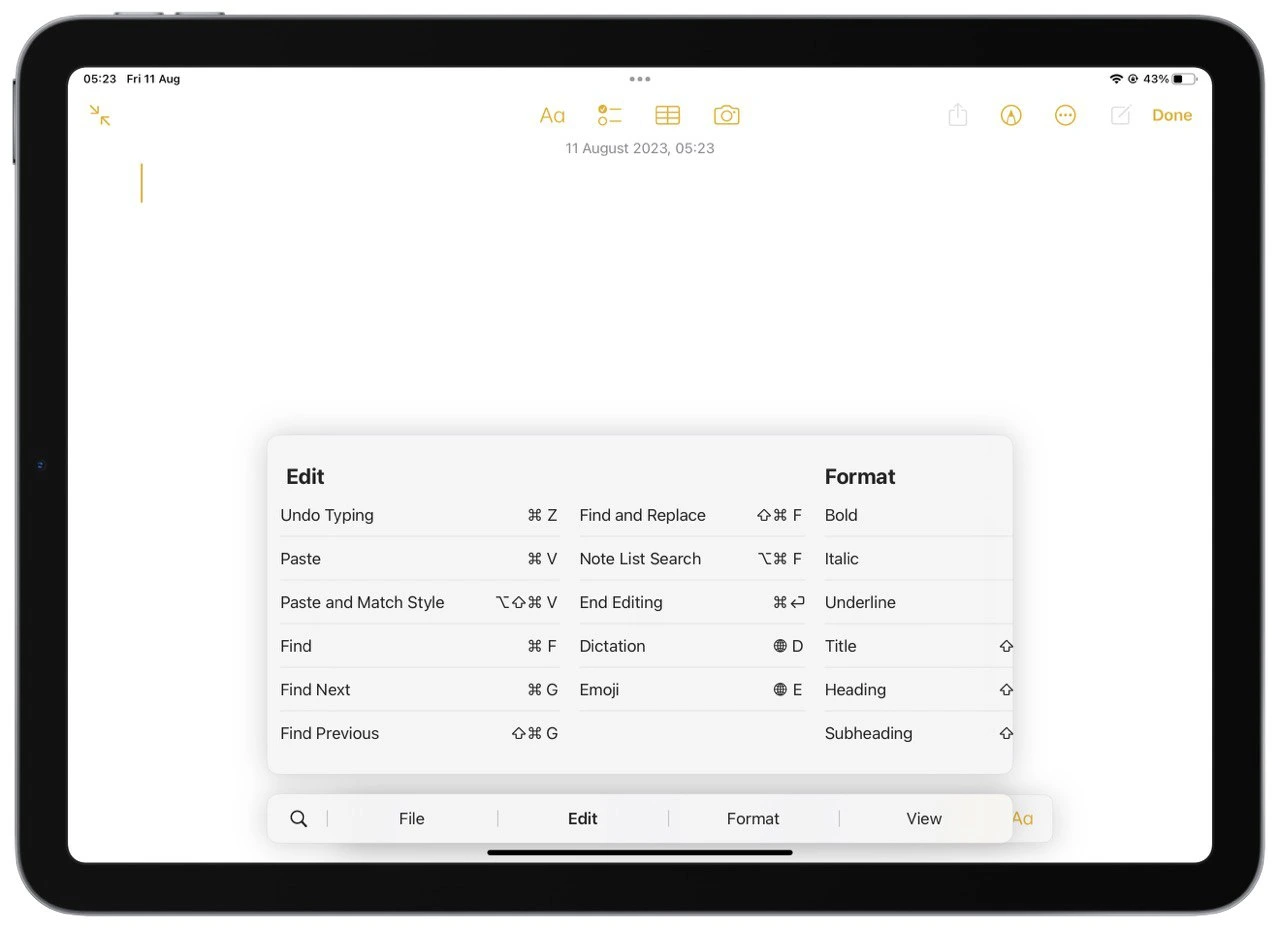
To find out what combinations you can use, press the Commands button on the keyboard (or its alternative). A pop-up menu will show you all the possible keyboard shortcuts. You can use them either while you’re typing, switching between applications, or doing other advanced actions.
Use quick notes gesture
If you have different ideas throughout the day that you need to write down quickly, the gesture to open the Notes app will be an indispensable tool. If you swipe left from the bottom right corner, you can create a quick note where you can jot down a sudden idea.
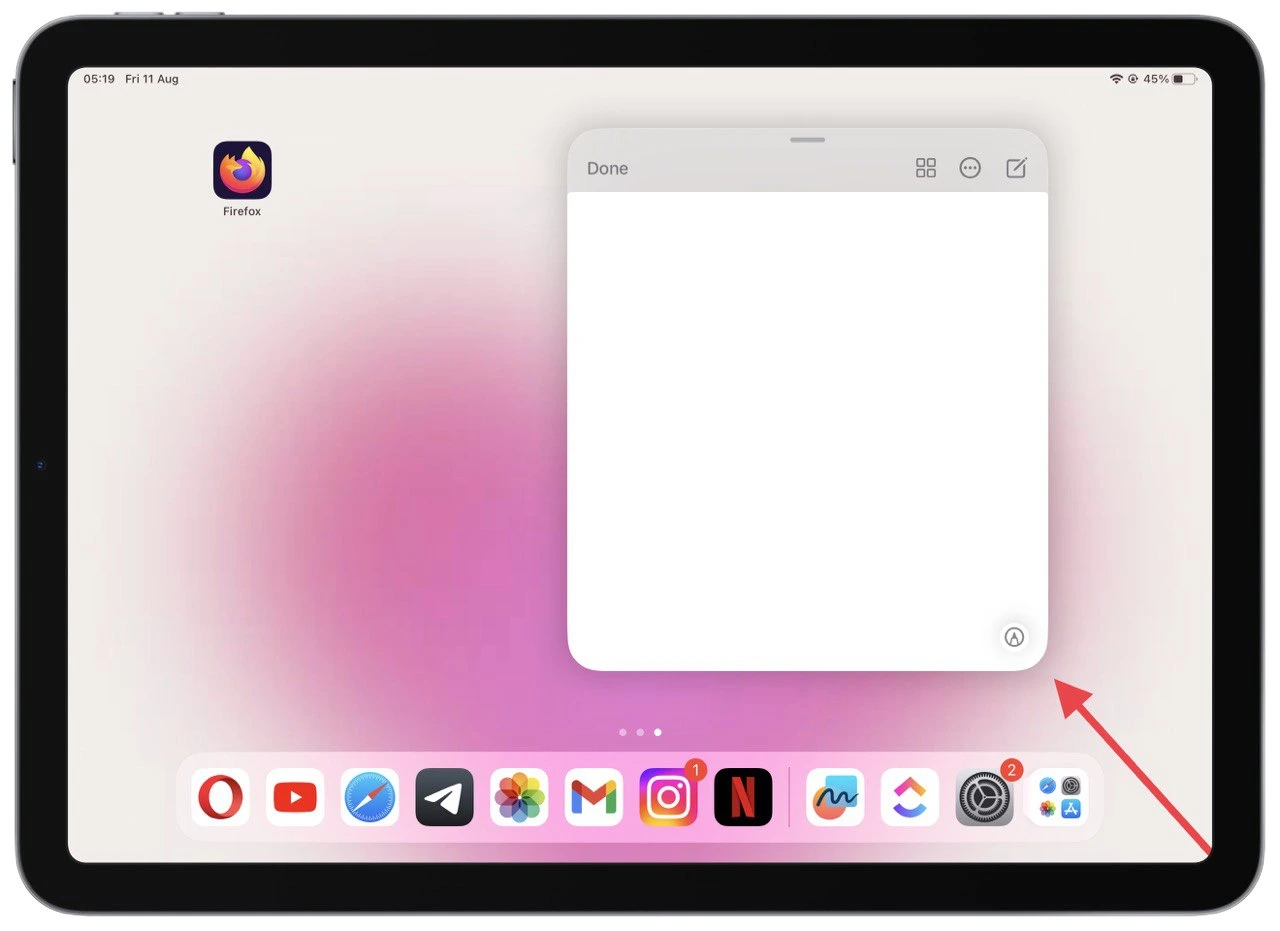
This note opens in a floating window to place anywhere on the screen. It can also be swiped to any corner to hide it. It supports Apple Pencil, and you can also draw in it.
Using the floating on-screen keyboard
If you don’t use an external keyboard, typing on your iPad is the most inconvenient thing ever. The on-screen keyboard takes up too much space on the screen, and if you’re using the tablet in landscape mode, it’s hard to reach the center buttons. However, iPadOS has a feature that allows you to make the keyboard less distracting.
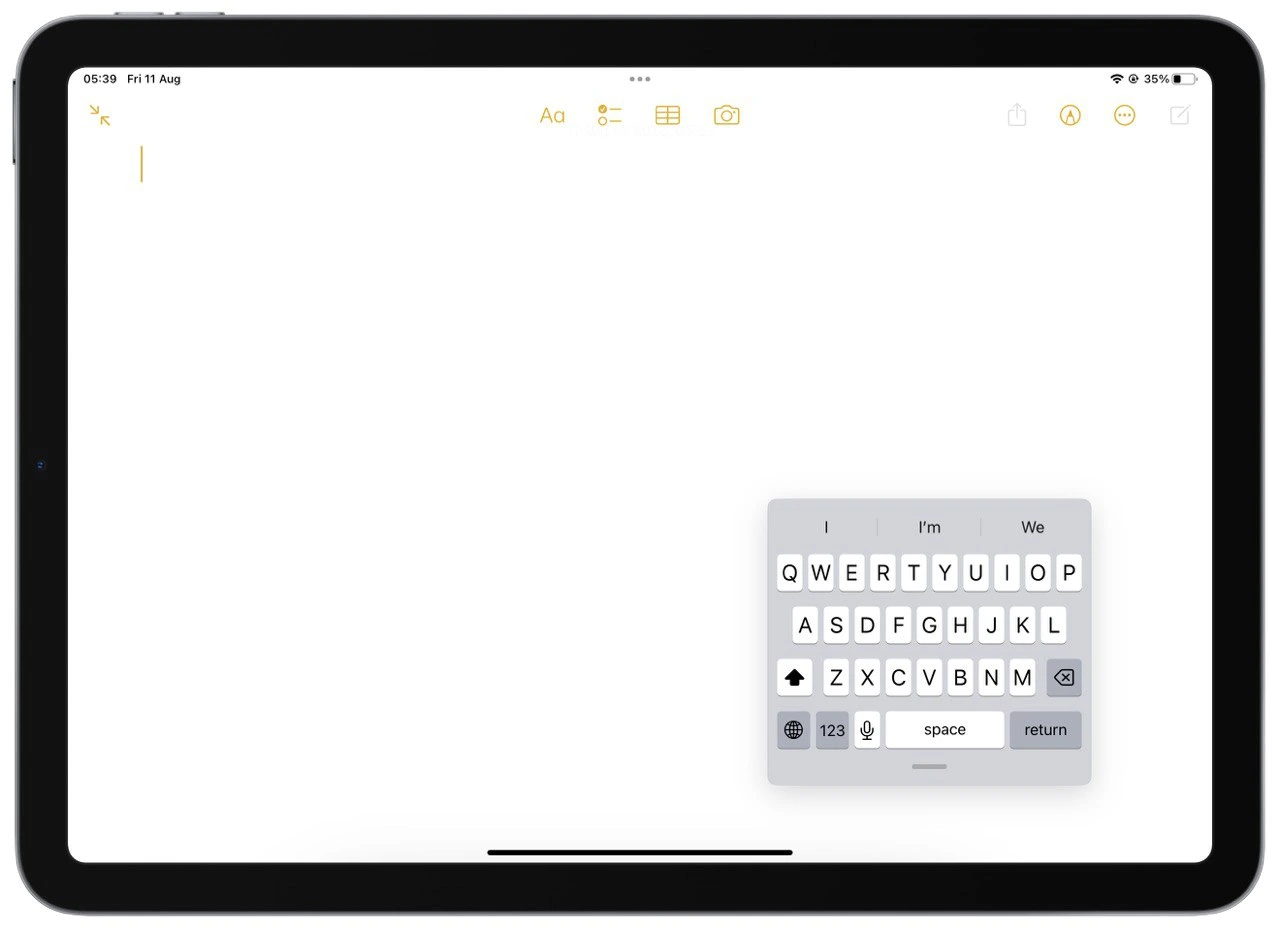
To do this, press and hold the keyboard button in the bottom right corner. From the pop-up menu, select the “Floating” option. As a result, you’ll get a compact iPhone-style keyboard that you can move across the screen to wherever you want. You can use it to type with one finger. Of course, it would be convenient if Apple gave you the option to split the keyboard into two pieces, as is available in many Android tablets, but for now, this is an idea for the future for Apple’s engineers.
Try customizing the mouse buttons
I often connect my Bluetooth mouse to my iPad when using an external keyboard, making word processing much more accessible. When you connect a mouse with extra buttons to your iPad, you may notice that they either don’t do anything or do something you don’t want them to do. You can change this and reassign all the mouse buttons to your liking.
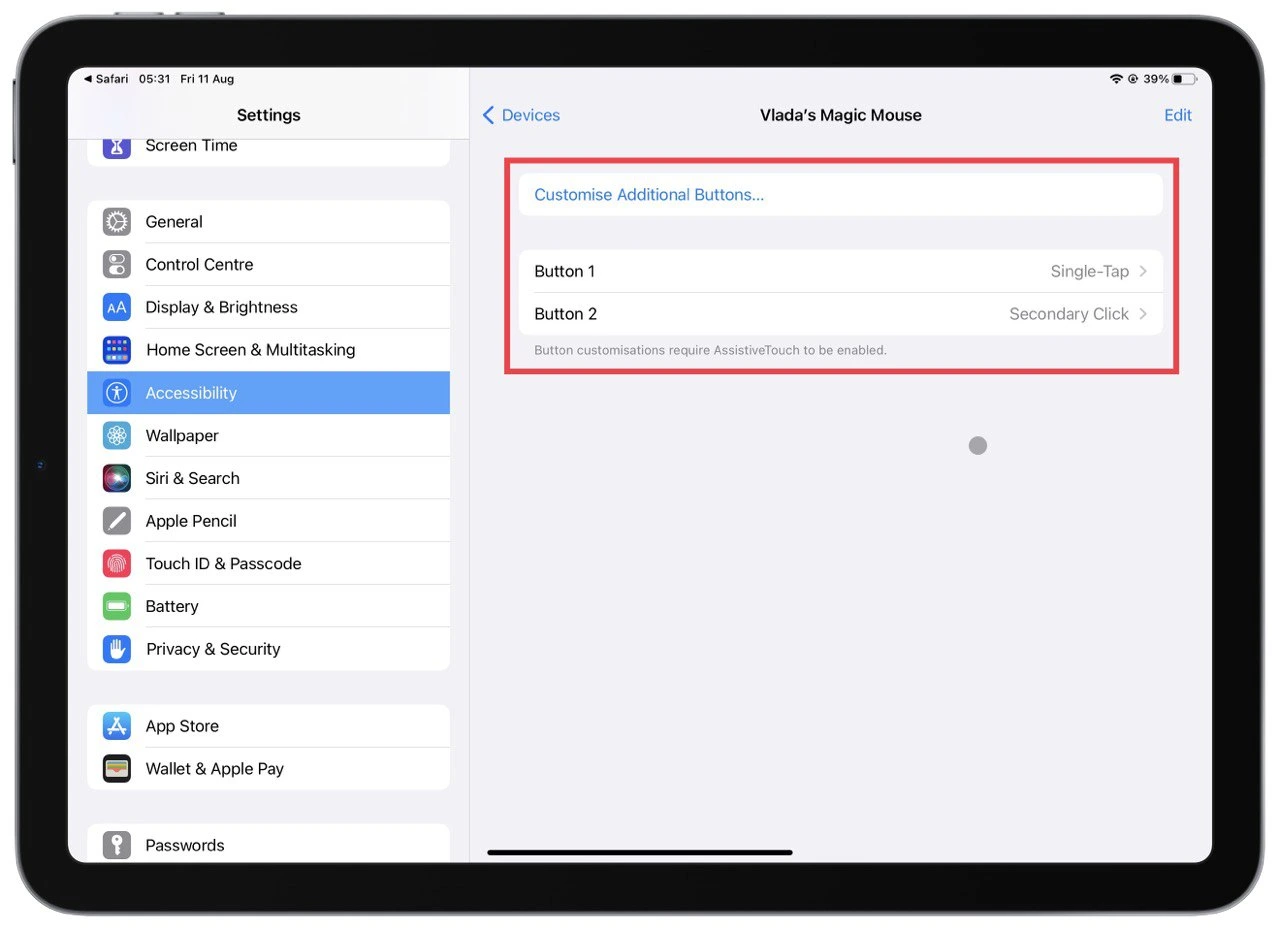
To do this, connect your mouse to your iPad and go to Accessibility > Touch > AssistiveTouch > Devices > Your Mouse in the settings. You can customize the additional buttons to your liking using the Customise Additional Buttons button. You can set them to specific actions or even customize the activation of shortcuts and applications.
Use picture-in-picture
Another handy feature, which is also available on iPhone (but I don’t use it much there) is Picture in Picture mode. This mode allows you to transfer a running YouTube video to a small window and watch it while you are doing something else on your iPad.
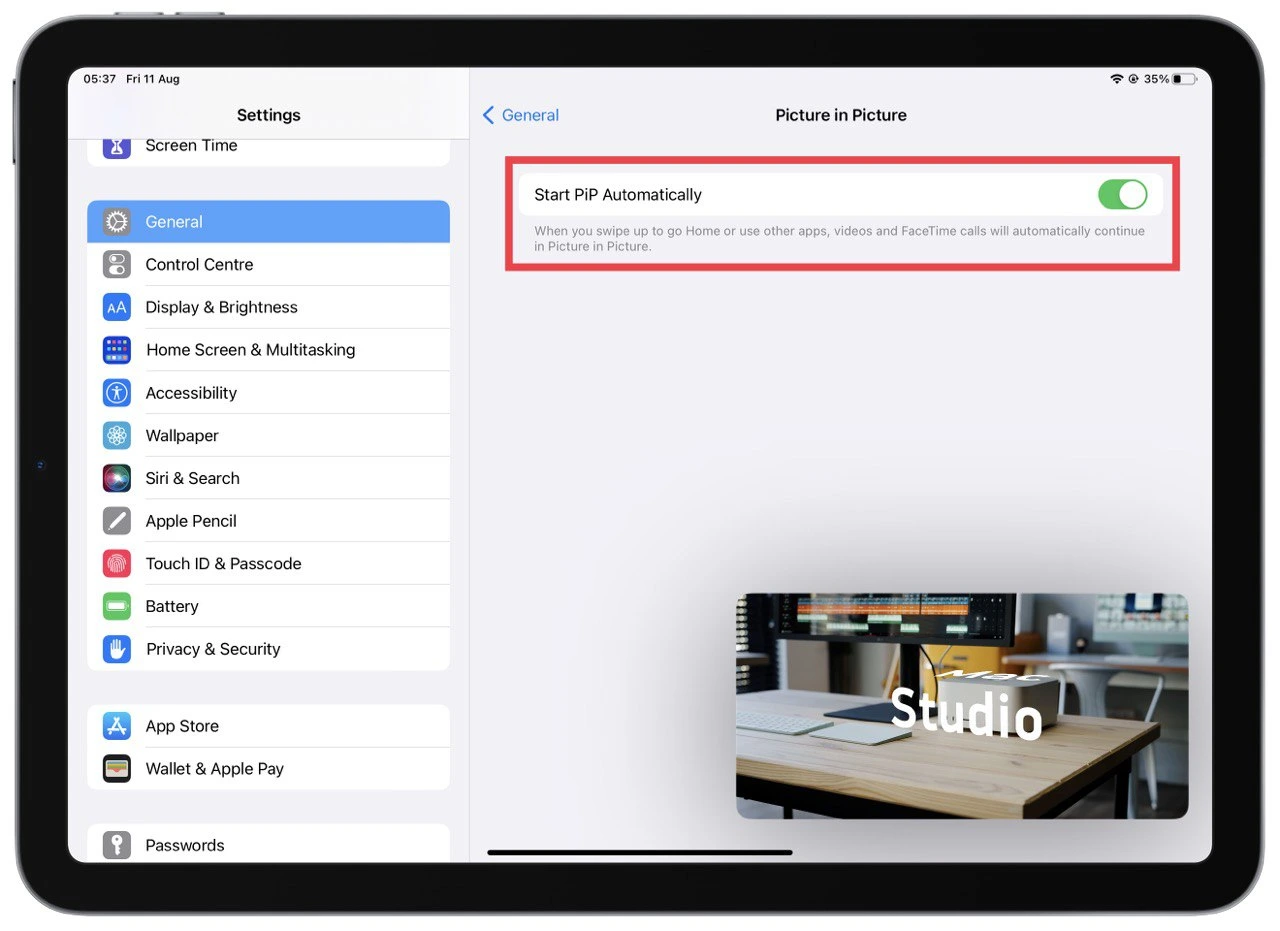
To activate it, go to General and select Picture in Picture. This is where you can enable it, and it will run automatically when you hide the app where the video is playing. Just start the video and swipe up to hide the app.
Use Night Shift on iPad
The Night Shift mode is the most useful since the iPad has a relatively large screen that you look at a lot and for a long time. It will help you give your eyes a rest if you are reading a book or watching a movie on your iPad at night in a poorly lit room.
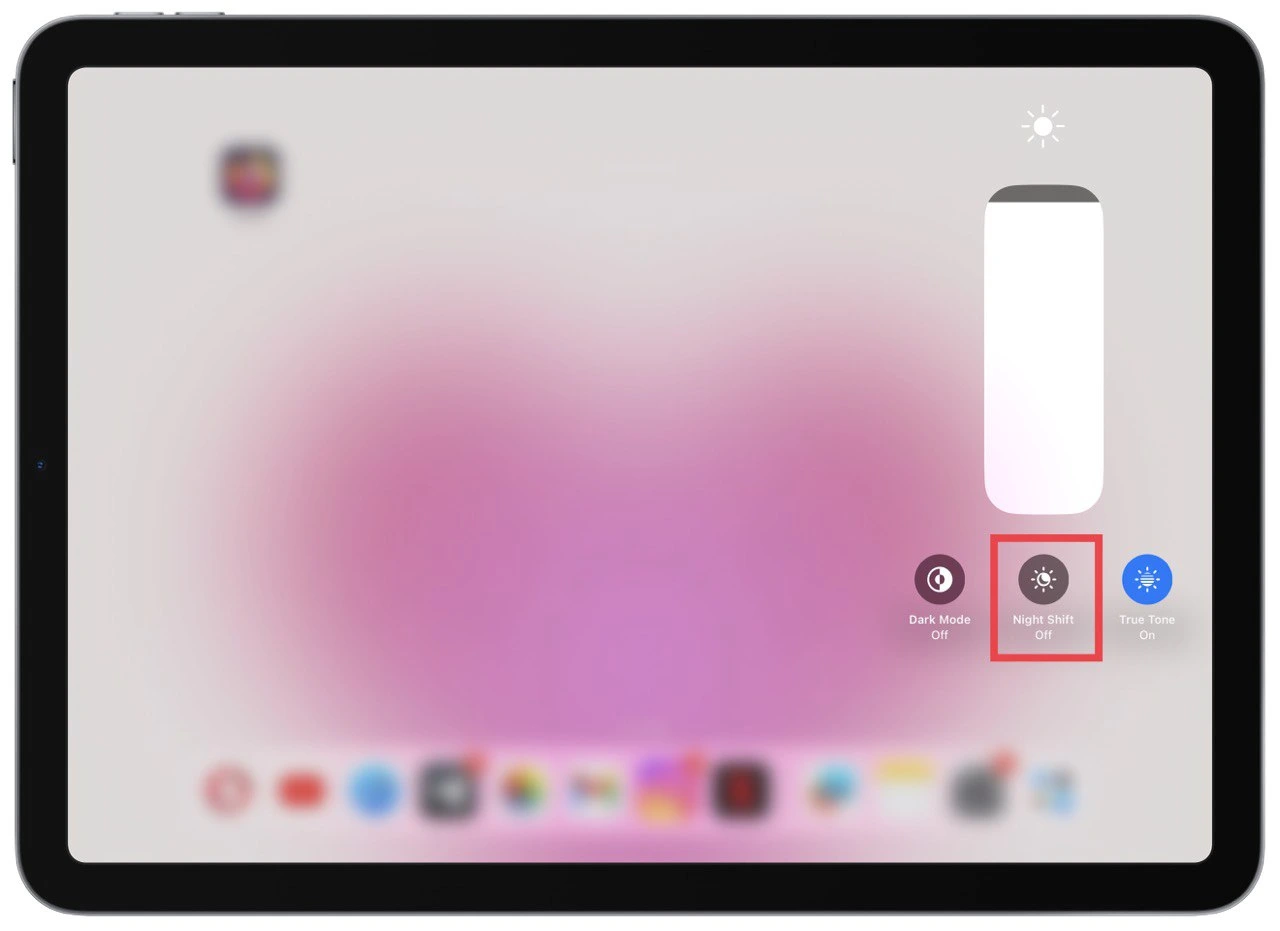
To activate Night Shift mode and make the colors less contrasty and bright, go to the Сontrol Center and hold down the brightness slider. Here you click on Night Shift. After that, you will notice the screen will change its color scheme a bit, and it will be easier for you to use your iPad for a long time.
Use Dark Mode on your iPad
Like Night Shift, Dark Mode helps you use your iPad more comfortably at night. This mode inverts the interface and many apps and makes them dark. In my opinion, this mode looks much more attractive than the default one.
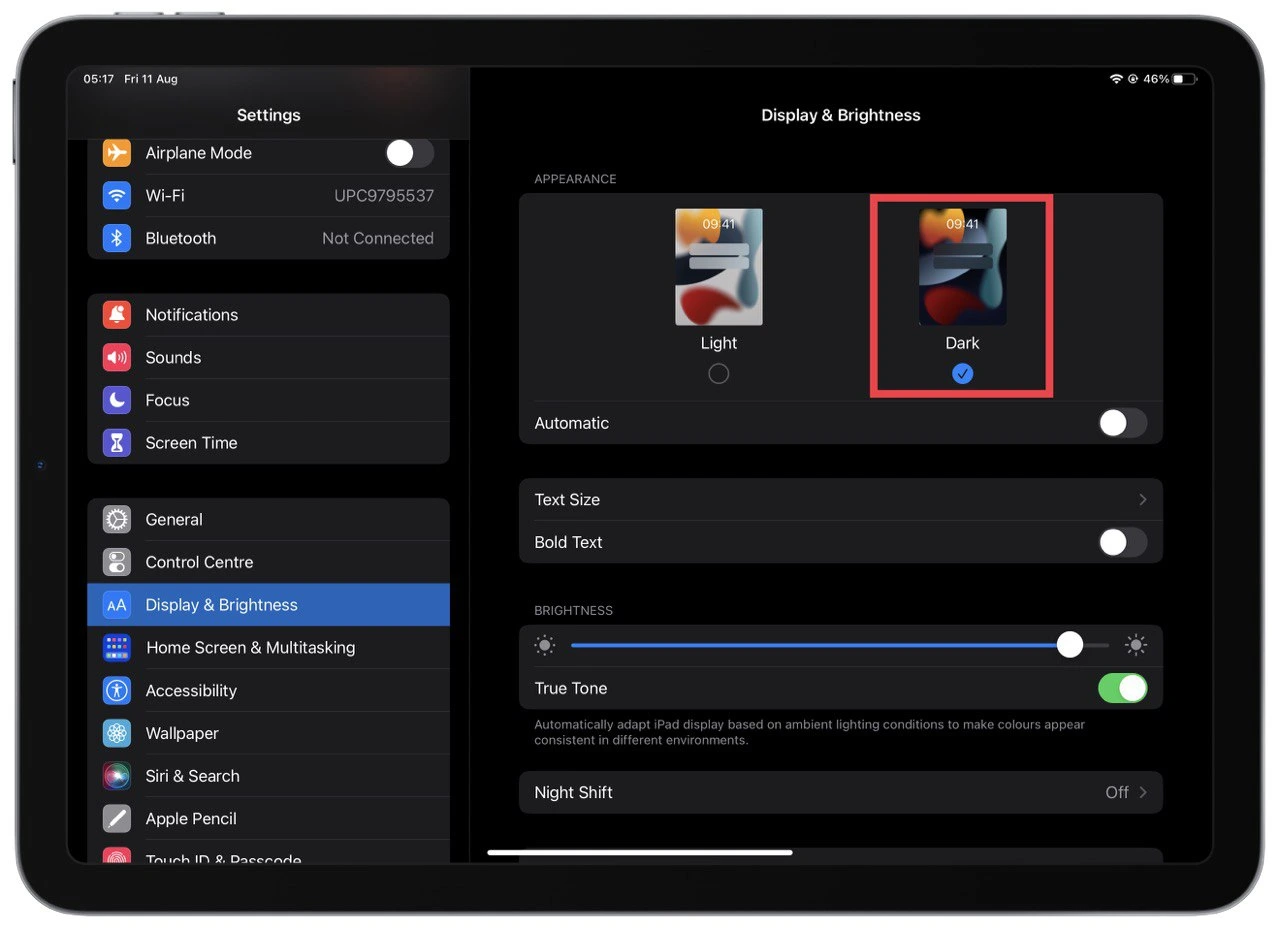
To activate it, you must go to Settings and select Display & Brightness. Specify Dark mode here. In addition to the overall attractiveness of the interface, it can also affect the autonomy of the iPad. The point is that less energy is used to display darker colors. So this can buy you an extra half an hour of battery life.
Using the Notes app as a text scanner
Also, since I’ve never worked with text on the iPhone before, I didn’t realize that the Notes app has a handy text scanner. You can use it to scan text and transfer it to a text document or create a PDF file with the scanned documents.
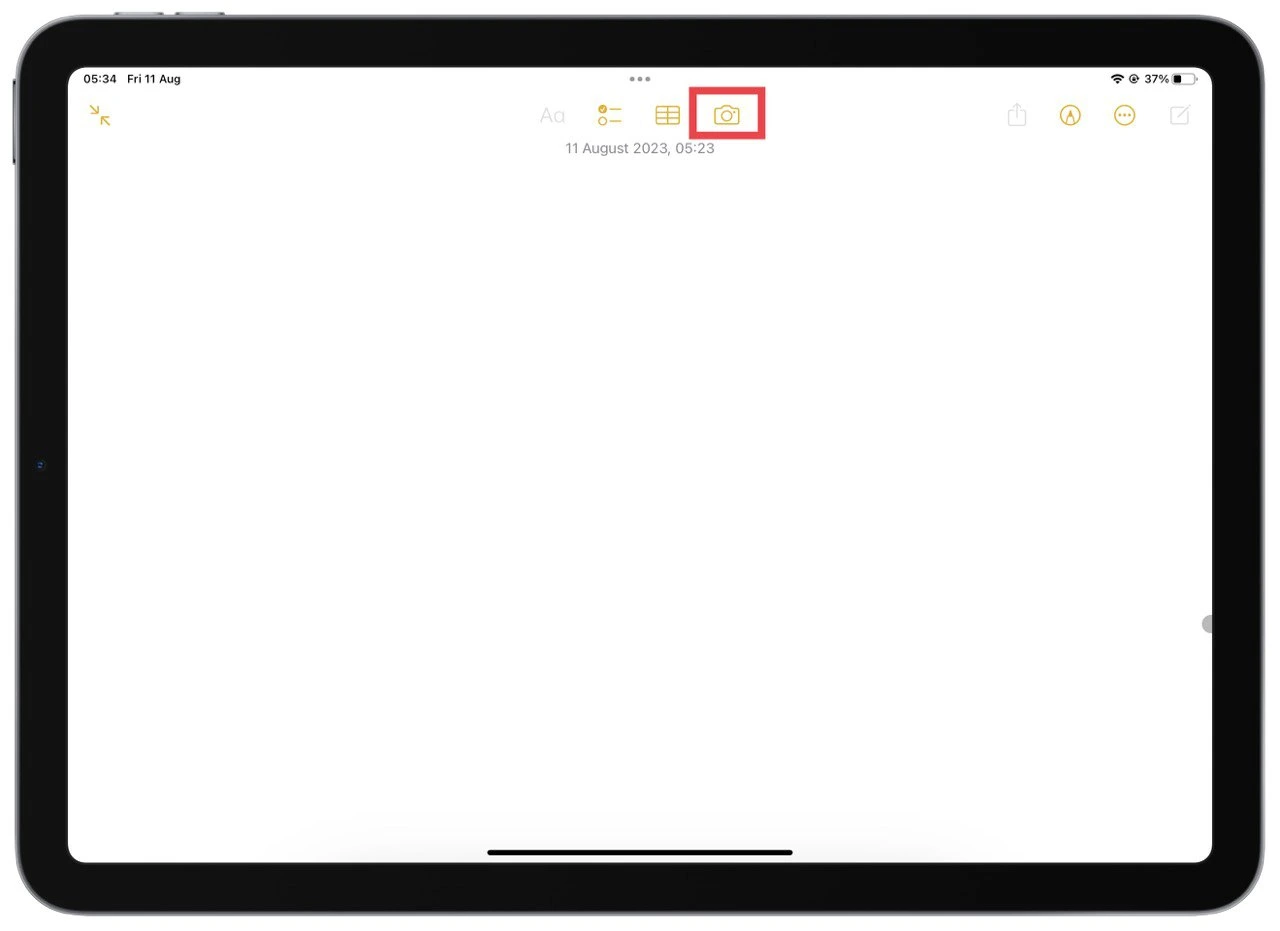
You can do this using the camera button while editing notes in the Notes app. You can save the scan in the note or create it as a separate document. I recommend doing this in good lighting, as the camera on most iPads leaves a lot to be desired.

